React Project – Weather Application
FREE Online Courses: Dive into Knowledge for Free. Learn More!
Weather Application helps fetch information related to the environment and help us know the parameters of Temperature, Humidity, and climatic conditions. Allows users to check current weather conditions by entering a location. The clean and user-friendly design features an input box for location, and if the user has typed the wrong place information, it automatically handles the error message. It has a dashboard where it can get the output of the value, which is the input value.
In the application, we have used the open weather API which can help us to fetch real-time data in the application by just typing the query.
About React Weather Application Project
The weather application was created using the open weather API, which is integrated into the front end of React JS in which the query is put in the input box, and it will process with API and give a result.
Let’s take an example: if we put a query in the input box then the results based on the query will be displayed on the dashboard(the main page). Create a weather dashboard application where users can input a city name or zip code into an input box. Upon submitting the query, the application fetches weather data from the OpenWeather API and displays it on the dashboard. This can include current weather conditions, temperature, humidity, wind speed, and a forecast for the next few days. People can get accurate weather information, which is the main aim of this application.
The important issue faced in our country is climatic changes and that can be resolved by our application. The goal of weather prediction is to provide information. People and organizations can use it to reduce weather-related losses and enhance societal benefits, including protection of life and property, public health, and support of economic prosperity and quality of life.
Prerequisite For React Weather Application Project
- React
- API integration
Download React Weather Application Project
Please download the source code of React Weather Application: React Weather Application Project Code.
About installation steps:
Follow the steps for installation of Visual Studio
You can choose the appropriate installer for your operating system (Windows, macOS, or Linux) on the download page. Once it is installed please follow the following steps.
For the installation of React, I have explained some of the steps as follows:
1. The first step is to download the node( as it will help to install react) from the below link:
The LTS version is recommendable:
2. Now, check the version of the node in Windows by following the command on the terminal:
node --version or node -V
Also, check the npm version using the following command, as it is a tool to download the react
npm --version
3. Now, create one folder on the desktop as react, open the terminal inside the react app, and go to the react folder using the following command as `cd react` and run the command:
npm init react-app <appname>
4. cryptoapp is created, go inside the cryptoapp folder using the command `cd cryptoapp` and then npm starts and boom react will run the browser.
Your app react is successfully installed, let’s move towards project building.
Steps to Create a React Weather Application Project:
Create a folder dashboard inside the src folder of the project and make a file inside the dashboard.
1. Import the necessary library of react and connect it with App.css for styling.
import React, { useState } from 'react';
import "../App.css"
2. This code defines a React functional component, WeatherApp, that manages location input and fetched weather data using the useState hook and includes constants for API key and URL to fetch weather data from OpenWeatherMap API.
const WeatherApp = () => {
  const [location, setLocation] = useState('');
  const [weatherData, setWeatherData] = useState(null);
  const apiKey = '54702605c8e8d2fe756eaa5b13c3f9c3';
  const apiUrl = 'https://api.openweathermap.org/data/2.5/weather';
3. This function asynchronously fetches data using async, which means it handles multiple requests at once. For example, if a person tries to access the same file then it handles the requests. Then, in the next lines, we have integrated with API key to access third-party API as direct access is impossible. What previously initialized weather data would be set if a response is good; otherwise, it will give us the error message. And set Weather data as null.
const fetchWeatherData = async () => {
    try {
      const response = await fetch(`${apiUrl}?q=${location}&appid=${apiKey}`);
      const data = await response.json();

      if (response.ok) {
        setWeatherData(data);
      } else {
        console.error('Failed to fetch weather data:', data.message);
        setWeatherData(null);
      }
    } catch (error) {
      console.error('Error fetching weather data:', error);
      setWeatherData(null);
    }
  };
4. When we input the query inside the input box and click on the Get Weather button will give results. What result will we get? See it in the next point.
<div className="weather-app">
      <h1>Weather App by ProjectGurukul</h1>
      <div className="input-container">
        <input
          type="text"
          placeholder="Enter location"
          value={location}
          onChange={(e) => setLocation(e.target.value)}
        />
        <button onClick={fetchWeatherData}>Get Weather</button>
      </div>
5. Then in the code we are fetching the information based on the string present on the JSON-based API usually it looks in the form of a dictionary like curly braces and key-value pair. We have fetched the name of the location, the description, temperature, and humidity.
{weatherData && (
        <div className="weather-info">
          <h2>{weatherData.name}, {weatherData.sys.country}</h2>
          <p>{weatherData.weather[0].description}</p>
          <p>Temperature: {weatherData.main.temp} ℃</p>
          <p>Humidity: {weatherData.main.humidity}%</p>
        </div>
      )}
Here is the complete code of the above explanation:
Src > dashboard > weather.jsx
import React, { useState } from 'react';
import "../App.css"
const WeatherApp = () => {
  const [location, setLocation] = useState('');
  const [weatherData, setWeatherData] = useState(null);
  const apiKey = '54702605c8e8d2fe756eaa5b13c3f9c3';
  const apiUrl = 'https://api.openweathermap.org/data/2.5/weather';

  const fetchWeatherData = async () => {
    try {
      const response = await fetch(`${apiUrl}?q=${location}&appid=${apiKey}`);
      const data = await response.json();

      if (response.ok) {
        setWeatherData(data);
      } else {
        console.error('Failed to fetch weather data:', data.message);
        setWeatherData(null);
      }
    } catch (error) {
      console.error('Error fetching weather data:', error);
      setWeatherData(null);
    }
  };

  return (
    <div className="weather-app">
      <h1>Weather App by ProjectGurukul</h1>
      <div className="input-container">
        <input
          type="text"
          placeholder="Enter location"
          value={location}
          onChange={(e) => setLocation(e.target.value)}
        />
        <button onClick={fetchWeatherData}>Get Weather</button>
      </div>

      {weatherData && (
        <div className="weather-info">
          <h2>{weatherData.name}, {weatherData.sys.country}</h2>
          <p>{weatherData.weather[0].description}</p>
          <p>Temperature: {weatherData.main.temp} ℃</p>
          <p>Humidity: {weatherData.main.humidity}%</p>
        </div>
      )}
    </div>
  );
};

export default WeatherApp;
App.css
.weather-app {
  max-width: 400px;
  margin: 50px auto;
  text-align: center;
  font-family: 'Arial', sans-serif;
}

h1 {
  color: #333;
}

.input-container {
  margin-bottom: 20px;
}

input {
  padding: 10px;
  margin-right: 10px;
  width: 60%;
  border: 1px solid #ccc;
  border-radius: 5px;
}

button {
  padding: 10px;
  cursor: pointer;
  background-color: #4caf50;
  color: #fff;
  border: none;
  border-radius: 5px;
}

button:hover {
  background-color: #45a049;
}

.weather-info {
  margin-top: 20px;
  padding: 20px;
  border: 1px solid #ccc;
  border-radius: 5px;
  background-color: #f9f9f9;
}

h2 {
  color: #333;
}

p {
  color: #666;
}
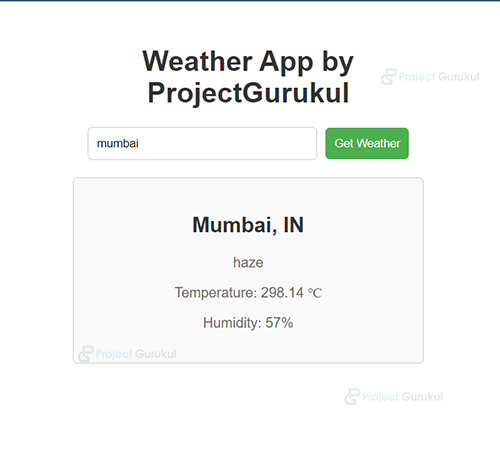
React Weather Application Output
Conclusion
The React Weather App fetches weather data from OpenWeatherMap using an API key. Users can input a location, and upon button click, the app displays the city name, country, weather description, temperature, and humidity.
The code is organized with React hooks for state management and error handling. The UI updates dynamically based on the retrieved data. The map can display markers for different cities, and clicking on a marker provides detailed weather information for that location. With the advancement of technology, weather forecasting has developed to its level best, but there is yet to develop, as far as nature is so unpredictable. Weather forecasts are increasingly accurate and useful, and their benefits extend widely across the economy. While much has been accomplished in improving weather forecasts, there remains much room for improvement.
In the era of global warming, research in weather measurement, monitoring, and forecasting is becoming more and more relevant. This research demonstrates the design and implementation of an affordable mini weather monitoring system that ensures flexibility, portability, scalability, and user-friendly operations, which can provide data on some weather variables, including temperature, humidity, and pressure.