Python Screen Recorder – Capture Your Screen in Style
FREE Online Courses: Transform Your Career – Enroll for Free!
A screen recorder is software that records the content and activities that occur on a computer screen. It is useful for tasks like creating video tutorials, recording screen content, and so on.
To capture our screen, we created a screen recorder project in Python. We designed a graphical user interface. By clicking the record button, the screen is recorded and the video is saved in the user-specified folder. We can see the live screen being recorded.
Prerequisites for Screen Recorder Using Python
- Basic knowledge of the Python programming language: how functions are defined, and how the window is made in Tkinter GUI.
- How to work with OpenCV, numpy, and the Pillow library
Download Python Screen Recorder Project
Please download the source code of Python Screen Recorder Project: Python Screen Recorder Project Code
Steps to Create Screen Recorder Project Using Python
Following are the steps for developing the Python Screen Recorder Project:
Step 1: Importing the necessary modules
Step 2: Making a window for our project
Step 3: Functions
Step 4: Making Frames and Mapping the Buttons to Their Functionalities
Step 1: Importing the necessary modules
To use Tkinter, we need to import the Tkinter module. We are also going to import the ImageGrab module from Pillow Library to capture screens or to take snapshots, Numpy for mathematical calculations, and OpenCV to process our images.
Code:
# importing the required packages
from tkinter import *
from tkinter import filedialog
from PIL import ImageGrab
import cv2
import numpy as np
Step 2: Making a window for our project
This code sets the title of the window as ‘ProjectGurukul’, and sets the dimensions ‘width x length’.
Code:
rec = Tk()
rec.title("ProjectGurukul")
rec.geometry("300x200")
Step 3: Functions
Now, we must build a VideoWriter object before we can record the screen. Moreover, the output file name, video codec, frame rate, and video resolution must be specified. The 4-byte code for the video codec must be specified (such as XVID, MJPG, X264, etc.). Here, we’ll be using XVID.
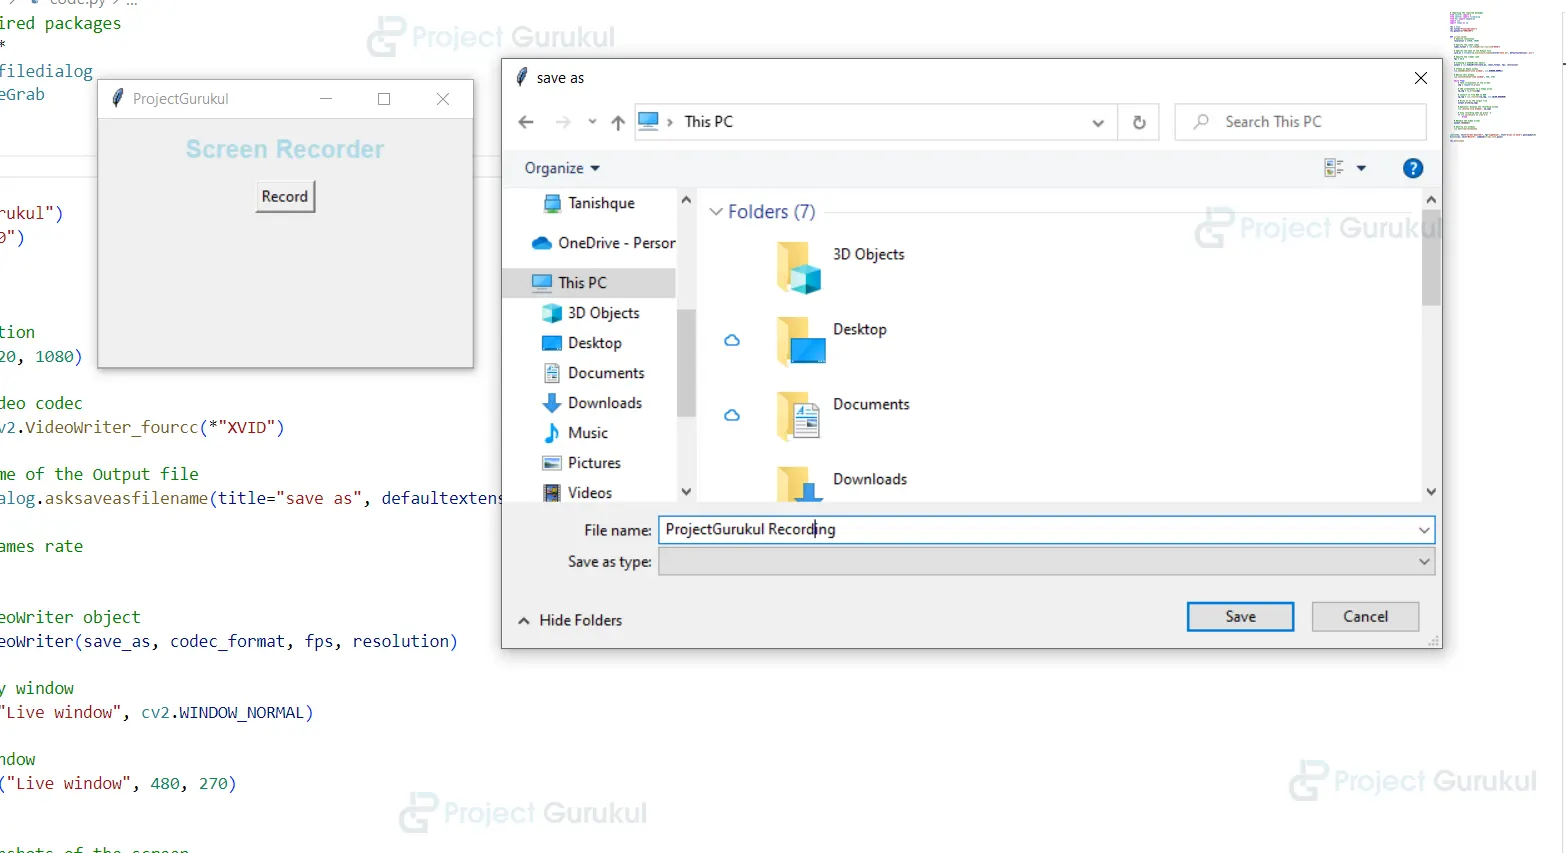
Filedialog.asksaveasfilename to get the file name and the location where to save the output file
codec_format as video codec, and output as VideoWriter object
Code:
def screen_rec():
# Specify resolution
resolution = (1920, 1080)
# video codec
codec_format = cv2.VideoWriter_fourcc(*"XVID")
# Getting the name of the Output file from the user
save_as = filedialog.asksaveasfilename(title="save as", defaultextension='.avi')
#frames rate
fps = 20.0
# Creating a VideoWriter object
output = cv2.VideoWriter(save_as, codec_format, fps, resolution)
# Creating an Empty window
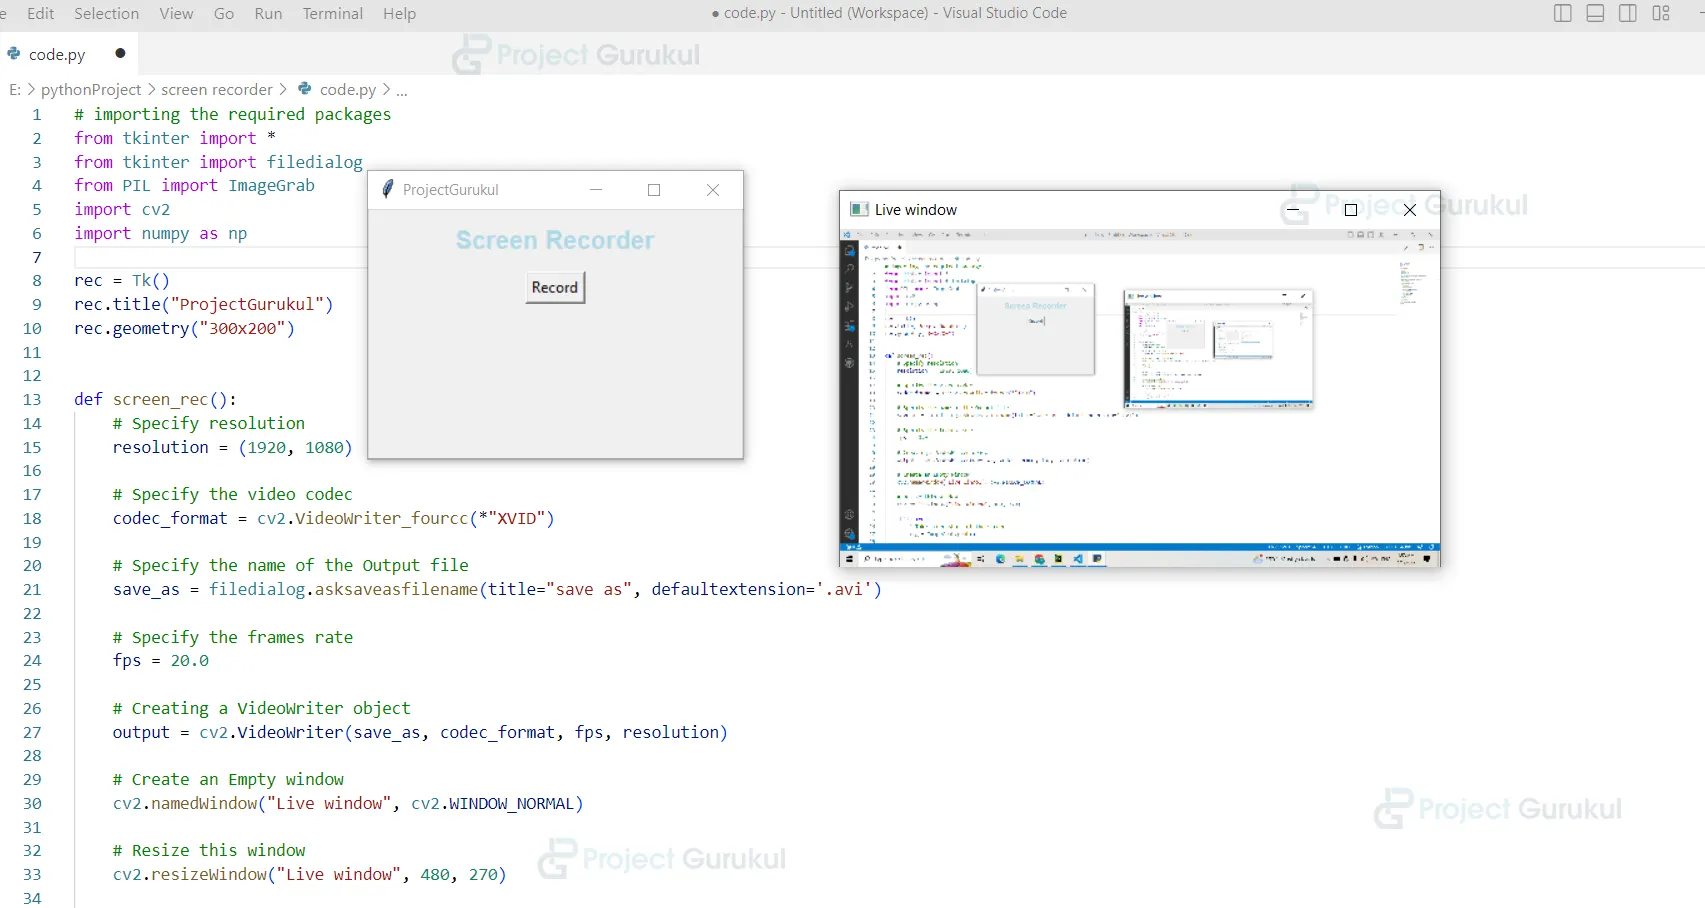
cv2.namedWindow("Live window", cv2.WINDOW_NORMAL)
# Resize this new empty window
cv2.resizeWindow("Live window", 480, 270)
Explanation:
We must construct and resize an Empty window in order to display the recording in real time.
while True:
       # To take screenshots of the screen
       img = ImageGrab.grab()


       # add screenshots to a numpy array
       np_img = np.array(img)


       # Convert it from BGR to RGB
       np_img = cv2.cvtColor(np_img, cv2.COLOR_BGR2RGB)


       # Write it to the output file
       output.write(np_img)


       # To Display the recording screen
       cv2.imshow('Live window', np_img)


       # Stop recording of the screen when we press 'e'
       if cv2.waitKey(1) == ord('e'):
           break


   # Release the Video writer and Destroy all windows
   output.release()
   cv2.destroyAllWindows()
Explanation:
To record our screen we will run an infinite loop, and during each iteration of the loop, we will take a screenshot and save it to the output file using the video writer.
Step 4: Making Frames and Mapping the Buttons to Their Functionalities
Now we add the required widgets for our GUI. We make a label to give the heading Screen Recorder, and we create a button widget and assign the screen_rec function to it to record our screen.
Code:
Label(rec, text="Screen Recorder", fg="Lightblue", font="Arial 15 bold").pack(pady=10)
Button(rec, text="Record", command=screen_rec).pack()


rec.mainloop()
Full Code:
# importing the required packages
from tkinter import *
from tkinter import filedialog
from PIL import ImageGrab
import cv2
import numpy as np


rec = Tk()
rec.title("ProjectGurukul")
rec.geometry("300x200")


def screen_rec():
   # Specify resolution
   resolution = (1920, 1080)


   # video codec
   codec_format = cv2.VideoWriter_fourcc(*"XVID")


   # Getting the name of the Output file from the user
   save_as = filedialog.asksaveasfilename(title="save as", defaultextension='.avi')


   #frames rate
   fps = 20.0


   # Creating a VideoWriter object
   output = cv2.VideoWriter(save_as, codec_format, fps, resolution)


   # Creating an Empty window
   cv2.namedWindow("Live window", cv2.WINDOW_NORMAL)


   # Resize this new empty window
   cv2.resizeWindow("Live window", 480, 270)


   while True:
       # To take screenshots of the screen
       img = ImageGrab.grab()


       # add screenshots to a numpy array
       np_img = np.array(img)


       # Convert it from BGR to RGB
       np_img = cv2.cvtColor(np_img, cv2.COLOR_BGR2RGB)


       # Write it to the output file
       output.write(np_img)


       # To Display the recording screen
       cv2.imshow('Live window', np_img)


       # Stop recording of the screen when we press 'e'
       if cv2.waitKey(1) == ord('e'):
           break


   # Release the Video writer and Destroy all windows
   output.release()
   cv2.destroyAllWindows()


Label(rec, text="Screen Recorder", fg="Lightblue", font="Arial 15 bold").pack(pady=10)
Button(rec, text="Record", command=screen_rec).pack()


rec.mainloop()
Final screens of the Screen Recorder:
Summary:
Using the Python Tkinter GUI, we were able to build the screen recorder with the help of the OpenCV and Pillow libraries. We acquired skills in GUI development, widget addition, and how function is defined and assigned to buttons. I hope you had fun creating with us!