Python OpenCV Photo Sketching Project
FREE Online Courses: Dive into Knowledge for Free. Learn More!
Photo sketching is a technique to convert photos into pencil-like sketches that find use in various applications like image stylization, visual effects, and digital art. OpenCV is a widely used open-source library for computer vision and machine learning that offers functions and algorithms for image processing and analysis. This Python OpenCV Photo Sketching Project will explore how to use OpenCV to convert a photo into a pencil sketch using simple image-processing techniques.
Preprocessing of an Image
Before applying the sketching effect to an input image using OpenCV, some preprocessing steps are needed. Firstly, the input image is converted into grayscale to remove the colour information from it. Then, a Gaussian blur is applied to reduce noise and smooth out any sharp edges. Next, the grayscale image is inverted to highlight the edges and improve the contrast. Finally, the edges are detected, which is crucial to defining the outlines of the sketch.
What is a Grayscale Image?
A grayscale image is an image that only uses shades of grey to represent different intensities of light. It does not use any colors, but instead uses different shades of grey to create the image.
What is a Blur Image?
A blurred image refers to an image that has been smoothed out or softened, making the details less sharp and less defined. It’s a way to reduce noise or emphasize certain parts of the image by removing fine details. The blur effect can be achieved through various image processing techniques, such as convolution or filtering.
Prerequisites for Photo Sketching Using Python OpenCV
It is important to have a solid understanding of the Python programming language and the OpenCV library. Apart from this, you should have the following system requirements.
1. Python 3.7 and above
2. Any Python editor (VS code, Pycharm, etc.)
Download Python OpenCV Photo Sketching Project
Please download the source code of Python OpenCV Photo Sketching Project: Python OpenCV Photo Sketching Project Code
Installation
Open Windows cmd as administrator
1. To install the opencv library, run the command from the cmd.
pip install opencv-python
2. To install the Scipy library, run the command from the cmd.
pip install scipy
Let’s Implement It
To implement it, follow the below steps.
1. First of all, we are importing all the necessary libraries that are required during implementation.
import cv2
import scipy.ndimage
2. This line of code reads the image file named “Yogesh,jpg” located in the “Images” directory using the OpenCV library in Python.
img = cv2.imread("Images/Yogesh.jpg")
3. This line of code resizes the image to a new width and height of 500 pixels using the resize() function provided by OpenCV.
img = cv2.resize(img, (500, 500))
4. This line of code converts the input image from the BGR color space to the grayscale color space using the cvtColor() function provided by OpenCV.
gray_img = cv2.cvtColor(img, cv2.COLOR_BGR2GRAY)
5. This code inverts a grayscale image by making light areas dark and vice versa to enhance the edges and make them more visible in the final sketch.
inverted_img = 255 - gray_img
The output of this step

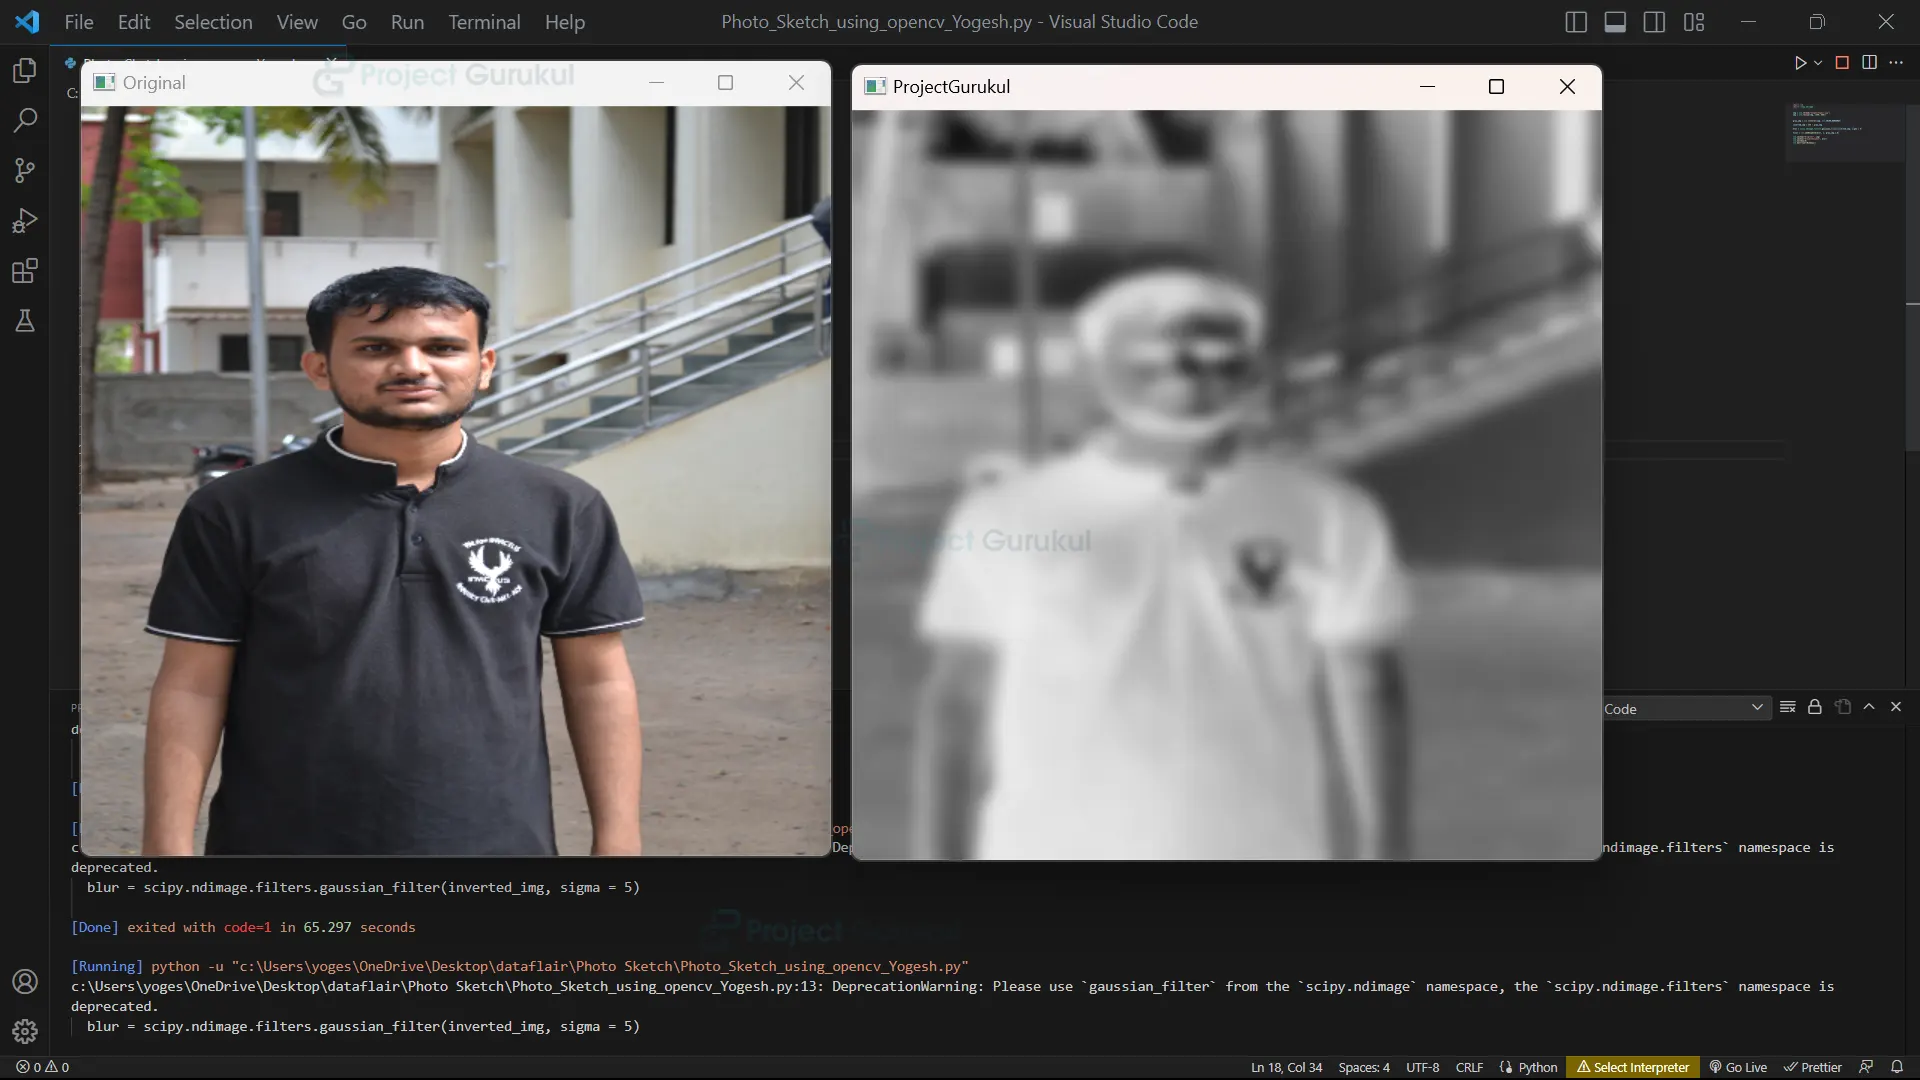
6. This line of code blurs the inverted grayscale image using a SciPy function and saves the blurred image as ‘blur’. The purpose is to reduce noise and smooth out sharp edges, making it easier to detect edges in the next step of photo sketching.
blur = scipy.ndimage.filters.gaussian_filter(inverted_img, sigma = 5)
The output of this step
7. This line of code blends a blurred inverted image and a grayscale image to create a sketch-like effect by enhancing the edges. The resulting image is stored in a variable called ‘final’.
final = cv2.addWeighted(blur, 1, gray_img,1,0)
The output of this step
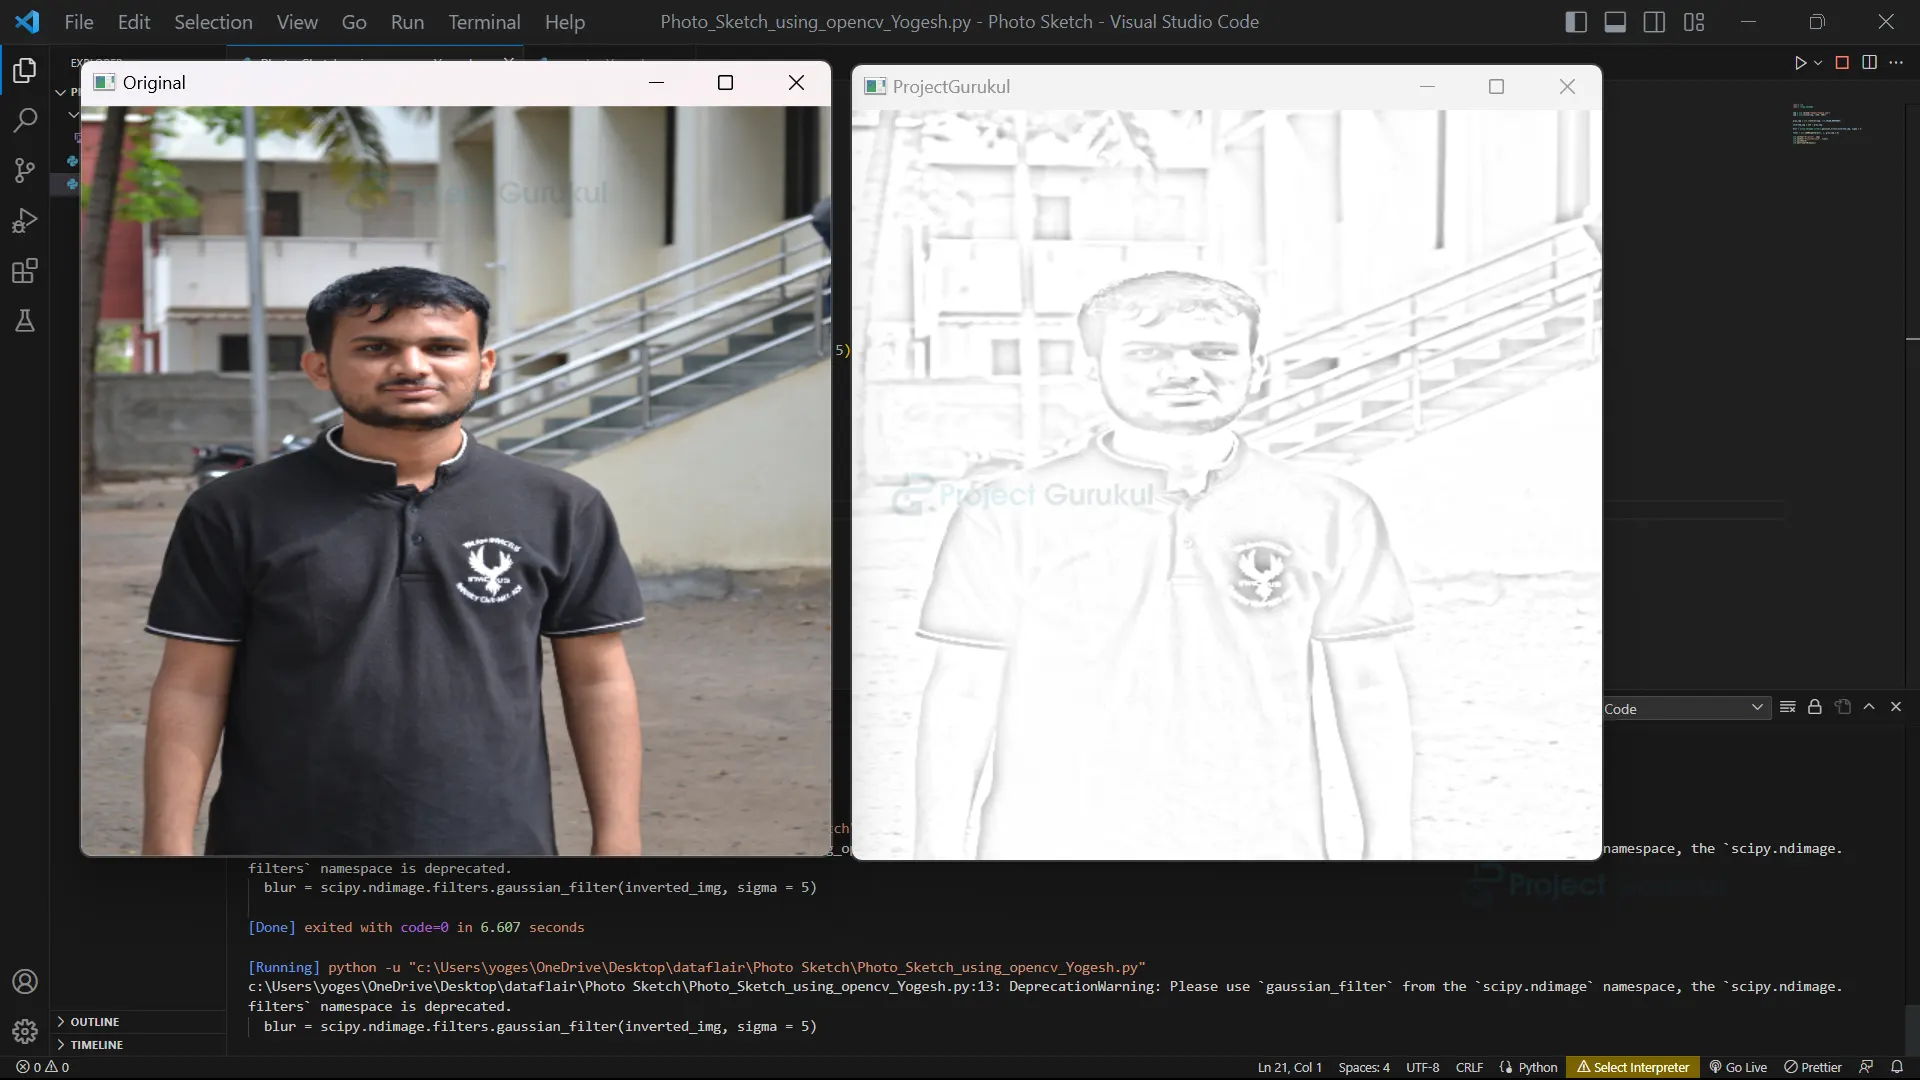
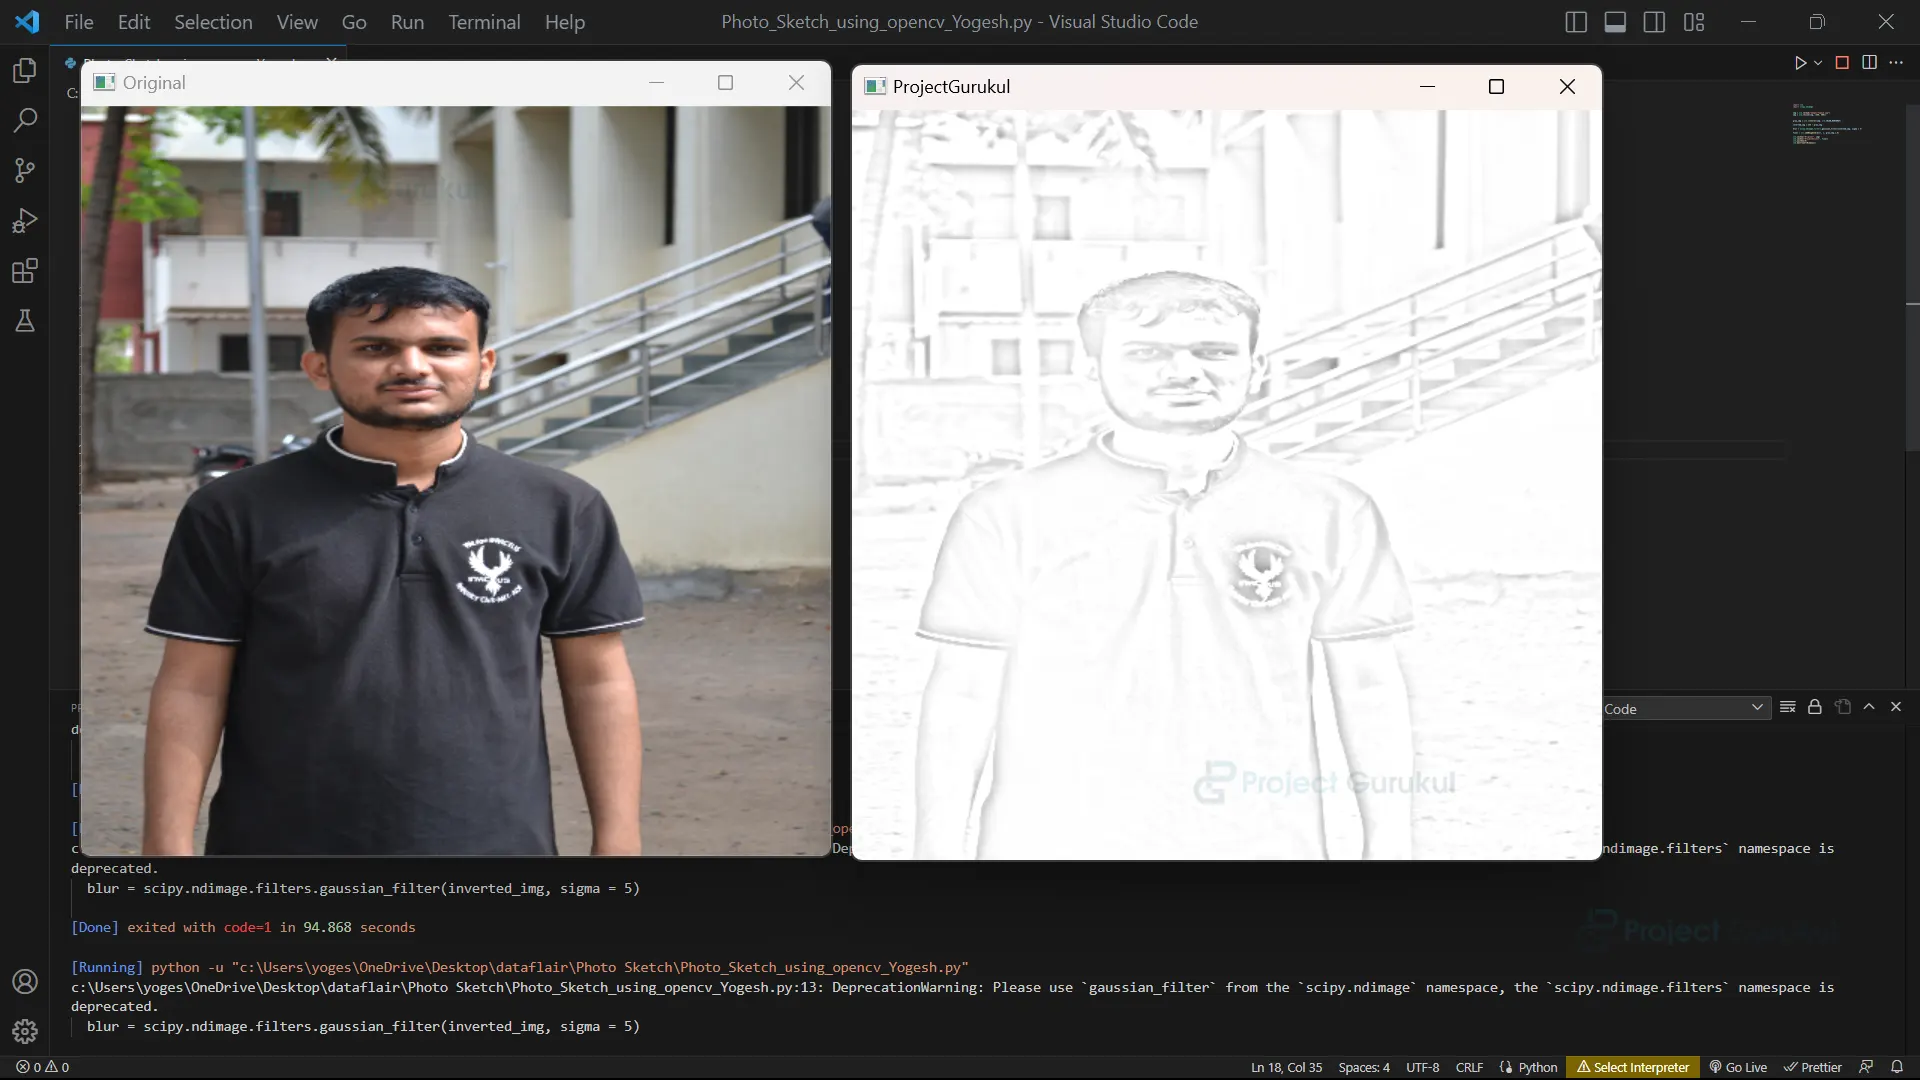
8. These two lines of code display two windows showing the original input image and the final processed image side by side using the OpenCV library function imshow(). The “Original” window displays the input image, while the “ProjectGurukul” window displays the output image after the photo sketching process.
cv2.imshow("Original", img)
cv2.imshow("ProjectGurukul", final)
The output of this step

9. The waitKey(0) function waits until a key is pressed, allowing the user to view the image in the window. Finally, destroyAllWindows() closes all open windows and releases any resources used by OpenCV.
cv2.waitKey(0)
cv2.destroyAllWindows()
Output

How to make an App / UI for this?
Tkinter
Tkinter is a Python library that allows developers to create a graphical user interface for a photo sketching app using OpenCV. The interface can include buttons, sliders, and checkboxes for user interaction. For instance, users can choose an image, view the original image, adjust the blur level, invert the image, and initiate the photo sketching process. Tkinter handles user input and updates the display with the final photo sketch.
Installation
Open Windows cmd as administrator
1. To install the tkinter library, run the command from the cmd.
pip install tk
2. To install the Pillow library, run the command from the cmd.
pip install pillow
Let’s Implement It
To implement it, follow the below steps.
1. First of all, we are importing all the necessary libraries that are required during implementation.
import cv2
import scipy.ndimage
import tkinter as tk
from tkinter import filedialog
import numpy as np
2. This line declares a Python function called ‘create_sketch’, which takes an argument ‘img_path’.
def create_sketch(img_path):
3. This code reads an image from the specified file path using OpenCV and stores it in a variable called ‘img’. The image is then resized to a size of 500×500 pixels using another OpenCV function called ‘resize’. This step reduces the amount of data that needs to be processed and can improve the performance of the photo sketching process.
img = cv2.imread(img_path)
img = cv2.resize(img, (500, 500))
4. These lines create a sketch of the image as discussed above.
gray_img = cv2.cvtColor(img, cv2.COLOR_BGR2GRAY)
inverted_img = 255 - gray_img
blur = scipy.ndimage.filters.gaussian_filter(inverted_img, sigma = 5)
final = cv2.addWeighted(blur, 1, gray_img, 1, 0)
output = cv2.cvtColor(final, cv2.COLOR_GRAY2BGR)
The output of this step
5. This line of code concatenates the original image and the resulting photo sketch horizontally using the hstack() function from the NumPy library.
return np.hstack((img, output))
Note:- you have to include steps 3 to 5 under the create_sketch() function.
6. This function opens a file dialog window that allows the user to select an image file from their computer. The selected file path is returned by the function and can be used as input to the photo sketching function. If the user cancels the file dialog window without selecting a file, the function returns None.
def select_image():
7. These lines of code allow the user to select an image file through a file dialog window and then apply the photo sketching effect to the selected image. The selected file path is stored in a variable called ‘file_path’, and the resulting image with the sketch effect is stored in another variable called ‘sketch’.
file_path = filedialog.askopenfilename()
sketch = create_sketch(file_path)
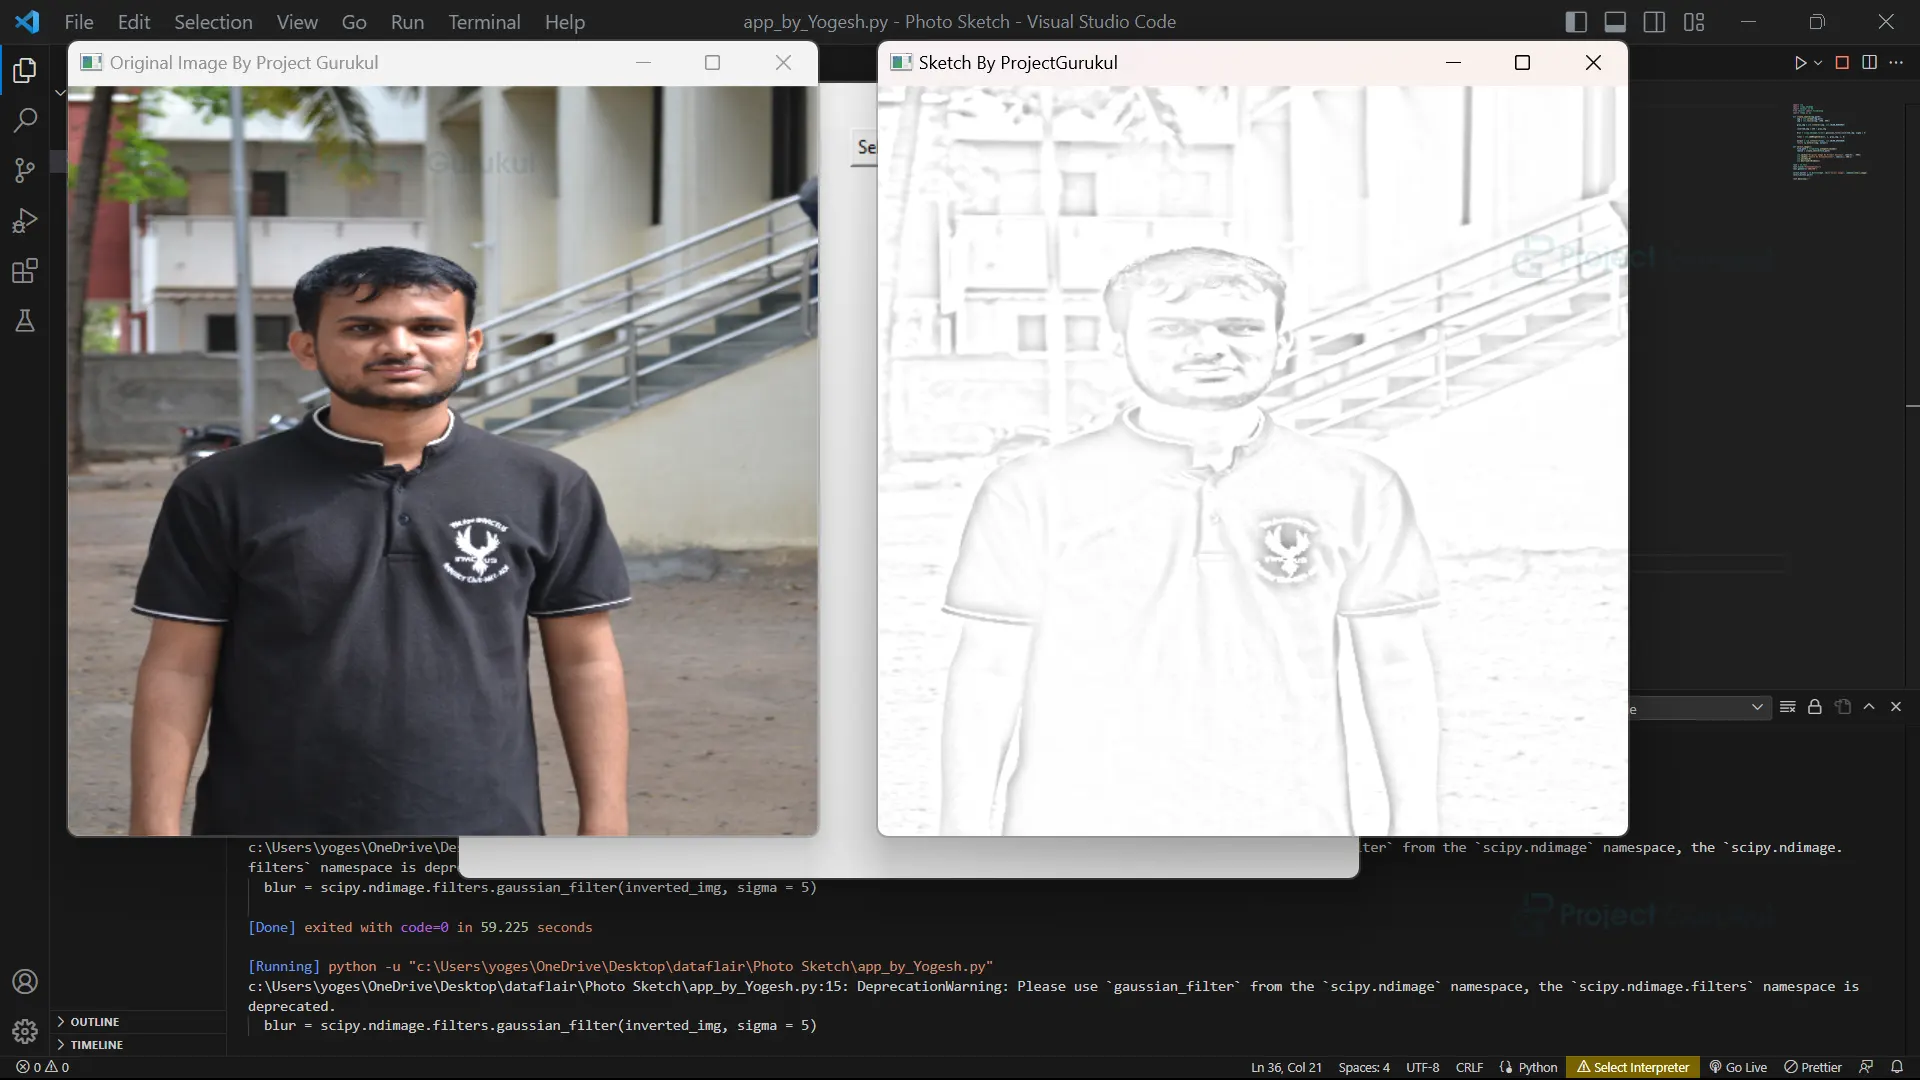
8. These lines display the original image and photo sketch effect in two separate windows using OpenCV’s imshow() function. The windows will remain open until closed by the user or program termination.
cv2.imshow("Original Image By Project Gurukul", sketch[:, :500])
cv2.imshow("Sketch By ProjectGurukul", sketch[:, 500:])
9. These two lines of code wait for a keyboard event and then close all OpenCV windows. They are typically used at the end of an OpenCV program to keep the windows open until the user closes them or the program exits.
cv2.waitKey(0)
cv2.destroyAllWindows()
Note:- you have to include steps 7 to 9 under the select_image() function.
10. This code creates a window using Tkinter with the title “DataFlair ” and sets its size to 600 x 500 pixels. The window can be further customized to create an interface for an application.
root = tk.Tk()
root.title("ProjectGurukul")
root.geometry('600x500')
11. This code creates a button in the Tkinter window labelled “Select Image” and attaches the function select_image() to it. When the button is clicked, the function is executed and allows the user to select an image file to make a sketch of it.
select_button = tk.Button(root, text="Select Image", command=select_image)
select_button.pack()
12. This line of code starts the main event loop of the Tkinter window, allowing the user to interact with the application by clicking on buttons, entering text in entry widgets, etc.
root.mainloop()
Output


Conclusion
To summarize, OpenCV can be used to develop a photo sketching app with a user-friendly interface. The photo sketching process involves several steps, such as converting the image to grayscale, applying a Gaussian blur, and performing edge detection using the Canny algorithm. The final output is produced by overlaying the sketch effect on the original image. OpenCV offers great flexibility to customize the photo sketching process and integrate it into a larger application.