Online College Admission Management System Python Project
FREE Online Courses: Click for Success, Learn for Free - Start Now!
Work on an interesting Python Django project – Online College Admission Management System
Before we start coding, let’s first look at some of the top features of the project:
- Login and Sign up.
- Different access rights to users (in our case student and admin).
- Delete and add courses, without going to django admin site.
- Detailed view of all courses.
We will develop this project using Django, It is an open-source Python-based web framework with a lot of inbuilt functionalities like UserCreationforms, login, and many more.
Project Prerequisites
We will use the following technologies:
- Python
- HTML
- CSS
- Bootstrap
- Django framework
To install the library, you can use the pip installer from cmd/terminal.
pip install Django
Download College Admission Course Project
Please download the code of Online college admission management system project: College Admission Management in Python
Steps to Build College Admission Management Project
Now, we will make a new project ‘GurukulMgmt’ and an app inside it. Run the following commands:
django-admin startproject GurukulMgmt
cd GurukulMgmt

django-admin startapp app
1. Writing Models
For database connectivity, we need the models. In the app/models.py, create the following models.
Code:
from django.db import models

# Create your models here.
class Courses(models.Model):
    name=models.CharField(max_length=200,null=True)
    duration=models.IntegerField(default=3,null=True,blank=True)
    fees=models.IntegerField(null=True,blank=True)
    decsription=models.CharField(null=True,blank=True,max_length=10000)
    def __str__(self):
        return str(self.name)
The model class ‘Courses’ has four fields which are clear from the code. Now to create required model in the database, run following in commands:
Py manage.py makemigrations
Py manage.py migrate
2. To add more courses: forms.py
Code:
from django.forms import ModelForm
from .models import *

class CourseForm(ModelForm):
    class Meta:
        model=Courses
        fields="__all__"
This code is simpler because django does it all for us, we are just importing and calling the inbuilt functions.
3. admin.py
Though we have already defined forms.py, but still sometimes we need to go to the admin panel and access the models. So we need to register the models in the admin.py
Code:
from django.contrib import admin
from .models import *
# Register your models here.

admin.site.register(Courses)
We also need a superuser who can access the models at admin site.To create a superuser:
py manage.py createsuperuser
4. Let’s set the url files
It is good practice to create a separate url file for each app. For this, we need to first include a new url file in project’s url file:
Code:
from django.contrib import admin
from django.urls import path,include

urlpatterns = [
    path('admin/', admin.site.urls),
    path('',include('app.urls')),
]
app/urls.py:
Code:
from django.urls import path
from .views import *
from django.contrib.auth import views as auth_views

urlpatterns = [
    path('',home,name='home'),
    path('createCourse/',createCourse,name='createCourse'),
    path('description/<str:pk>',description,name='description'),
    path('deleteCourse/<str:pk>/',deleteCourse,name='deleteCourse'),
    path('register/', registerPage,name='register'),
    path('login/', loginPage,name='login'),
    path('logout/', logoutPage,name='logout'),
]
Here, we are just making URLs for every function of the views.py file.
5. Let’s finally work on ‘views.py’ :
Code:
from django.shortcuts import render,redirect
from .models import *
from .forms import *
from django.contrib.auth.forms import UserCreationForm
from django.contrib.auth import login,logout,authenticate

# Create your views here.

def home(request):
    courses=Courses.objects.all()
    context={
        'courses':courses,
        }
    return render(request,'main.html',context)

def createCourse(request):
    if request.user.is_authenticated:
        form=CourseForm()
        if(request.method=='POST'):
            form=CourseForm(request.POST)
            if form.is_valid():
                form.save()
                return redirect('/')
        context={'form':form}
        return render(request,'createCourse.html',context)
    else:
        return redirect('home')

def deleteCourse(request,pk):
    if request.user.is_authenticated:
        course=Courses.objects.get(id=pk)
        if(request.method=='POST'):
            course.delete()
            return redirect('/')
        context={
            'course':course,
            }
        return render(request,'delete.html',context)
    else:
        return redirect('home')

def description(request,pk):
    course=Courses.objects.get(id=pk)
    context={
        'course':course,
        }
    return render(request,'description.html',context)

def registerPage(request):
    if request.user.is_authenticated:
        return redirect('home')
    else:
        form=UserCreationForm()
        if request.method=='POST':
            form=UserCreationForm(request.POST)
            if form.is_valid():
                form.save()
                return redirect('login')
        context={
            'form':form
        }
        return render(request,'register.html',context)

def loginPage(request):
    if request.user.is_authenticated:
        return redirect('home')
    else:
       if request.method=="POST":
        username=request.POST.get('username')
        password=request.POST.get('password')
        user=authenticate(request,username=username,password=password)
        if user is not None:
            login(request,user)
            return redirect('home')
       context={}
       return render(request,'login.html',context)

def logoutPage(request):
    logout(request)
    return redirect('login')
We have created seven functions in this file:
1. Home
It deals with the home page request for both the users (college staff and the student). It renders all the ‘course’ objects to home.html which displays all the details of the course and also checks whether the user is authenticated or not and displays everything based on its access rights.
Admin’s home page:
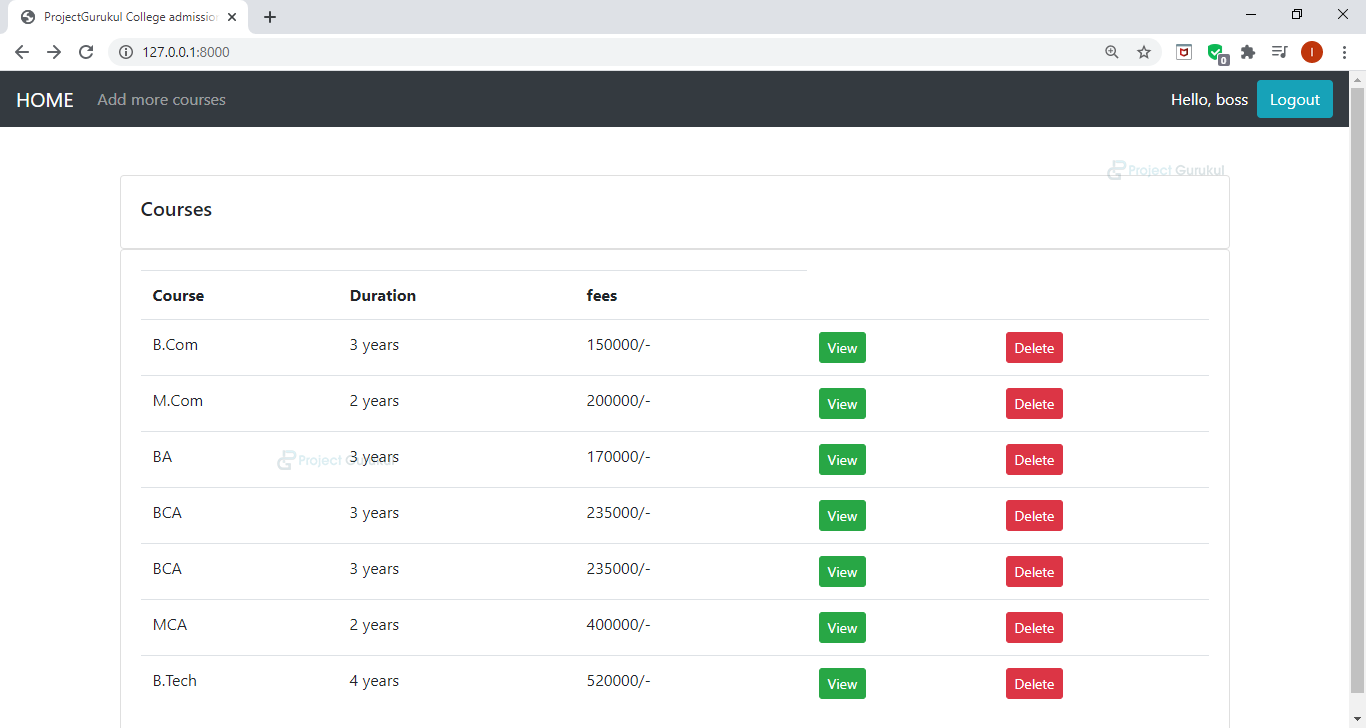
Student’s home page:

We can see that the navbar does not contain ‘Add more courses’ in the student’s page because a student cannot create a new course. Also, a student cannot delete a course, so the delete button is also removed.
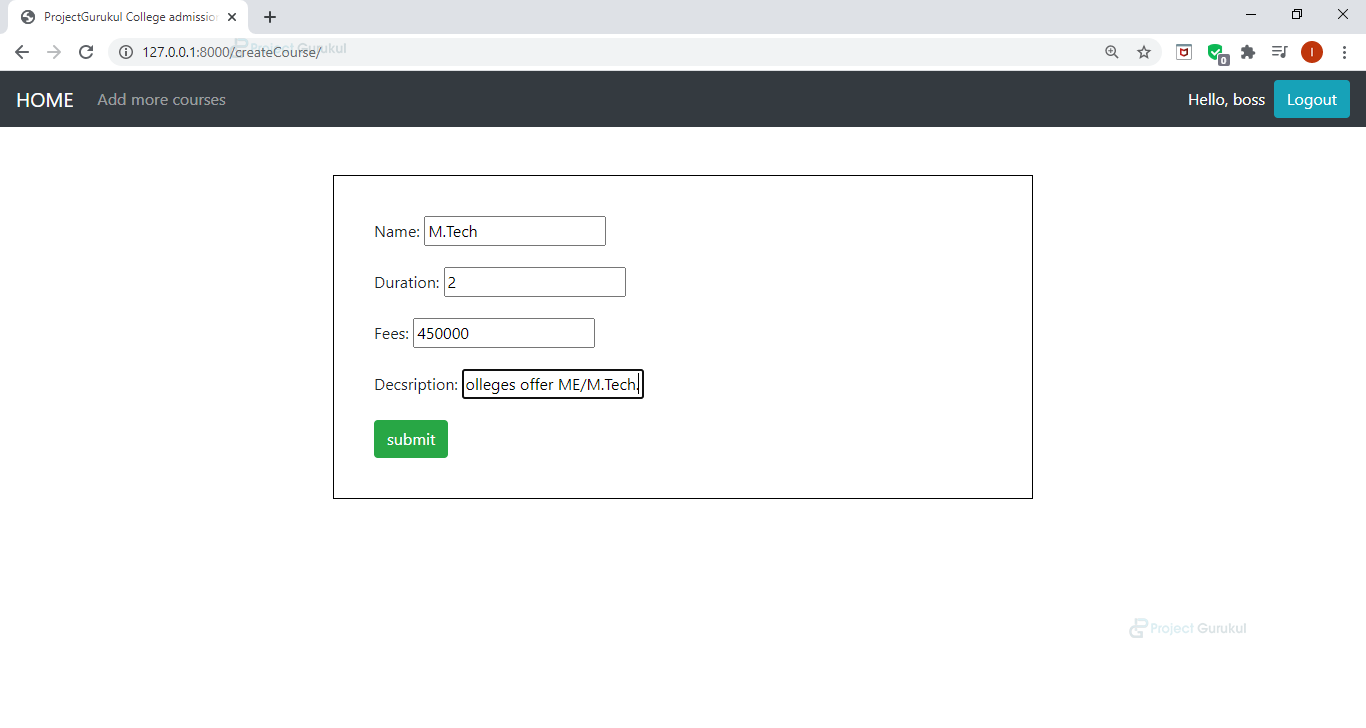
2. CreateCourse
If the user has access rights (admin) then it will create new courses using the CourseForm object otherwise it will redirect the user to home page.
3. DeleteCourse:
It first checks whether the user is authenticated or not. If the user is not authenticated (i.e. a student) then he cannot delete a course from the website, so it will redirect the user back to the home page. After checking the authenticity it allows deletion of the course.

4. Description:
It redirects the user to a description page which contains all the information of the requested course.
Rest are register, login, and logout which use inbuilt django functions.
templates
Make a separate folder ‘templates’ in the project folder. This folder contains all the frontend files (html, css) and you can easily get them from the source code mentioned above.
Summary
We have successfully developed college admission management system project. This is a popular project among python django beginners. You can post all your doubts, issues in comment section and we will help you.
Happy Coding!
How to run this code
Because it’s not having html file
bro how to createsuperuser
shantanu kedare
mca 1st year
i want project
Download the project from the link on the website and you can find all the templates files in a folder named templates.
Gm sir, sir please give html templates sir
Please provide html templates files sir, I’m stuck in creating templates file..
Thank you