Python GIF Creator – Create Stunning GIFs with Ease
FREE Online Courses: Enroll Now, Thank us Later!
In this project, we will create a python gif creator application using the Tkinter library. This python project will allow users to select a video file, specify a start and end time, and then convert the selected portion of the video into a GIF file. The end result will be a simple and easy-to-use application that can create GIFs from video files with minimal effort.
Python GIF Creator
This project aims to provide a step-by-step guide on how to create a GIF convertor application using Python and Tkinter. The tutorial will cover everything from importing the necessary libraries to designing the user interface and implementing the application’s core functionality. By the end of this tutorial, you will have a working GIF converter application that you can use and customize to suit your needs.
Project Prerequisites
Before starting this tutorial, you should have a basic understanding of Python programming and be familiar with the Tkinter library. Additionally, you will need to have the following libraries installed: moviepy, tkinter, and you will need to have python installed in your system.
Please run the following commands
pip install moviepy
pip install tk
Download Python GIF Creator Project
Please download the source code for the GIF Creator python project: GIF Creator Project
Python GIF Creator Project File Structure
Steps for building the python GIF Creator project:
Step 1: Importing libraries
The first step in creating our application is to import the necessary libraries. In this case, we will be using the Tkinter library for the user interface, the moviepy library for working with video files, and the filedialog and messagebox modules from Tkinter for handling file input and output.
# Importing the required libraries
import tkinter as tk
from tkinter import filedialog
from tkinter import messagebox
from moviepy.video.io.VideoFileClip import VideoFileClip
Step 2: Creating the main window
Next, we will create the main window of our application using Tkinter’s Tk class. We will set the title of the window, the size, and the background color. We will also set the window to be non-resizable.
# Creating root window
root = tk.Tk()


#setting title
root.title("ProjectGurukul - GIF Creator")


#setting window size
root.geometry("600x400")
root.resizable(width=False, height=False)
root.configure(background="#D7BDE2")
Step 3: Adding the input file selection feature
The next step is to add the feature to select the input file. We will create a function called “input_file” that will open a file selection dialog box and allow the user to select a video file. We will then display the selected file’s name on the input label.
# function to select input file
def input_file():
    global input_file_name
    input_file_name = filedialog.askopenfilename(initialdir = "/", title = "Select file", filetypes = (("PDF files", "*.mp4"), ("all files", "*.*")))
    input_label.configure(text="Input File : " + input_file_name.split("/")[-1])
Step 4: Adding the output file selection feature
We will follow the similar approach for the output file. We will create a function called “output_file” that will open a file selection dialog box and allow the user to select the location and name of the output GIF file. We will then display the selected file’s name on the output label.
# function to select output file
def output_file():
    global output_file_name
    output_file_name = filedialog.asksaveasfilename(initialdir = "/", title = "Select file", filetypes = (("GIF files", "*.gif"), ("all files", "*.*")))
    output_label.configure(text="Save As : " + output_file_name.split("/")[-1])
Step 5: Adding the GIF creation feature
The next step is to add the feature to create the GIF. We will create a function called “create_gif” that will take the start and end time from the start_range and stop_range entries, respectively. We will then use the moviepy library to create a subclip of the video file between the start and end time. We will then use the write_gif method to create the GIF file.
# function to create gif
def create_gif():


    # getting start and end time
    start_time = int(start_range.get())
    end_time = int(stop_range.get())


   # checking for errors
    if start_time > end_time:
        messagebox.showerror("Error", "Start time is greater than end time")
        return
    if end_time < 0 or start_time < 0:
        messagebox.showerror("Error", "Start and end time should be positive")
        return
    if input_file_name == None or output_file_name == None:
        messagebox.showerror("Error", "Input file and output file not selected")
        return

    # creating gif
    clip = VideoFileClip(input_file_name)
    subclip = clip.subclip(start_time, end_time)
    subclip.write_gif(output_file_name, verbose=False)


    # showing success message
    messagebox.showinfo("Success", "GIF created successfully")
Step 6: Creating the user interface
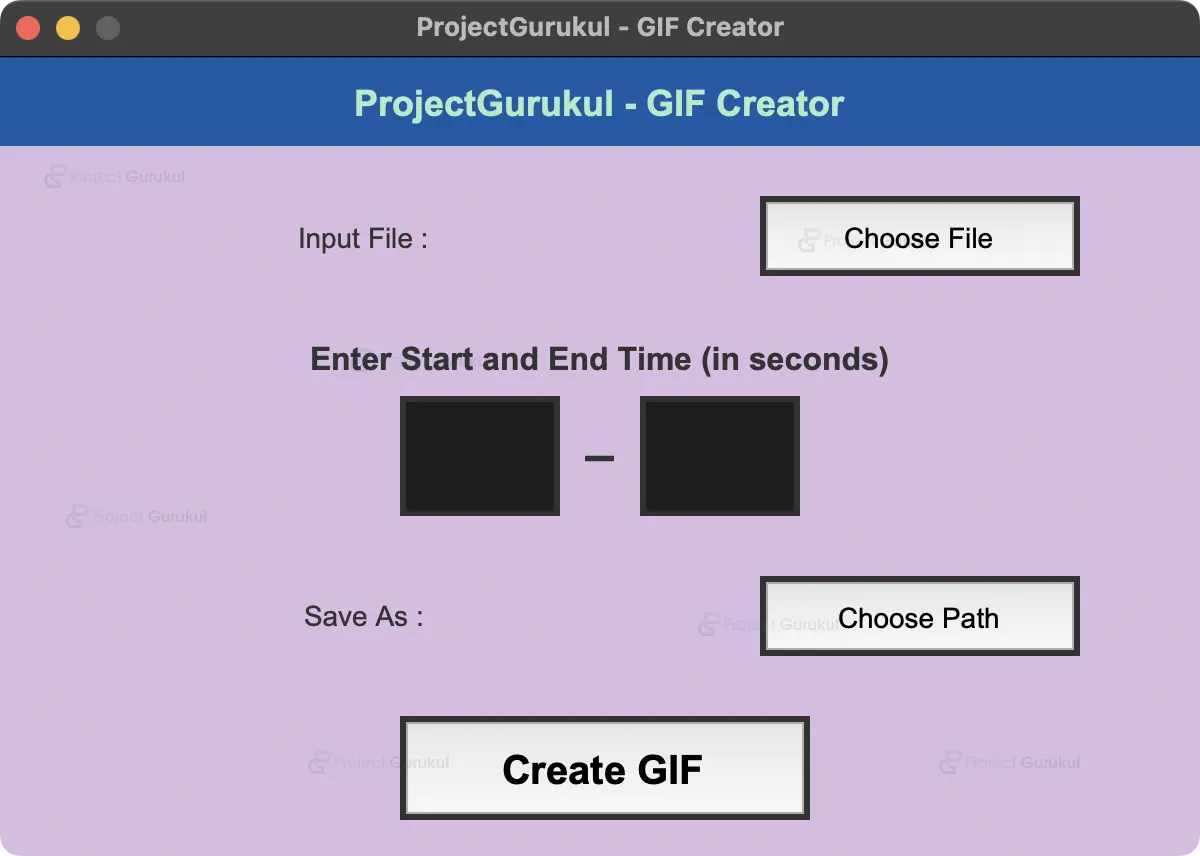
The final step is to create the user interface. We will create a title label, input label, input button, start and end time entries, output label, output button, and a create GIF button. We will then place them on the window using the place method.
# Creating GUI
title_label=tk.Label(root)
title_label.configure(background="#095aaa",foreground="#ABEBC6",font="Arial 18 bold",justify="center",text="ProjectGurukul - GIF Creator")
title_label.place(x=0,y=0,width=600,height=45)


input_label=tk.Label(root)
input_label.configure(background="#D7BDE2",foreground="#333333",font="Arial 14",justify="center",text="Input File : ")
input_label.place(x=20,y=70,width=328,height=40)


input_button=tk.Button(root)
input_button.configure(font="Arial 14",justify="center",text="Choose File",command=input_file)
input_button.place(x=380,y=70,width=160,height=40)


range_label=tk.Label(root)
range_label.configure(background="#D7BDE2",foreground="#333333",font="Arial 16 bold",justify="center",text="Enter Start and End Time (in seconds)")
range_label.place(x=150,y=130,width=300,height=41)


start_range=tk.Entry(root)
start_range.configure(font="Arial 30",justify="center", background="#1E1E1E", foreground="white")
start_range.place(x=200,y=170,width=80,height=60)


stop_range=tk.Entry(root)
stop_range.configure(font="Arial 30",justify="center", background="#1E1E1E", foreground="white")
stop_range.place(x=320,y=170,width=80,height=60)


range_label2=tk.Label(root)
range_label2.configure(background="#D7BDE2",foreground="#333333",font="Arial 30",justify="center",text="−")
range_label2.place(x=280,y=170,width=40,height=60)


output_label=tk.Label(root)
output_label.configure(background="#D7BDE2",foreground="#333333",font="Arial 14",justify="center",text="Save As : ")
output_label.place(x=20,y=260,width=328,height=38)


output_button=tk.Button(root)
output_button.configure(font="Arial 14",justify="center",text="Choose Path", command=output_file)
output_button.place(x=380,y=260,width=160,height=40)


create_button=tk.Button(root)
create_button.configure(font="Arial 20 bold",justify="center",text="Create GIF", command=create_gif)
create_button.place(x=200,y=330,width=205,height=52)
Step 7: Running the application
The final step is to run the application. We will use the mainloop method to run the application.
# Running the root window
root.mainloop()
Python GIF Creator Output
Summary
You have successfully created a GIF creator application using Python. Now you can use this application to create GIFs from any video file. I hope you enjoyed this tutorial. If you have any questions, please feel free to ask them in the comments section below.
i couldn’t able to run the code ?