Create a Discussion Forum in Python Django
FREE Online Courses: Click, Learn, Succeed, Start Now!
Let us develop our own Discussion Forum in python django and let others join the forum to discuss their problems. You will also be able to gain much knowledge in Django and how to handle back-end databases.
About Python Discussion Forum Project
Have you ever heard about StackOverflow? If you are into programming then you definitely must be knowing it. Have you ever thought of building a forum similar to it? If yes then you are at the right place. Yes, in this project, we will build a discussion forum using python django where all the logged-in users will be able to post their questions or problems or answer other people’s queries if they know about it. This python django project is for those people who have basic knowledge in Django.
Django Discussion Forum Project
The objective of the discussion forum django project is to implement an online discussion forum where users can post their questions or reply to other people’s questions. Basic knowledge of the front-end part and a good knowledge of Django is required to complete and understand the project.
Project Prerequisites
Discussion forum django project requires a good knowledge of html, css, bootstrap, and Python Django Framework. You must have created at least 2-3 easy and simple projects in Django is the basic requirement.
Download Discussion Forum Python Code
Please download the source code of python django discussion forum project: Discussion Forum Project Code
Steps to create Discussion Forum Project
First, let’s check the steps to build the Discussion Forum in Python Django Framework:
- First, it is important to start the project in Django by using django-admin startproject command.
- Then create an app inside our project by django-admin startapp command.
- Create a folder for templates and add it to the settings.py file.
- Similarly, create a static file and media file as per requirements and add it to the settings.py file.
- Then you are good to go and start making the URLs and views.
Let’s start
1. First of all we create a basic.html file in templates folder which will contain the basic design that is required on all pages that is the navigation bar. Then we can extend this file on all the html pages.
<title>{% block title %} {% endblock %}</title>
      <style>
          {% block css %} {% endblock %}
    </style>
  </head>
  <body>
    <nav class="navbar navbar-expand-lg navbar-dark bg-dark fixed-top">
  <a class="navbar-brand" href="/">Discussion Forum</a>
  <button class="navbar-toggler" type="button" data-toggle="collapse" data-target="#navbarSupportedContent" aria-controls="navbarSupportedContent" aria-expanded="false" aria-label="Toggle navigation">
    <span class="navbar-toggler-icon"></span>
  </button>

  <div class="collapse navbar-collapse" id="navbarSupportedContent">
    <ul class="navbar-nav mr-auto">
      <li class="nav-item active">
        <a class="nav-link" href="/">Home <span class="sr-only">(current)</span></a>
      </li>
      {% if user.is_authenticated %}
<ul class="navbar-nav mr-2">
<li class="nav-item dropdown">
<a class="nav-link dropdown-toggle" href='#' id="navbarDropdown" role="button" data-toggle="dropdown"> Welcome {{request.user}}</a>
<div class="dropdown-menu" aria-labelledby="navbarDropdown">
          <a class="dropdown-item" href="/logout">Logout</a>

        </div>
      </li>
{% else %}
      <li class="nav-item">
        <a class="nav-link" href="/register">Register</a>
      </li>
      <li class="nav-item">
        <a class="nav-link" href="/login">Login</a>
      </li>
      {% endif %}

      <li class="nav-item">
        <a class="nav-link" href="/myprofile">Profile</a>
      </li>
    </ul>
  </div>
</nav>
<br>
</body>
{% block body %} {% endblock %}
Code Explanation:
You must have a basic knowledge of bootstrap. It is sometimes very important to use it. It is open-source and free to use the code. There are various components that you can use from bootstrap.
Similarly, in this project we use a navigation bar. You can make your own navigation bar however you like it to be. There are 4 items where the users can navigate Home, Register, Login, Profile. {% if user.is_authenticated %} means that when the users login or register and login items will not be displayed instead of it a welcome message with the user’s username will be displayed. So that was everything about the navigation bar.
Models.py
from django.db import models
from django.contrib.auth.models import User
from django.utils.timezone import now

# Create your models here.
class Profile(models.Model):
    user = models.OneToOneField(User, null=True, blank=True, on_delete=models.CASCADE)
    image = models.ImageField(upload_to="images",default="default/user.png")

class Post(models.Model):
    user1 = models.ForeignKey(User, on_delete=models.CASCADE, default=1)
    post_id = models.AutoField
    post_content = models.CharField(max_length=5000)
    timestamp= models.DateTimeField(default=now)
    image = models.ImageField(upload_to="images",default="")

class Replie(models.Model):
    user = models.ForeignKey(User, on_delete=models.CASCADE, default=1)
    reply_id = models.AutoField
    reply_content = models.CharField(max_length=5000)
    post = models.ForeignKey(Post, on_delete=models.CASCADE, default='')
    timestamp= models.DateTimeField(default=now)
    image = models.ImageField(upload_to="images",default="")
2. Create the user registration page (register.html):
{% block body %}
<br>
<div id="login-box">
    <div class="items">
      <h1>Register</h1>
        <form action="/register/" method="post"> {% csrf_token %}

      <input type="text" name="username" placeholder="Username" />
      <input type="email" name="email" placeholder="E-mail" />
      <input type="text" name="first_name" placeholder="First Name" />
      <input type="text" name="last_name" placeholder="Last Name" />
      <input type="password" name="password" placeholder="Password" />
      <input type="password" name="confirm_password" placeholder="Confirm your password" />

      <input type="submit" name="signup_submit" value="Register" />
    </div>
  </div>

  {% endblock %}
Views.py:
def UserRegister(request):
    if request.method=="POST":
        username = request.POST['username']
        email = request.POST['email']
        first_name=request.POST['first_name']
        last_name=request.POST['last_name']
        password = request.POST['password']
        confirm_password = request.POST['confirm_password']
        user = User.objects.create_user(username, email, password)
        user.first_name = first_name
        user.last_name = last_name
        user.save()
        return render(request, 'login.html')
    return render(request, "register.html")
Code Explanation:
We take the input from the user that is the username, email, first name, last name, password and confirm password and then send a post request. Then in views.py the post request is accepted and saved in the Django user model.
3. Create the user login page (login.html):
<div id="login-box">
    <div class="items">
      <h1>Log In</h1>
              <form action="/login/" method="post"> {% csrf_token %}
      <input type="text" name="username" placeholder="Username" />
      <input type="password" name="password" placeholder="Password" />
      <input type="submit" name="signup_submit" value="Log In" />
    </div>
  </div>
  {% endblock %}
Views.py:
def UserLogin(request):
    if request.method=="POST":
        username = request.POST['username']
        password = request.POST['password']
        user = authenticate(username=username, password=password)
        if user is not None:
            login(request, user)
            messages.success(request, "Successfully Logged In")
            return redirect("/myprofile")
        else:
            return HttpResponse("User not Found")
        alert = True
        return render(request, 'login.html', {'alert':alert})
    return render(request, "login.html")
Code Explanation:
Similar to the registration code the username and password is taken from the user while logging in to his account from which the user had registered. To check the authenticate function is used. If the logged in credentials are correct then the user gets redirected to the profile page else error message that is Invalid Credentials will get displayed.
4. Create the profile page of the user after the user is logged in (login.html):
<div class="container">
    <div class="row">
        <div class="col-lg-12 col-lg-offset-0">

            <div class="row pad">
                <div class="col-lg-12">
                    <div class="panel panel-primary">
                        <div class="card-body">
                            <ul class="list-group">
                                <li class="list-group-item">
                                    Username: <strong class="float-right">{{request.user}}</strong>
                                </li>
                                <li class="list-group-item">
                                    Full Name: <strong class="float-right">{{request.user.get_full_name}}</strong>
                                </li>
                                <li class="list-group-item">
                                    Email: <strong class="float-right">{{request.user.email}}</strong>
                                </li>
                                <li class="list-group-item">
                                    <form action="/myprofile/" enctype="multipart/form-data" method="POST">{% csrf_token %}
                                        {{ form.as_p }}
                                        <button type="submit">Upload</button>
                                        Profile Photo: <strong class="float-right"> <img
                                                src="{{request.user.profile.image.url}}" class="rounded-circle" alt=""
                                                width="150px" height="150px"></strong>
                                </li>
                            </ul>
                        </div>
                    </div>
                </div>
            </div>
        </div>
    </div>
</div>
</div>
Views.py :
def myprofile(request):
    if request.method=="POST":
        user = request.user
        profile = Profile(user=user)
        profile.save()
        form = ProfileForm(data=request.POST, files=request.FILES)
        if form.is_valid():
            form.save()
            obj = form.instance
            return render(request, "profile.html",{'obj':obj})
    else:
        form=ProfileForm()
    return render(request, "profile.html", {'form':form})
Code Explanation:
After login is done, the user can view the profile where the user’s username, full name, email is displayed. The user can add a profile photo if the user wants.
5. Create the actual forum the home page of the project (forum.html):
<div class="container my-4">
<div class="jumbotron">
<h1 class="display-4">Project Gurukul Disscussion Forum</h1>
<p class="lead">This is a simple hero unit, a simple jumbotron-style component for calling extra attention to featured content or information.</p>
<hr class="my-4">
<p>It uses utility classes for typography and spacing to space content out within the larger container.</p>
<button class="btn btn-primary btn-lg" data-target="#questions" data-toggle="modal" role="button">Add Question</button>
</div>
{% for post in posts %}
<div class="container-fluid mt-10">
<div class="row">
<div class="col-md-12">
<div class="card mb-4">
<div class="card-header">
<div class="media flex-wrap w-100 align-items-center"> <img src="/media/{{post.image}}"
class="d-block ui-w-40 rounded-circle" alt="">
<div class="media-body ml-3"> <a href="/discussion/{{post.id}}" data-abc="true">{{post.user1}}</a>
</div>
<div class="text-muted small ml-3">
<div class="px-4 pt-3">{{post.timestamp}} </div>
</div>
</div>
</div>
<div class="card-body">
<p>{{post.post_content}}</p>
</div>
<div class="card-footer d-flex flex-wrap justify-content-between align-items-center px-0 pt-0 pb-3">
</div>
</div>
</div>
</div>
</div>
{% endfor %}
</div>
<!-- Modal -->
<div class="modal fade" id="questions" tabindex="-1" role="dialog" aria-labelledby="exampleModalLabel" aria-hidden="true">
<div class="modal-dialog" role="document">
<div class="modal-content">
<div class="modal-header">
<h5 class="modal-title" id="exampleModalLabel">Modal title</h5>
<button type="button" class="close" data-dismiss="modal" aria-label="Close">
<span aria-hidden="true">×</span>
</button>
</div>
<div class="modal-body">
<form action="/" method="POST"> {% csrf_token %}
<div class="form-group">
<label for="exampleFormControlTextarea1">Post Your Question Here</label>
<textarea class="form-control" id="content" name="content" rows="3"></textarea>
</div>
</div>
<div class="modal-footer">
<button type="button" class="btn btn-secondary" data-dismiss="modal">Close</button>
<button type="submit" class="btn btn-primary">Post</button>
</div>
</div>
</div>
</div>
Views.py :
def forum(request):
    profile = Profile.objects.all()
    if request.method=="POST":
        user = request.user
        image = request.user.profile.image
        content = request.POST.get('content','')
        post = Post(user1=user, post_content=content, image=image)
        post.save()
        alert = True
        return render(request, "forum.html", {'alert':alert})
    posts = Post.objects.all()
    return render(request, "forum.html", {'posts':posts})
Code Explanation:
When the user clicks on add post button a modal is opened where user can write the content of the post and then simply post the content by clicking on post button.
{% for post in posts %}: All the posts posted by different users will be displayed on the home page with the help of the for loop inside a card design where the username, post content, date and time of the post is also shown.
posts = Post.objects.all(): It saves all the data from Post database in posts variable so that the posts variable can be used inside the template to display the data from the Post database on the user’s screen.
<script>
     {% if alert %}
    alert('Your Question has been posted successfully!!');
    document.location = '/';
    {% endif %}
    </script>
    {% endblock %}
alert = True (in views.py): When the user posts the message an alert will appear with the required message.
6. Create the reply page (discussion.html):
{% for reply in replies %}
<br>
<div class="container">
<div class="media">
<img class="mr-3" src="/media/{{reply.image}}" alt="." width="30px" height="30px">
<div class="media-body">
<h4 class="mt-0">{{reply.user}} <span><small style="font-size: 13px;">({{reply.timestamp}})</small></span></h4>
<h5>{{reply.reply_content}}</h5>
</div>
</div>
</div>
{% endfor %}
<!-- Modal -->
<div class="modal fade" id="reply" tabindex="-1" role="dialog" aria-labelledby="exampleModalLabel" aria-hidden="true">
<div class="modal-dialog" role="document">
<div class="modal-content">
<div class="modal-header">
<h5 class="modal-title" id="exampleModalLabel">Modal title</h5>
<button type="button" class="close" data-dismiss="modal" aria-label="Close">
<span aria-hidden="true">×</span>
</button>
</div>
<div class="modal-body">
<form action="/discussion/{{post.id}}/" method="POST"> {% csrf_token %}
<div class="form-group">
<label for="exampleFormControlTextarea1">Post Your Solution Here</label>
<input type="hidden" name="post_id" value="{{post.id}}">
<textarea class="form-control" id="desc" name="desc" rows="3"></textarea>
</div>
</div>
<div class="modal-footer">
<button type="button" class="btn btn-secondary" data-dismiss="modal">Close</button>
<button type="submit" class="btn btn-primary">Post Solution</button>
</div>
</div>
</div>
</div>
Views.py:
def discussion(request, myid):
    post = Post.objects.filter(id=myid).first()
    replies = Replie.objects.filter(post=post)
    if request.method=="POST":
        user = request.user
        image = request.user.profile.image
        desc = request.POST.get('desc','')
        post_id =request.POST.get('post_id','')
        reply = Replie(user = user, reply_content = desc, post=post, image=image)
        reply.save()
        alert = True
        return render(request, "discussion.html", {'alert':alert})
    return render(request, "discussion.html", {'post':post, 'replies':replies})
Code Explanation :
If the user wants to comment on any post, he can click on that particular post, bringing the user to a new page corresponding to that post. After that the user can click on reply button and post the content. The reply to the particular post will get posted.
Filtering of data from database:
post = Post.objects.filter(id=myid).first()
replies = Replie.objects.filter(post=post)
The above two lines are very important. It filters all replies according to the selected posts only.
Python Discussion Forum Project Output:
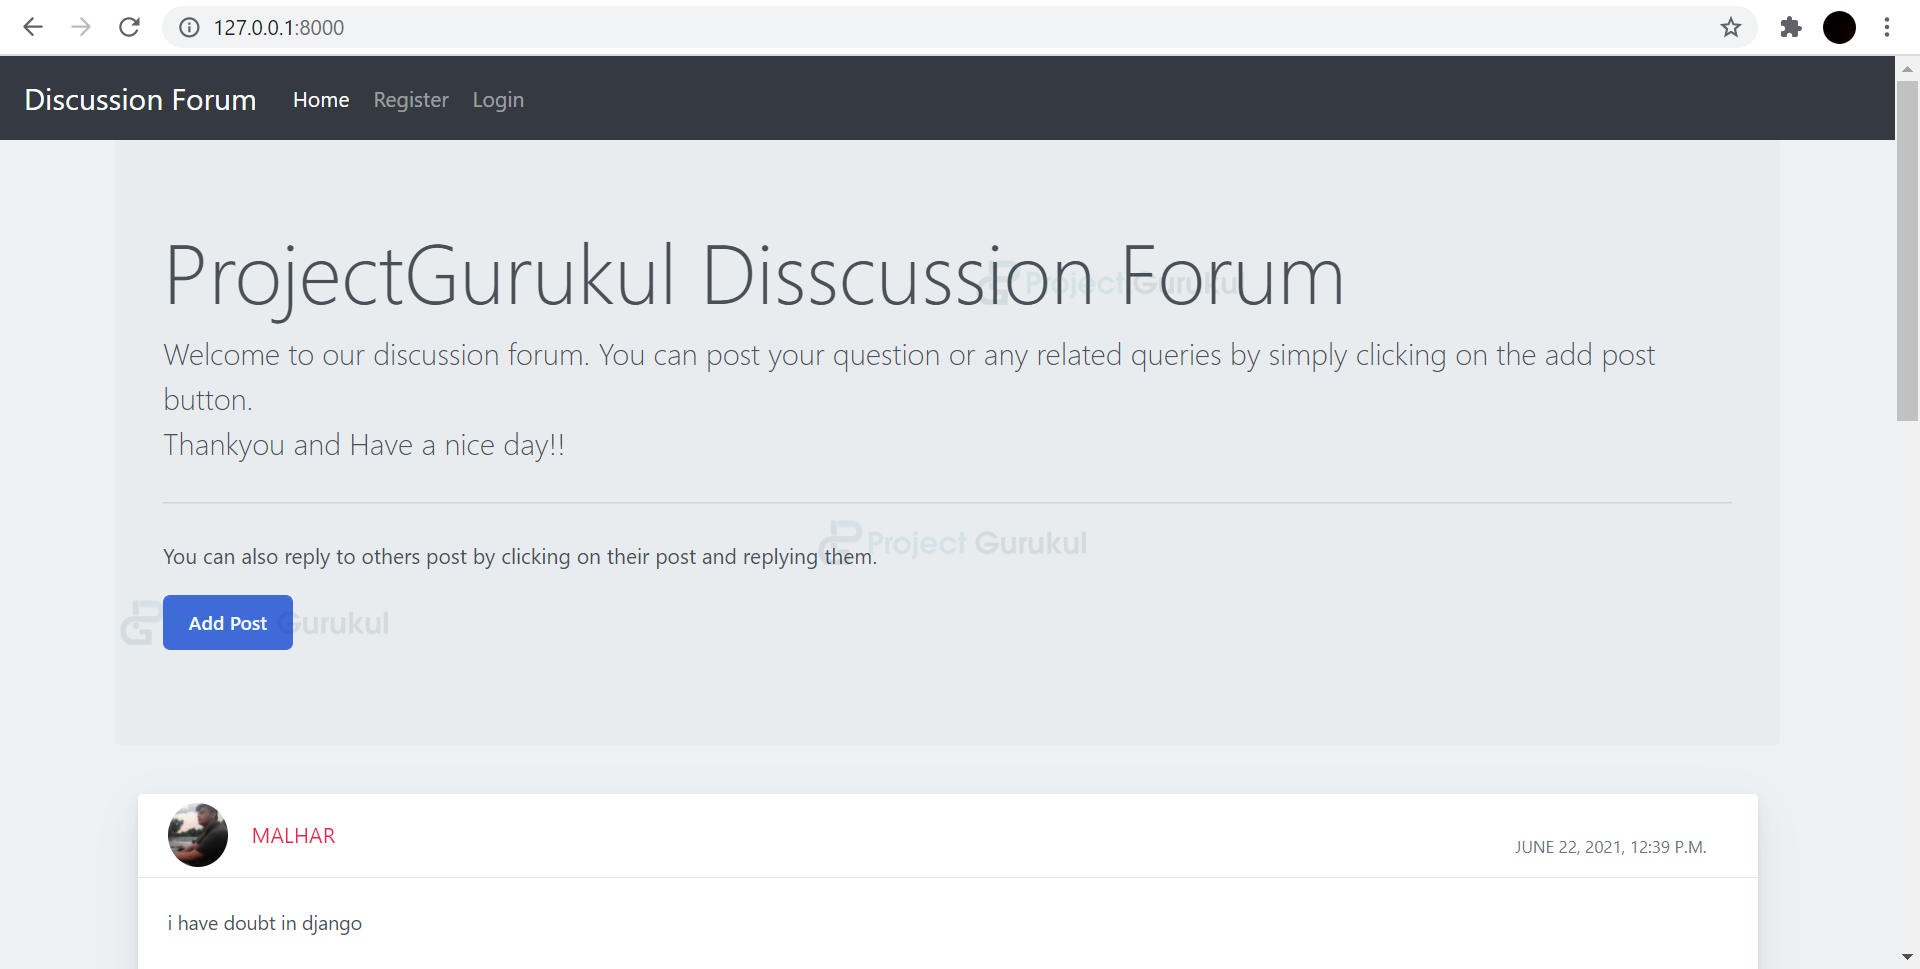
First Page of discussion forum project with all the posts:
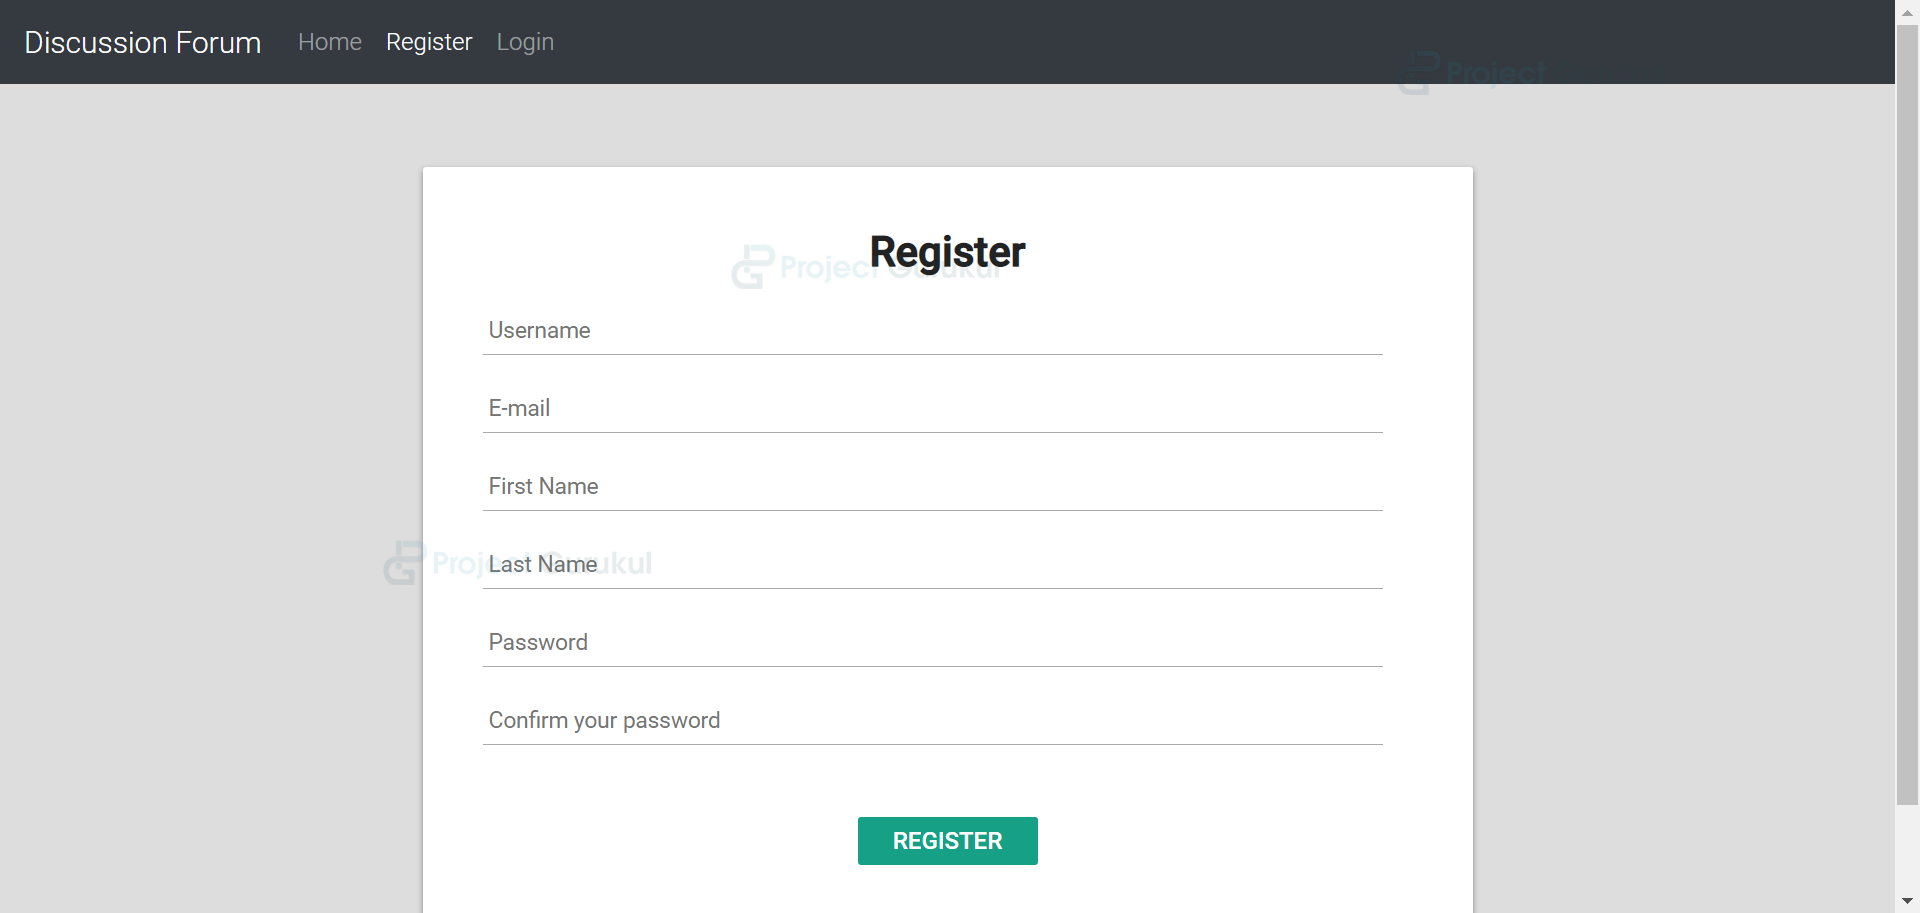
User registration page:
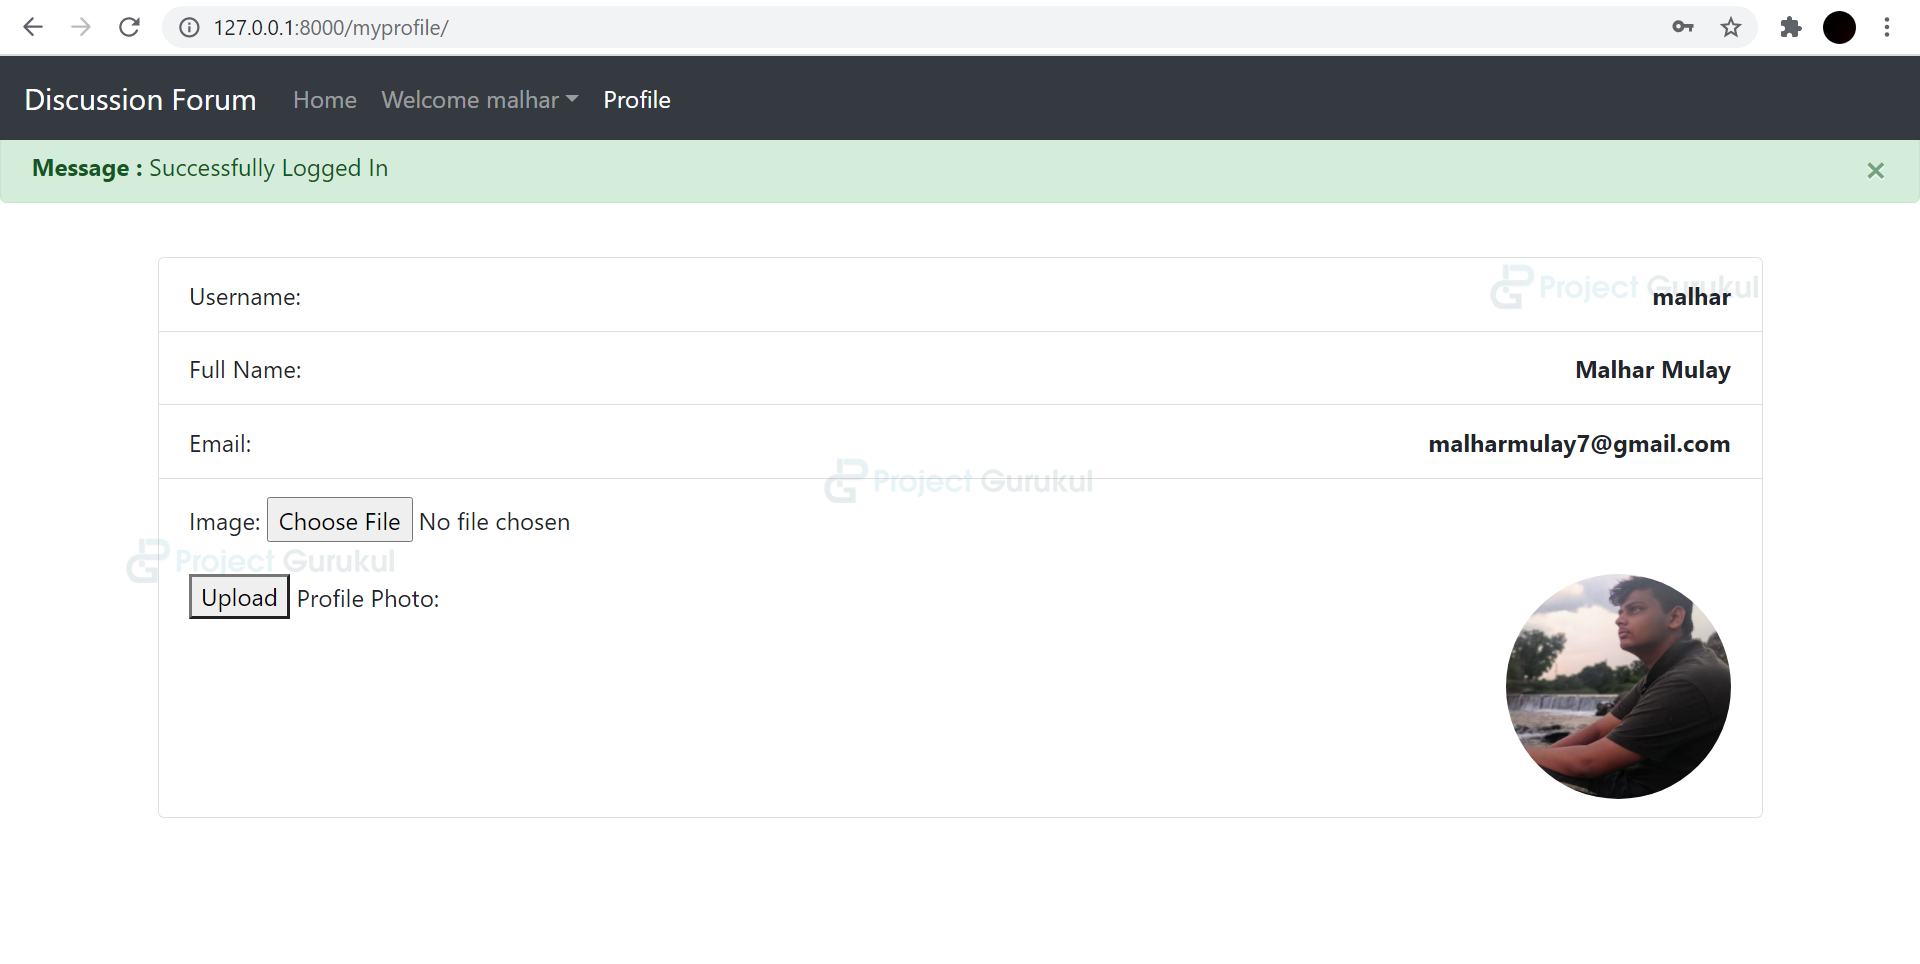
After login user is redirected to the user profile page:
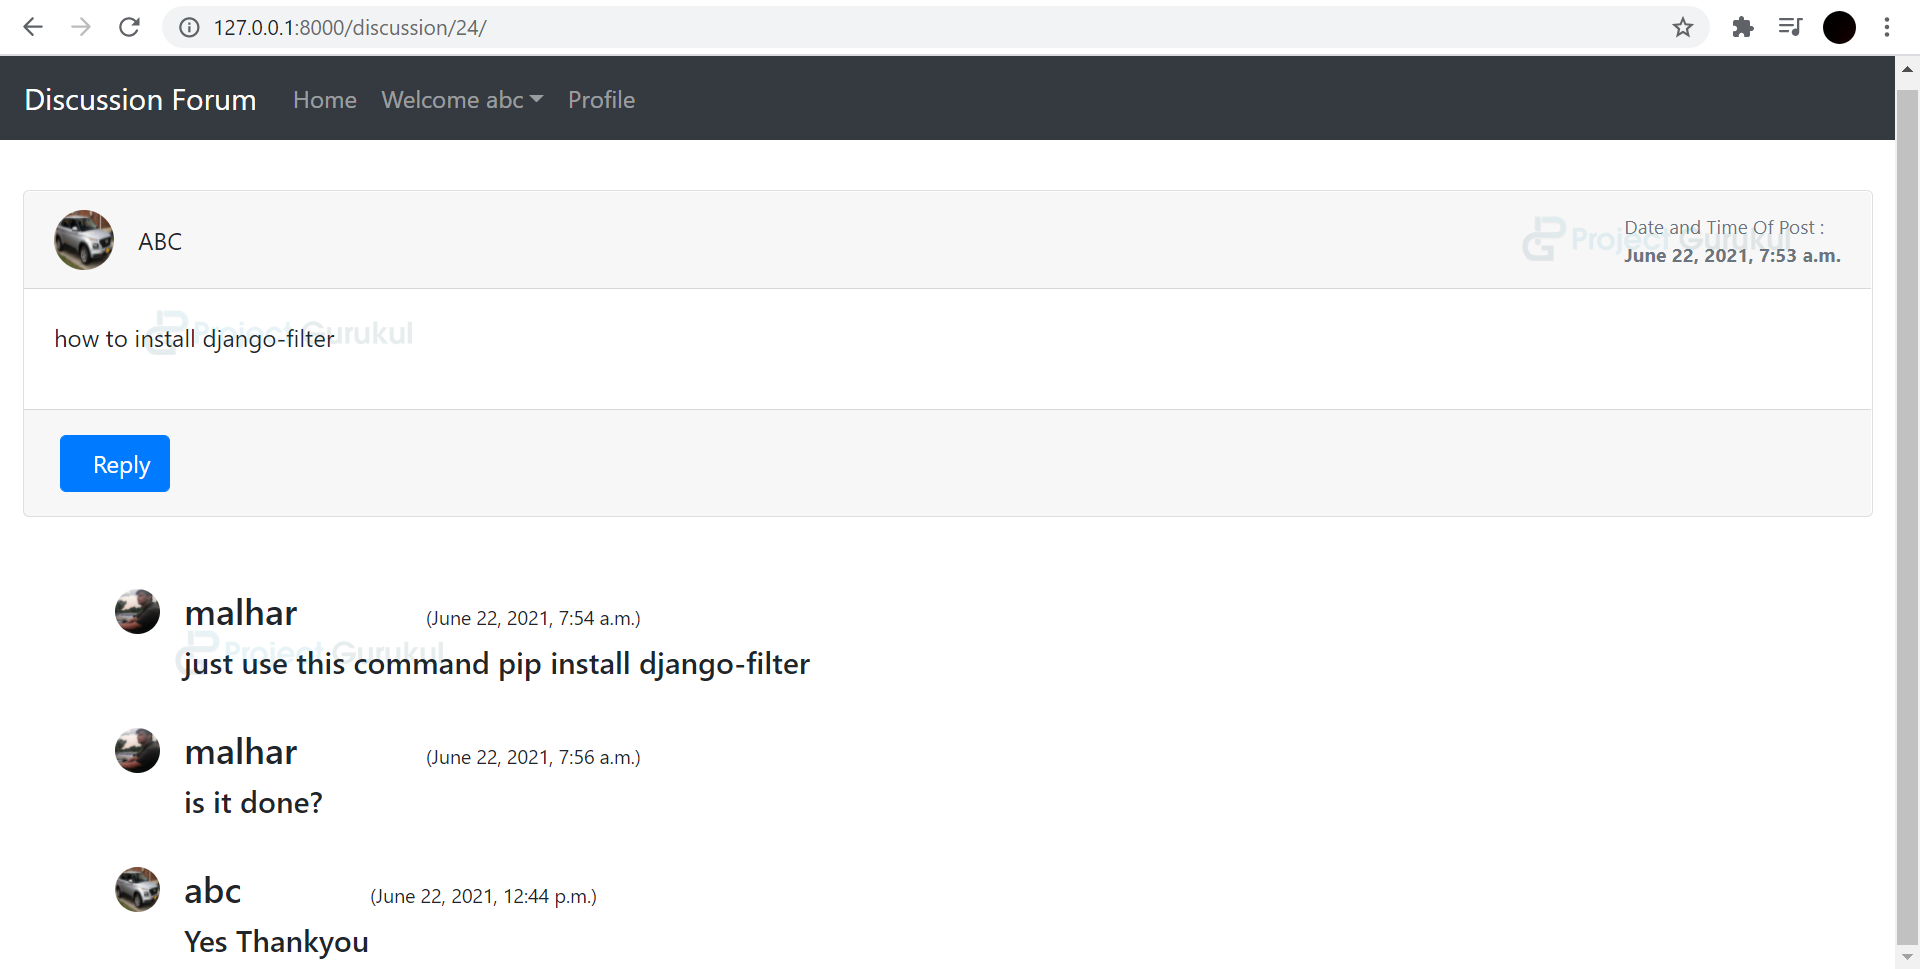
After successful login user can reply to any post through the home screen:
Summary
With this Django project, we have successfully developed a Discussion Forum with the front-end and back-end. You can try to add more features based on requirements. This is an interesting python django project where we developed front end using HTML, css, bootstrap and backend using python.