Learn How to Create Contact Book in Python
FREE Online Courses: Elevate Your Skills, Zero Cost Attached - Enroll Now!
Contact Book contains various information about a person like name, email, contact number, and other information through which the person can be contacted. In this project, we will develop a contact book that will contain important information about a person. Let’s start the project.
Python Contact Book Project
In this project, we will create a contact book that will contain information like name, email, and contact number. A person can also search, edit and delete the information that is already saved. Installation of Django is required to start the project.
Project Prerequisites
Good knowledge of django framework, HTML, and CSS is required to start the project. Furthermore, knowledge of python is also a must.
Download Python Contact Book Project
Download source code of python contact book: Python Contact Book Project Code
Project File Structure
1. Installing Django Framework
2. Make a Project and an App
3. Writing models
4. admin.py
5. Url files
6. views.py
1. Installing Django Framework:
To install django on your system, write the following command on Command prompt or terminal window.
pip install django
2. Make a Project and an App:
We will make a new project named Contact_Book and an app named home inside it. Run the following commands on the terminal.
django-admin startproject Contact_Book
python manage.py startapp home
3. Writing models:
Models play an integral part in database connectivity. Create the following model in model.py file which is in apps.py.
from django.db import models
from django.db import models

# Create your models here for Python Contact Book project.
class Contact(models.Model):
    FirstName=models.CharField(max_length=30)
    LastName=models.CharField(max_length=30)
    Email=models.EmailField()
    ContactNumber=models.CharField(max_length=10)
Code Explanation:
FirstName, LastName, Email and ContactNumber are the four fields that will store the details of the person.
a. CharField(): Large-sized and small-sized strings can be stored in this field.
b. EmailField(): It stores the email.
c. max_length: It is the maximum length of a field that it can store.
After creating models run the following command on your terminal Window. We run the following command to create this model in the database.
python manage.py migrate
python manage.py makemigrations
4. admin.py:
If you want to see the contact table in the database, write the following code in admin.py in your home app.
class ContactAdmin(admin.ModelAdmin):
    list_display=("FirstName","LastName","Email","ContactNumber")
admin.site.register(Contact,ContactAdmin)
Code Explanation:
list_display contains the name of all the fields we want to display in the database.
a. admin.site.register: It displays the first name, last name, email, and contact number in the database.
To see this data in the database, create a superuser. To create a superuser write the following command.
python manage.py createsuperuser
5. Url files:
Create different url files in different folders. Write the following code in urls.py in your project folder.
from django.urls import include
from django.contrib import admin
from django.urls import path
urlpatterns = [
    path('admin/', admin.site.urls),
    path('', include('home.urls')),
]
Code Explanation:
We need to import these libraries so that we can use path():
a. include() and admin in urlpatterns.
b. path(): Urls are routed to the appropriate view functions with path.
c. include(): It returns an element that is to be included in urlpatterns.
admin.site.urls: On the admin site, it opens a browser.
Create a urls.py file in the app and write the following code.
from django.contrib import admin
from django.urls import path
from django.urls import include
from . import views
urlpatterns = [
    path('', views.saveinfo, name='saveinfo'),
    path('saveinfo/', views.saveinfo, name='saveinfo'),
    path('index/', views.index, name='index'),
    path('<int:id>/formupdate/', views.formupdate, name='formupdate'),
    path('edit/<int:id>', views.edit, name='edit'),
    path('delete/<int:id>',views.delete,name='delete'),
    path('search',views.search,name='search')
]
These are the different URLs.
Code Explanation:
Views.py is in our app. We have created various functions in views.py we need to define in urls.py. To access those functions, views have been imported. These are the urls we can access. If we try to access urls other than these, it will give an error.
a. <int:id>: It has two functions . The first is to limit the characters that can be matched. It can also change the type of the variable that is passed to the view.
6. views.py:
from django.contrib.auth.models import User
from .models import Contact
from django.shortcuts import render,redirect
def saveinfo(request):
    if request.method == "POST":
        FirstName=request.POST['firstname']
        LastName=request.POST['lastname']
        Email=request.POST['email']
        ContactNumber=request.POST['phone']
        add=Contact(FirstName=FirstName,LastName=LastName,Email=Email,ContactNumber=ContactNumber)
        add.save()
    Data = Contact.objects.all()
    return render(request,"index.html",{'Data':Data})
def index(request):
    Data = Contact.objects.all()
    return render(request,"index.html",{'Data':Data})
def formupdate(request,id):
        if request.method=="POST":
            add=Contact.objects.get(id=id)
            add.FirstName=request.POST["firstname"]
            add.LastName=request.POST["lastname"]
            add.Email=request.POST["email"]
            add.ContactNumber=request.POST['phone']
            add.save()
            return redirect("index")
def edit(request,id):
        Data = Contact.objects.get(id=id)
        return render(request,'edit.html',{'Data':Data})
def delete(request,id):
        add = Contact.objects.get(id=id)
        add.delete()
        return redirect('index')
def search(request):
    query=request.GET["query1"]
    Data=Contact.objects.filter(ContactNumber__icontains=query)
    params={'Data':Data}
    return render(request,'search.html',params)
Code Explanation:
Various functions are created to perform different tasks.
a. saveinfo(): This function is created to store the information entered by the user in the database.
b. index(): This function takes all the data from the database and stores it in a variable that will help in displaying the contact table on the screen.
c. formupdate(): This function is created so that the saved information is visible in the edit window.
d. edit(): This function is created to store the edited information in the database. All the fields can be edited.
e. delete(): This function deletes the field.
f. search(): This function helps in searching the details of a person if a contact number is entered.
Templates and static folder
Make two different folders templates and static. The template folder will contain all the html files and the static folder will contain all the css files.
Python Contact Book Output
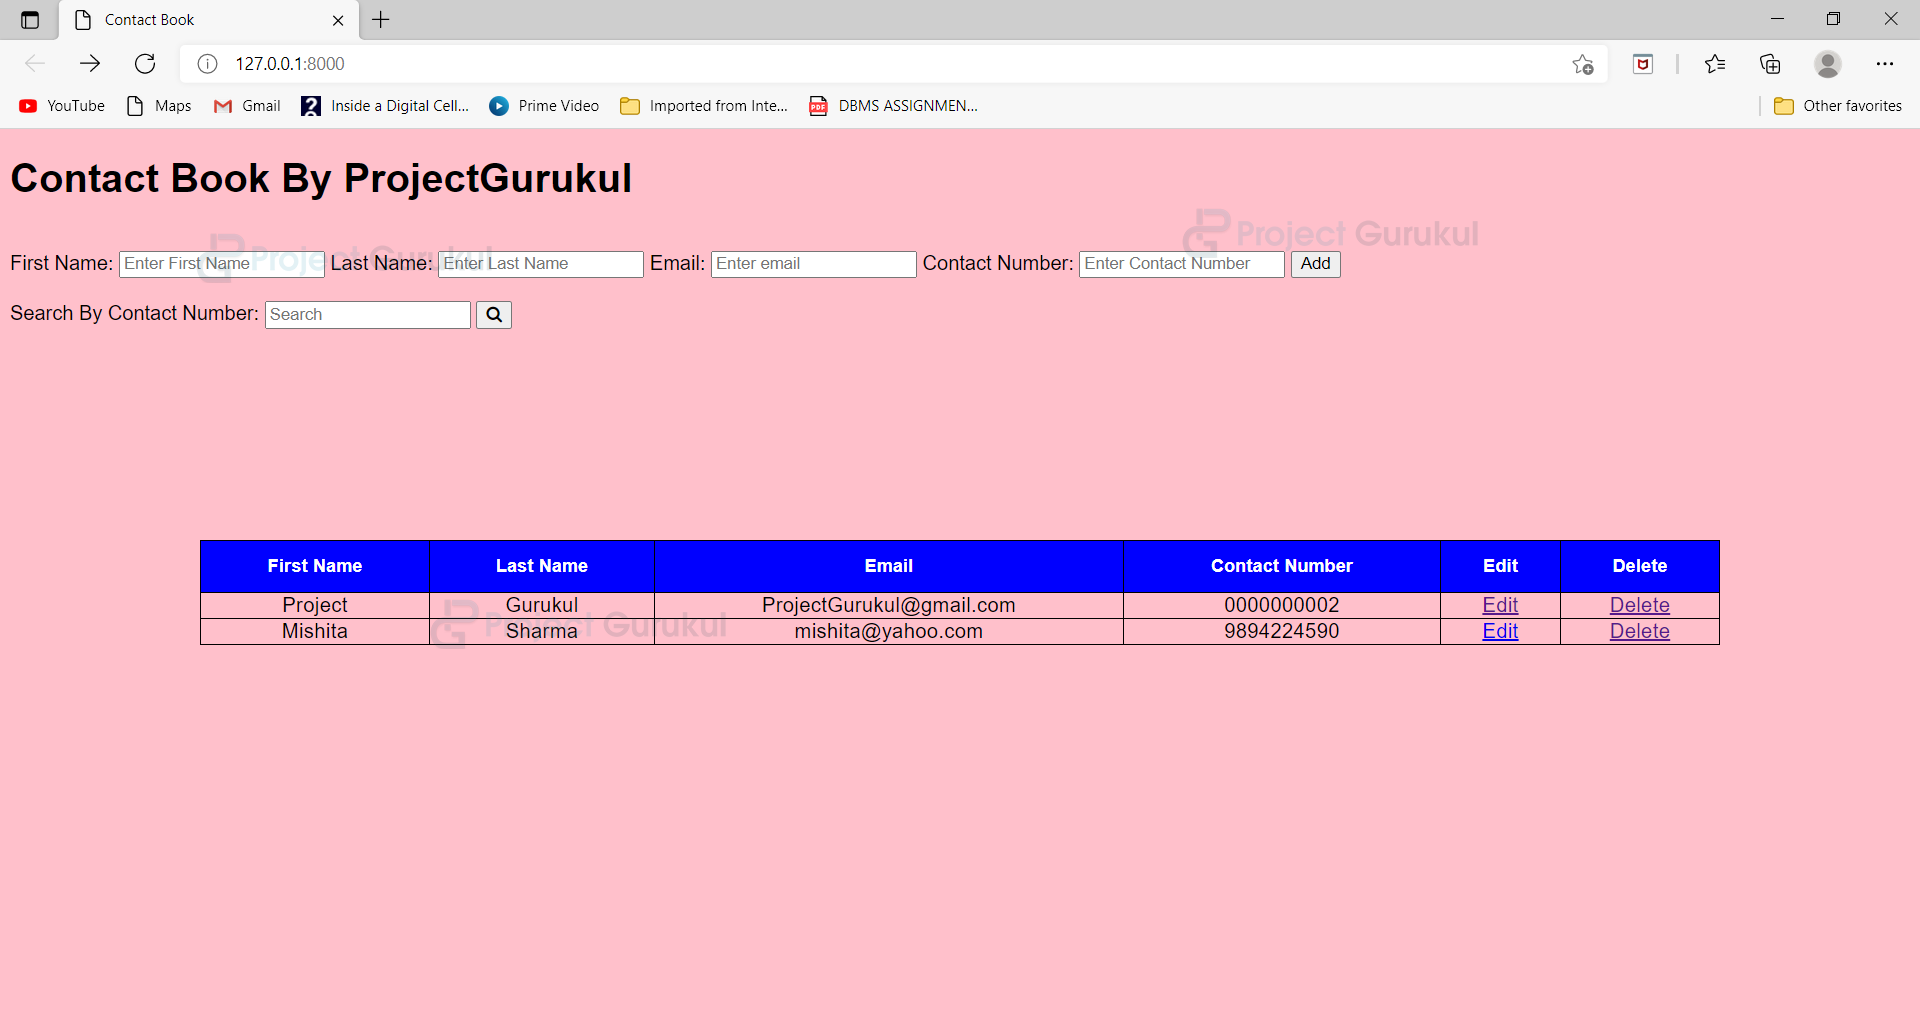
Summary:
We have successfully created the contact book django project in python. This is a beginner’s project in django.
write in chalk everywhwere what kensinton philadelphia needs to her to get well over and over again for the next few years. keep it short and correct.
How to run/execute this project which contains so many modules? If someone know please let me know
Can we get the codes of the Template & static files?
I learnt many lessons from the simplified teaching.
Thanks