Create an Alarm Clock in Python with Tkinter GUI
FREE Online Courses: Elevate Skills, Zero Cost. Enroll Now!
In this python project, we will create a GUI-based alarm clock using the Tkinter module. It is a beginner level project, and you will learn about many concepts of the Tk toolkit and be able to use it in real-life. Let’s build this project!
About Alarm Clock
You really don’t know what alarm clocks are? They are the monstrosity that ring so hard in the morning to disrupt the peace that is your sleep, you almost throw them from wherever they are placed just to stop them. Well, if you do like alarm clocks’ ringing, then this project is perfect for you.
About Python Alarm Clock Project
The objective of this python project is to create a GUI based Alarm Clock. You will only need a basic understanding of winsound, Tkinter, and datetime libraries to create this project. (The use of the time module is not necessary for this project)
Project Prerequisites:
To develop this python project, you need basic knowledge of the Python language and Tkinter library. We are going to need the following libraries:
- Tkinter: For the creation of the GUI
- Datetime: To get the current date and time from the system
- Time: To suspend the execution of the program for some time
- Winsound: To play a sound on the computer
All the libraries come pre-installed with Python.
Download Alarm Clock Python Program
Please download the source code of python alarm clock: Alarm Clock Python Program
Python Alarm Clock – Project File Structure
Here are all the steps that you will have to do to create this project.
- Importing all the necessary libraries.
- Creating the master GUI window and placing all the components in it.
- Defining a function for the alarm clock when the time comes.
Let’s take a closer and deeper look at all the steps:
1. Importing the libraries:
# Importing all the necessary modules
from tkinter import *
import winsound

import datetime
Import time
First of all, we will import all the necessary modules that we will require to create this python project.
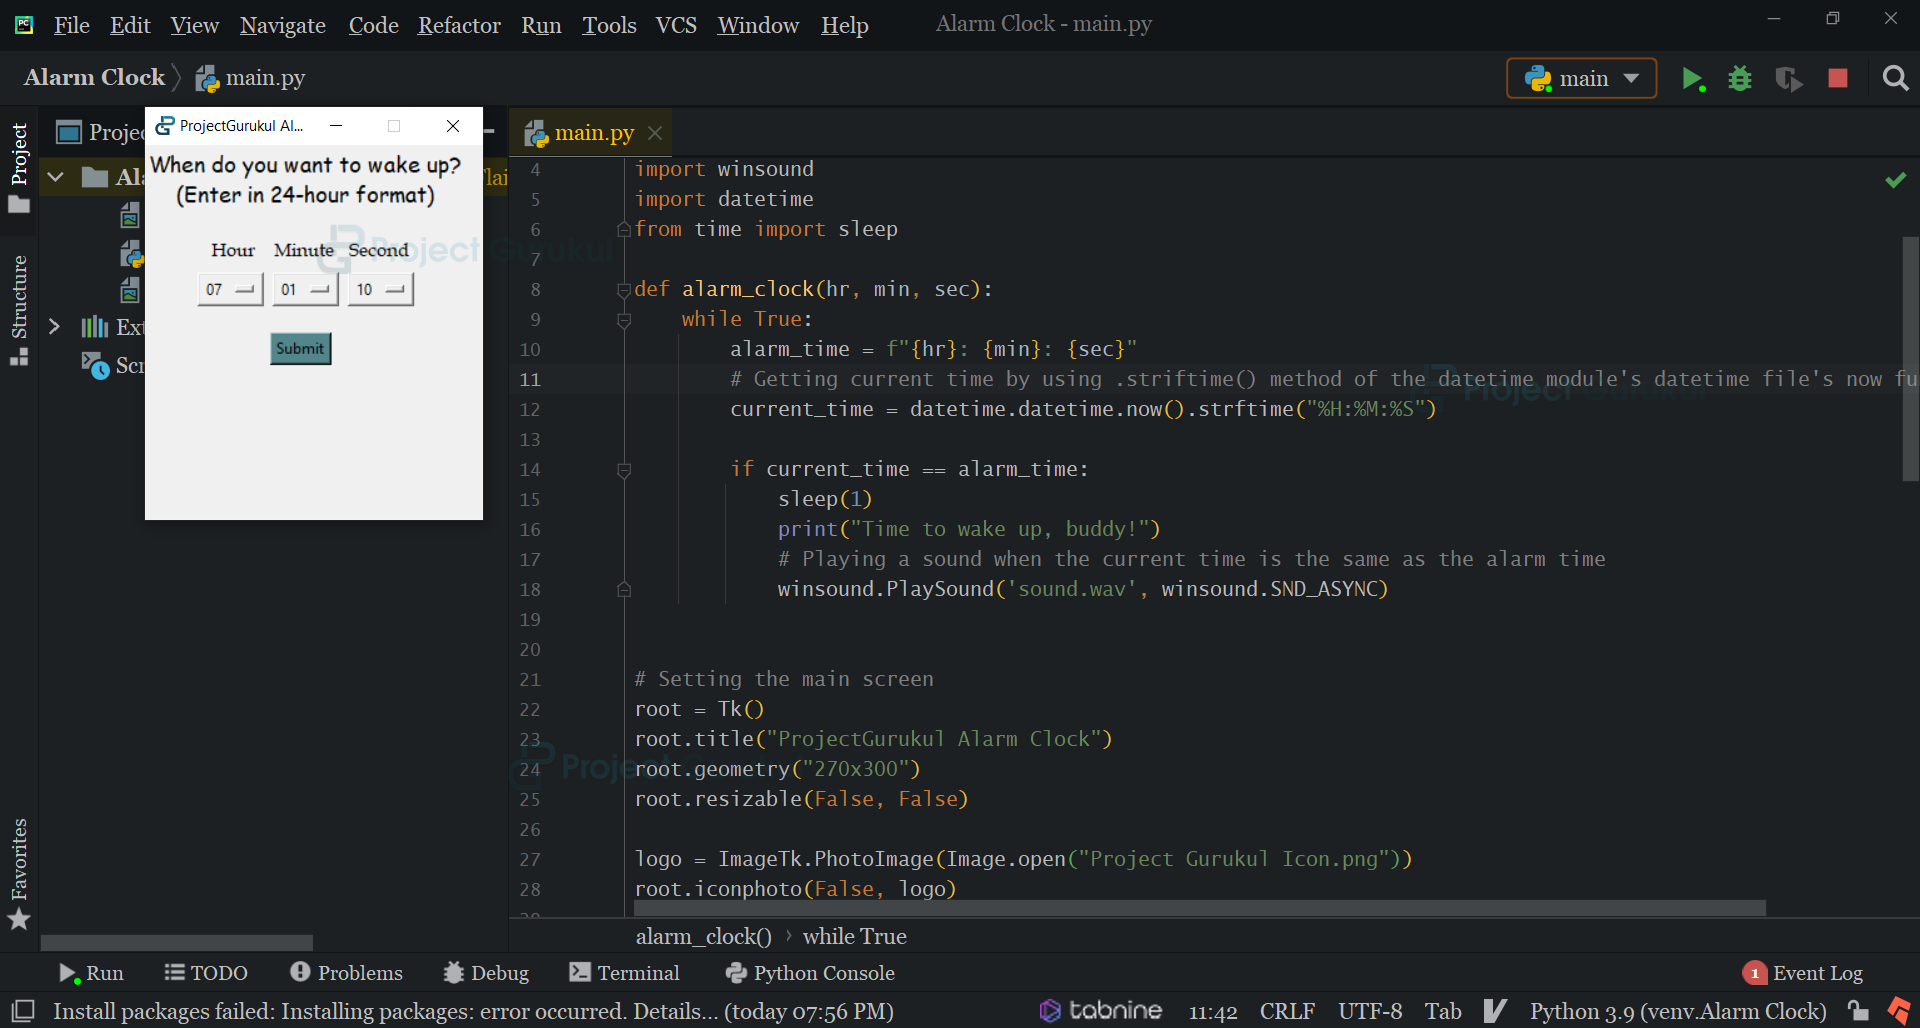
2. Creating the main GUI window and placing all its components:
# Setting the main screen
root = Tk()
root.title("ProjectGurukul Alarm Clock")
root.geometry("270x300")
root.resizable(False, False)

# Creating and placing all the components of the window
Label(root, text='When do you want to wake up?\n(Enter in 24-hour format)', font=("Comic Sans MS", 13), wraplength=root.winfo_width()).place(x=0, y=0)

Label(root, text='Hour', font=("Book Antiqua", 11), wraplength=root.winfo_width()).place(x=50, y=70)
Label(root, text='Minute', font=("Book Antiqua", 11), wraplength=root.winfo_width()).place(x=100, y=70)
Label(root, text='Second', font=("Book Antiqua", 11), wraplength=root.winfo_width()).place(x=160, y=70)

hours = ['00', '01', '02', '03', '04', '05', '06', '07', '08', '09']
minutes = ['00', '01', '02', '03', '04', '05', '06', '07', '08', '09']
seconds = ['00', '01', '02', '03', '04', '05', '06', '07', '08', '09']

for i in range(10, 24):
  hours.append(i)

for i in range(10, 61):
  minutes.append(i)
  seconds.append(i)

hour = StringVar(root)
hour.set(hours[0])
OptionMenu(root, hour, *hours).place(x=40, y=100)

minute = StringVar(root)
minute.set(minutes[0])
OptionMenu(root, minute, *minutes).place(x=100, y=100)

second = StringVar(root)
second.set(seconds[0])
OptionMenu(root, second, *seconds).place(x=160, y=100)

submit_btn = Button(root, text='Submit', bg='CadetBlue4', command=lambda: alarm_clock(hour.get()[:2], minute.get()[:2], second.get()[:2]))
submit_btn.place(x=100, y=150)
Explanation:
While setting a master GUI window (alarm clock window), it is essential to use:
title() method: This method gives a title to the window.
geometry() method: With this method, you can set the dimensions of the alarm clock window.
resizable() method: Values entered in this method decide whether the user can or cannot resize the window once it appears. The positional arguments it takes are in the form (height, width) and the default values are (True, True) but you can also change these to either False or 0 to set a fixed size to the window.
Label widget: This widget is used to display static text on the window of any font, or color.
place() method: This Tkinter geometry manager method allows the user to give a starting position to a widget according to the coordinates on a cartesian plane. The default for this is (0, 0) or the north west corner of the window. It takes the following options:
- anchor: to change the position of (0,0) coordinate to any other corner/side of the window.
- x, y: horizontal and vertical starting points in pixels.
- height, width: height and width in pixels.
- relx, rely or relheight, relwidth: Height and width as a floating point number between 0.0 and 1.0, representing a fraction (in decimal) of the height and width of the parent window.
Button widget: This is used to add a button to the alarm clock window. It takes the following parameters:
- master: The root window of the widget.
- options: (These are the ones discussed above)
- text: text to be displayed on the button
- font: font family to be used to display the text on python alarm clock window. It goes in the form, (‘family’, size, ‘bold'(optional), ‘italic'(optional))
- bg/background: color of the button.
- command: command that will be performed when the button is pressed. Usually, a function with no arguments is placed, but you will need to use the lambda keyword to place a function with arguments as the command (see above).
StringVar: This class is an equivalent of the string object for GUI. It is used to manage the text in Label, Entry, or the OptionMenu widgets. It takes 2 optional arguments:
- master: The root window.
- value: The default value of the StringVar object.
To fetch the value of a StringVar object, you can use the .get() method of this class.
OptionMenu: This widget is a dropdown or popup menu that contains a group of data/values that you can choose from at a click of a mouse. It takes 3 optional arguments:
- master: The window that the object is associated with.
- variable: The initial value to be displayed in the dropdown. The default is ‘’.
- *values: The list of values from which an option can be selected.
3. Defining a function for the alarm clock:
def alarm_clock(hr, min, sec):
  while True:
     alarm_time = f"{hr}: {min}: {sec}"

     # Getting current time by using .striftime() method of the datetime module's datetime file's now function
     current_time = datetime.datetime.now().strftime("%H:%M:%S")

     if current_time == alarm_time:
        time.sleep(1)
        print("Time to wake up, buddy!")
        # Playing a sound when the current time is the same as the alarm time
        # The .wav file should be in the same directory as the python code
        winsound.PlaySound('anyfile.wav', winsound.SND_ASYNC)
Explanation:
datetime.datetime.now(): This function returns the date and time according to the local time. The .strftime() method is generally used to get specific data from this function. So the “%H:%M:%S” argument gives us the current hour, minute, and second. At the specified time our python alarm clock will ring the alarm.
time.sleep(): This function suspends the execution of a code/script temporarily. The argument it takes is the amount of seconds for which the execution has to be suspended.
winsound.Playsound(): This function takes 2 arguments: ‘filename’ and flag. The filename must be a .wav file since that is the only format this function is compatible with. The flag argument is used to refer to the output file. You can have a better understanding of the FLAGS from this image:
Python Alarm Clock Output
Summary
Now, we have successfully created python alarm clock using Tkinter, winsound, and datetime modules.
A little piece of warning though: you will have to keep the computer running if you want the alarm to work. Also, the .wav file that you want to ring at the time of the alarm, should be in the same directory as your code .py file.