Face Detection & Counting using OpenCV – Python
We offer you a brighter future with FREE online courses - Start Now!!
These days face detection is a very common problem in various fields such as security, surveillance, etc. Face detection is also known as facial detection. It is a computer vision technology that is used to find and identify human faces in digital images. Today we’ll build a Face Detection and Counting Project using OpenCV and MediaPipe framework in python.
What is OpenCV?
OpenCV is a real-time Computer Vision framework written in C/C++. It is used in many image processing and computer vision tasks.
What is the MediaPipe framework?
MediaPipe is an open-source cross-platform framework for customizable ML solutions developed by Google. It is very lightweight as well as very accurate. MediaPipe comes with some pre-trained ML solutions such as face detection, pose estimation, object detection, etc.
Prerequisites for OpenCV Face Detection and Counting Project:
1. Python – 3.x (we used Python 3.8.8 in this project)
2. OpenCV – 4.5
- Run “pip install opencv-python” to install OpenCV.
3. MediaPipe – 0.8.5
- Run “pip install mediapipe” to install MediaPipe.
Download Face Detection & Counting OpenCV Code
Please download the source code of opencv face detection – counting: Face Detection & Counting Project Code
Steps to Develop the Face detection and Counting Project in OpenCV:
- Import necessary packages and create the face detector object.
- Create a face detector class.
- Detect face from an image.
- Extract data from the result.
- Draw Bounding box overdetection.
- Handling Errors and Exceptions.
Step 1 – Import necessary packages and create the face detector object:
#Import necessary packages

import cv2
import mediapipe as mp

# Define mediapipe Face detector

face_detection = mp.solutions.face_detection.FaceDetection(0.8)
- For face detection we’ll use mediapipe’s FaceDetection() method under solutions.face_detection class and set the face detector object as face_detection.
- Here 0.8 is the minimum accuracy score we want to detect.
Step 2 – Create a face detector class:
def detector(frame):
    count = 0
  height, width, channel = frame.shape

  # Convert frame BGR to RGB colorspace

  imgRGB = cv2.cvtColor(frame, cv2.COLOR_BGR2RGB)
  # Detect results from the frame
  result = face_detection.process(imgRGB)

  print(result)

  return frame
- First, we create a function named detector and pass a parameter called a frame. The detector class will take an image/frame as an argument.
- shape function returns a tuple containing image height, width, and channel.
- Convert the frame to RGB colorspace using cv2.cvtCOLOR() function. Because MediaPipe works with RGB image but OpenCV reads an image as BGR.
- And then we’ll print the result and return the frame.
Step 3 – Detect face from an image:
We have created our detection function. Now everything is ready. So let’s detect faces from an image.
# Reading image
img = cv2.imread ("image.png")
detector(img)
Output :
<class ‘mediapipe.python.solution_base.SolutionOutputs’>
- Using cv2.imread function we read an image from the local path and store it in the img variable.
- Then we pass the image to the detector function.
We can see that the output is just a class, not the actual information. So we have to extract that information from the class.
Step 4 – Extract data from the result –
  for count, detection in enumerate(result.detections):
    	print(detection)
count += 1
print(count)
- result.detections contain all the detected faces.
- Using for loop we can get each of the individual detection from result.detections.
- We’ve used enumerate in the for-loop, because we want to count the number of total detection. Enumerate basically counts the number of iterations of a loop.
- Enumerate counts the number of iteration from 0, that’s why we added 1 with count after the for-loop.
Output –

Now we have all the data from the result for a single image, and we can also see that 4 faces are found in this image. But we don’t need all of this data. We’re interested only in score and relative_bounding_box. So let’s see how to get these.
  # Extract Score and bounding box information

    	score = detection.score
    	box = detection.location_data.relative_bounding_box
  print(score)
print(box)
Output:
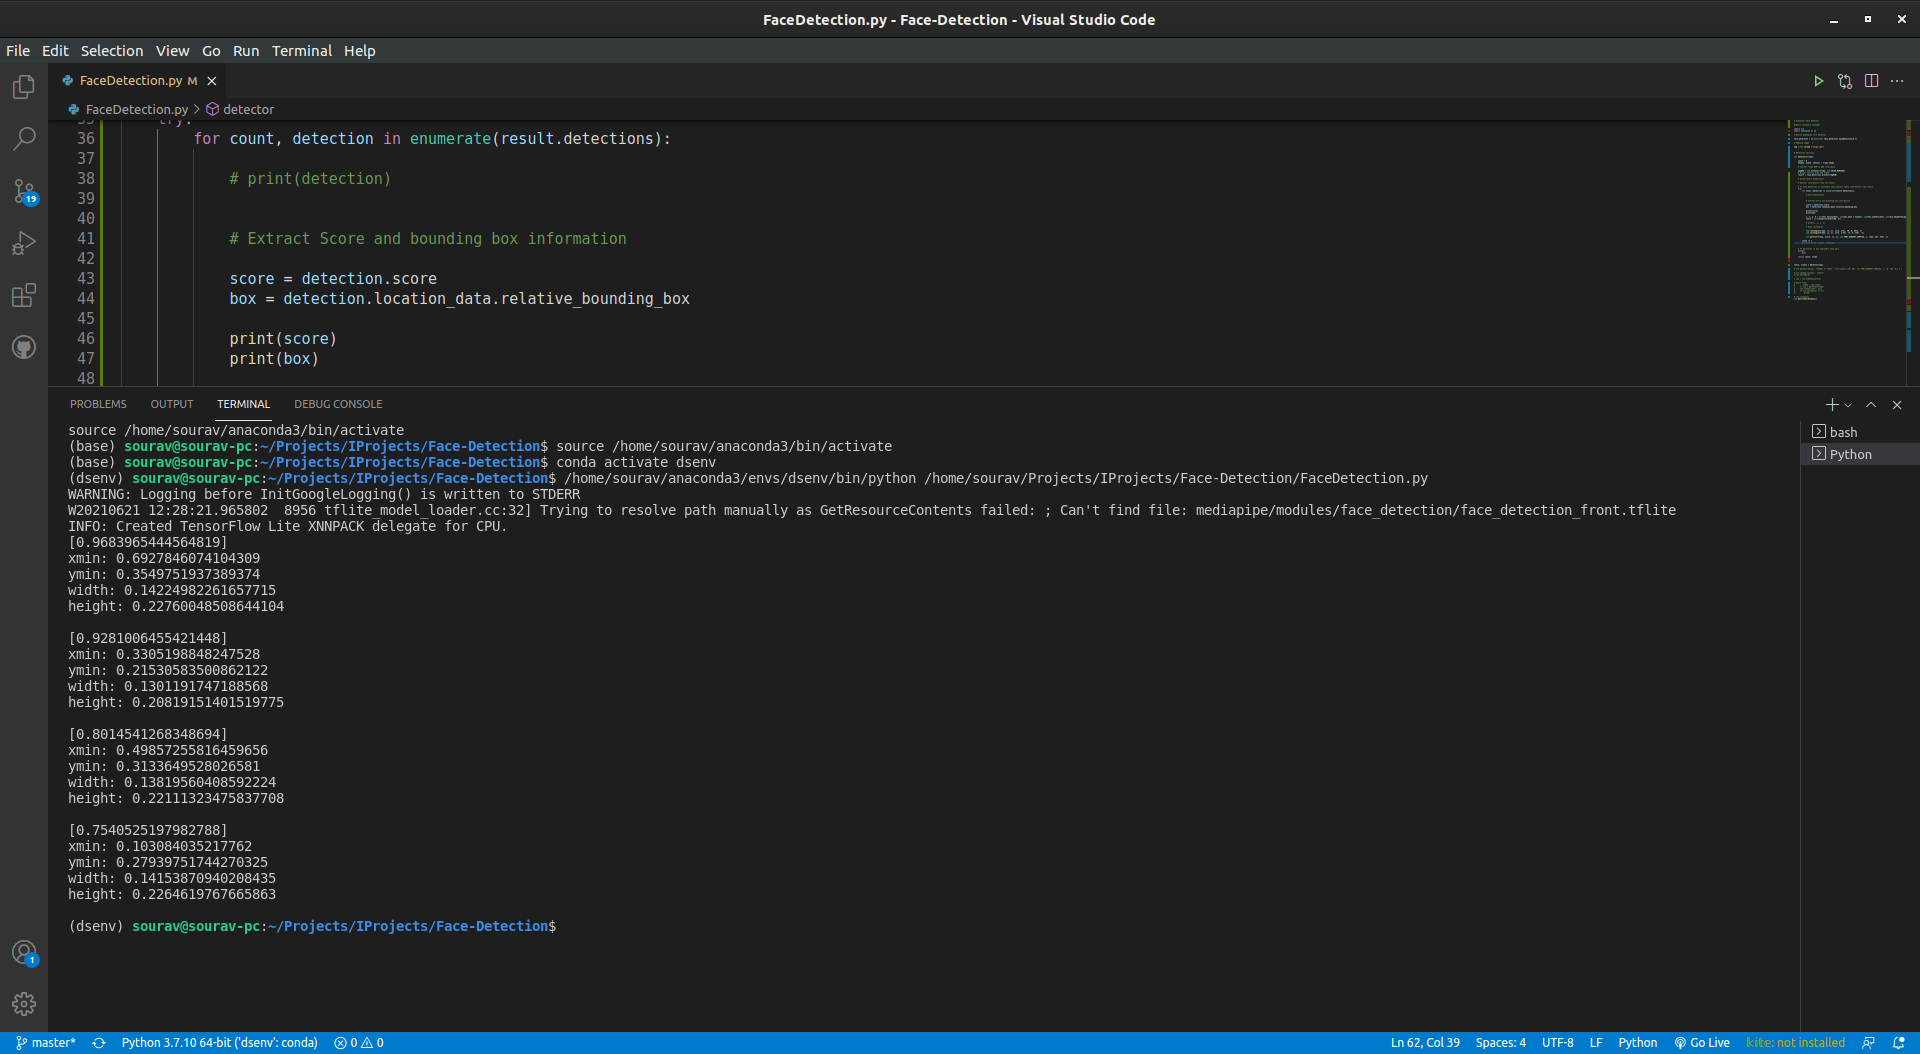
Now we have successfully extracted all the information we need for this project. So the next step is drawing the bounding box over detections and showing the detection score.
Step 5 – Draw Bounding box overdetection :
If you see the output, all the information value is between 0-1. But we need that information according to our frame size. For this, we have to process the output data.
  score = str(round(score[0]*100, 2))
x, y, w, h = int(box.xmin*width), int(box.ymin * height), int(box.width*width),
int(box.height*height)


  print(x, y, w, h)
Output:
886 283 182 182
423 172 166 166
638 250 176 176
131 223 181 181
- First, we multiplied the score by 100 and rounded it to two decimal points.
- Then we multiplied xmin with frame width and ymin with frame height. Because we know that x represents width and y represents height.
# Draw rectangles
    	cv2.rectangle(frame, (x, y), (x+w, y+h), (0, 0, 255), 2)
    	cv2.rectangle(frame, (x, y), (x+w, y-25), (0, 0, 255), -1)

    	cv2.putText(frame, str(round(score[0]*100, 2)), (x, y),
cv2.FONT_HERSHEY_COMPLEX, 1, (255, 255, 255), 2)
Explanation:
- Cv2.rectangle function draws rectangles in an image.
- cv2.putText draws text in a frame in an image.

Step 6 – Handling Errors and Exceptions.
Till now everything is fine in our program. But there is a big problem with the detector function. If the model can’t find any faces in the input image then the program will throw an error.
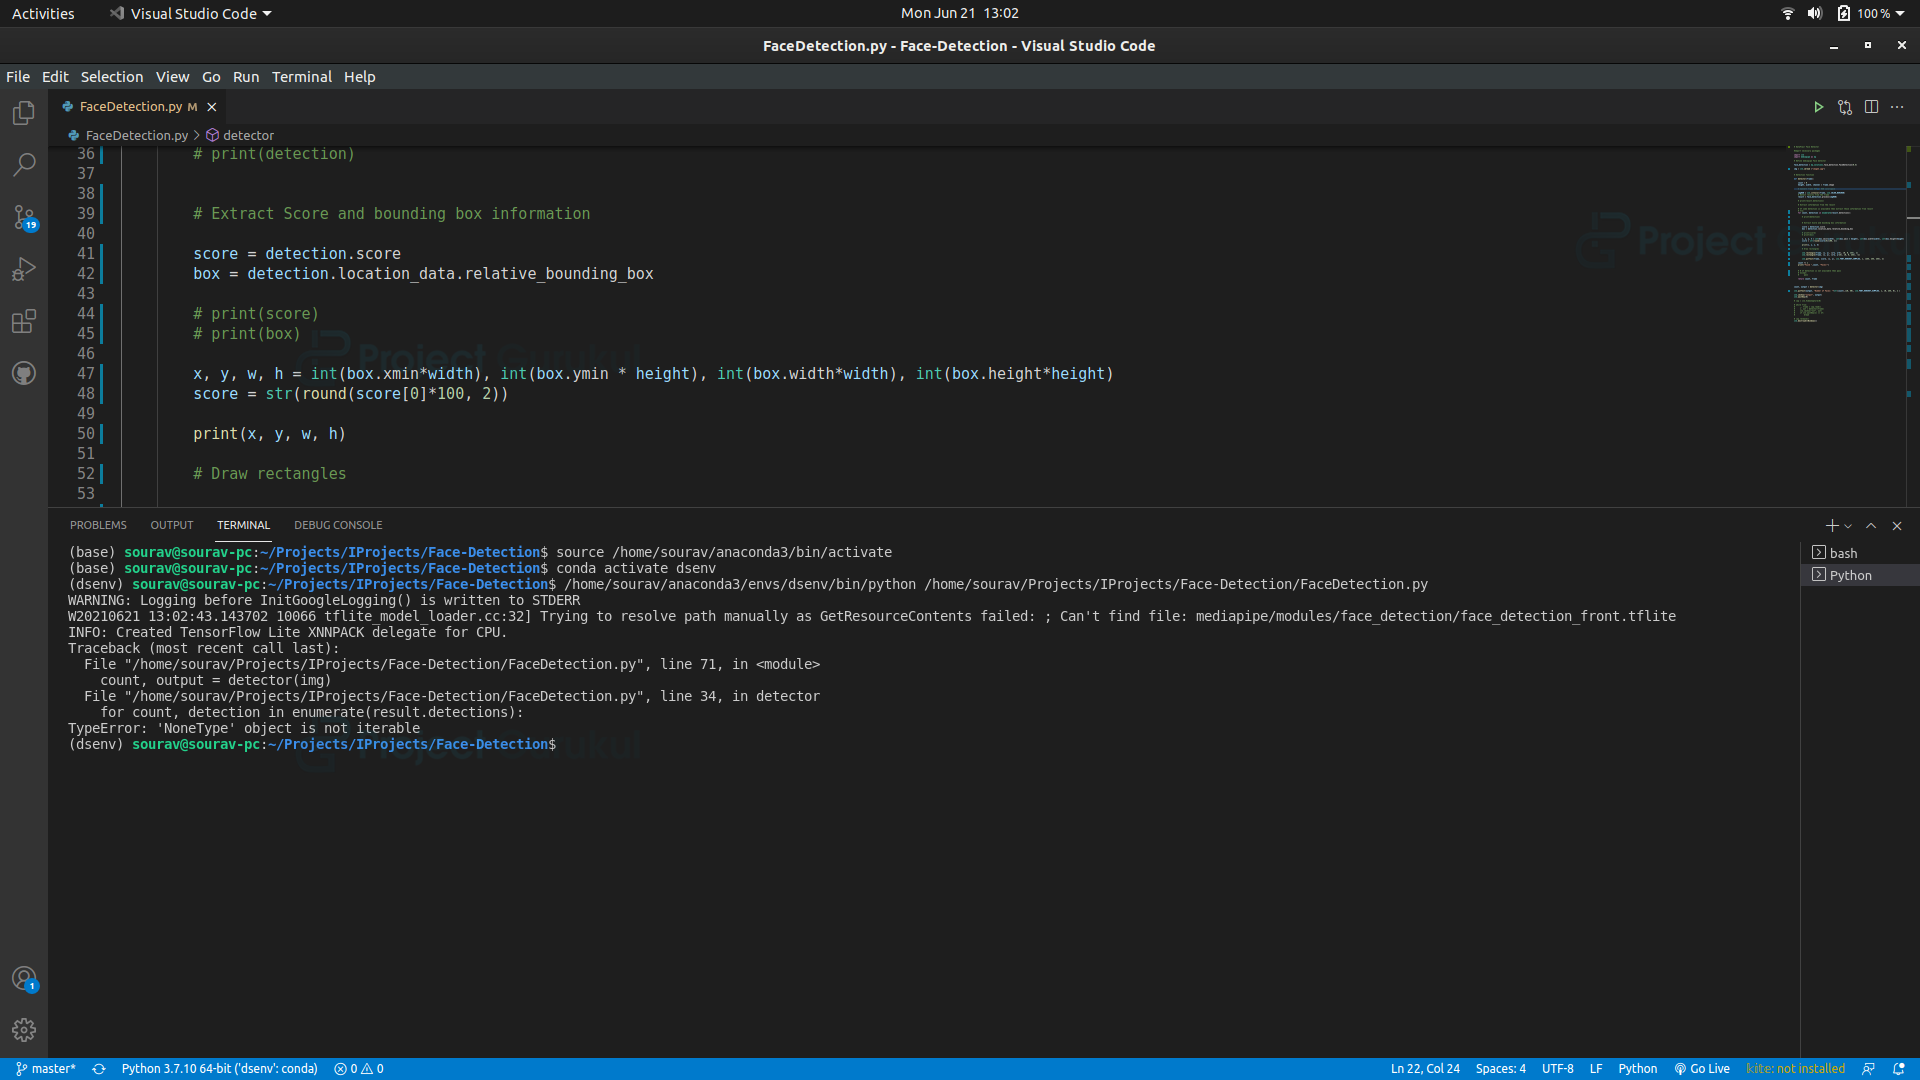
The error happens in the for-loop when it tries to iterate through the result.detections, because if there is no detection found in the result then the result.detections will return a none type object.
So how can we fix this?
In python, there is a statement called Try and Except or in other words try-except block. The try block tests a block of code for errors and the except block handles those errors. So we put the whole for loop in the try block and in the except block we put the pass statement. Pass statement does nothing, just avoids the error.
The final detector function:
def detector(frame):
    count = 0
    height, width, channel = frame.shape
    # Convert frame BGR to RGB colorspace
    imgRGB = cv2.cvtColor(frame, cv2.COLOR_BGR2RGB)
    # Detect results from the frame
    result = face_detection.process(imgRGB)
    # print(result.detections)
    # Extract information from the result
    # If some detection is available then extract those information from result
    try:
    	for count, detection in enumerate(result.detections):
        	# print(detection)
        	# Extract Score and bounding box information

        	score = detection.score
        	box = detection.location_data.relative_bounding_box
        	# print(score)
        	# print(box)

        	x, y, w, h = int(box.xmin*width), int(box.ymin * height), int(box.width*width),
 int(box.height*height)
        	score = str(round(score[0]*100, 2))

        	print(x, y, w, h)

        	# Draw rectangles

        	cv2.rectangle(frame, (x, y), (x+w, y+h), (0, 0, 255), 2)
        	cv2.rectangle(frame, (x, y), (x+w, y-25), (0, 0, 255), -1)

        	cv2.putText(frame, score, (x, y), cv2.FONT_HERSHEY_COMPLEX, 1,
(255, 255, 255), 2)
    	count += 1
    	print("Found ",count, "Faces!")

  # If detection is not available then pass
    except:
    	    pass
    return count, frame
Output of OpenCV face detection and counting Project
  # run the detection
count, output = detector(img)
cv2.putText(output, "Number of Faces: "+str(count),(10, 50),
cv2.FONT_HERSHEY_SIMPLEX, 1, (0, 255, 0), 2 )

cv2.imshow("output", output)
cv2.waitKey(0)
- Using cv2.putText we draw the number of face counts in the image.
- Finally using cv2.imshow() function shows the final image in a new OpenCV window.
- cv2.waitKey(0) keeps the window open until any key is pressed or the window is closed.
Result:

Count faces on a real-time video feed:
cap = cv2.VideoCapture('video.mp4')
while True:
  _, frame = cap.read()
  count, output = detector(frame)
  cv2.putText(output, "Number of Faces: "+str(count),(10, 50),
cv2.FONT_HERSHEY_SIMPLEX, 1, (0, 0, 255), 2 )
  cv2.imshow("frame", output)
  if cv2.waitKey(15) == ord('q'):
    		break
- Using cv2.VideoCapture(0) we load the video file.
- cap.read() function reads each frame from the webcam.
OpenCV Face Detection & Counting Output
Summary
In this project, we’ve made a very fast and accurate face detection application. We used the MediaPipe framework to build this face detector. We learned about how an object detector works, how we can handle errors in python, how we can count the loop iteration and some basics of data extraction.
how are you
hlo everyone
hlo
hi,
I want to define id for each face how can i do it can you help me
It will define a new id for each face that enters the image, and the id value will increase for each new face.
source code is error