How to Create Expense Tracker in Python
We offer you a brighter future with FREE online courses - Start Now!!
Expense tracking is important for the financial health of your personal or professional budget.
You need to keep a record of your daily expenses and stocks in a proper format so that you can analyze all your expenditures efficiently and correctly.
How about an application that does all this work for you and you just need to feed the information?
So, understanding the importance of the application, we are here to give you a nice explanation and implementation of the same.
Expense tracker is a simple project developed using python which helps us to analyse our expenses by storing them in a systematic tabular form.
We’ll use tkinter for GUI.
Project Prerequisites
The prerequisites are as follows:
- Basic concepts of Python
- Tkinter
Installation requirements:
Pip install tkcalendar
Pip install sqlite3
Download Expense Tracker Python Project Code
Before proceeding ahead, please download expense tracker project code: Python Expense Tracker Code
Creating main.py
from tkinter import *
from tkinter import ttk
import sqlite3  as db

from tkcalendar import DateEntry

def init():
    connectionObjn = db.connect("expenseTracker.db")
    curr = connectionObjn.cursor()
    query = '''
    create table if not exists expenses (
        date string,
        name string,
        title string,
        expense number
        )
    '''
    curr.execute(query)
    connectionObjn.commit()

def submitexpense():
    values=[dateEntry.get(),Name.get(),Title.get(),Expense.get()]
    print(values)
    Etable.insert('','end',values=values)

    connectionObjn = db.connect("expenseTracker.db")
    curr = connectionObjn.cursor()
    query = '''
    INSERT INTO expenses VALUES
    (?, ?, ?, ?)
    '''
    curr.execute(query,(dateEntry.get(),Name.get(),Title.get(),Expense.get()))
    connectionObjn.commit()

def viewexpense():
    connectionObjn = db.connect("expenseTracker.db")
    curr = connectionObjn.cursor()
    query = '''
     select * from expenses
    '''
    total='''
    select sum(expense) from expenses
    '''
    curr.execute(query)
    rows=curr.fetchall()
    curr.execute(total)
    amount=curr.fetchall()[0]
    print(rows)
    print(amount)

    l=Label(root,text="Date\t  Name\t  Title\t  Expense",font=('arial',15,'bold'),bg="DodgerBlue2",fg="white")
    l.grid(row=6,column=0,padx=7,pady=7)

    st=""
    for i in rows:
        for j in i:
            st+=str(j)+'\t'
        st+='\n'
    print(st)
    l=Label(root,text=st,font=('arial',12))
    l.grid(row=7,column=0,padx=7,pady=7)


init()
root=Tk()
root.title("ProjectGurukul Expense tracker")
root.geometry('800x600')

dateLabel=Label(root,text="Date",font=('arial',15,'bold'),bg="DodgerBlue2",fg="white",width=12)
dateLabel.grid(row=0,column=0,padx=7,pady=7)

dateEntry=DateEntry(root,width=12,font=('arial',15,'bold'))
dateEntry.grid(row=0,column=1,padx=7,pady=7)

Name=StringVar()
nameLabel=Label(root, text="Name",font=('arial',15,'bold'),bg="DodgerBlue2",fg="white",width=12)
nameLabel.grid(row=1,column=0,padx=7,pady=7)

NameEntry=Entry(root,textvariable=Name,font=('arial',15,'bold'))
NameEntry.grid(row=1,column=1,padx=7,pady=7)

Title=StringVar()
titleLabel=Label(root, text="Title",font=('arial',15,'bold'),bg="DodgerBlue2",fg="white",width=12)
titleLabel.grid(row=2,column=0,padx=7,pady=7)

titleEntry=Entry(root,textvariable=Title,font=('arial',15,'bold'))
titleEntry.grid(row=2,column=1,padx=7,pady=7)

Expense=IntVar()
expenseLabel=Label(root,text="Expense",font=('arial',15,'bold'),bg="DodgerBlue2",fg="white",width=12)
expenseLabel.grid(row=3,column=0,padx=7,pady=7)

expenseEntry=Entry(root,textvariable=Expense,font=('arial',15,'bold'))
expenseEntry.grid(row=3,column=1,padx=7,pady=7)

submitbtn=Button(root,command=submitexpense,text="Submit",font=('arial',15,'bold'),bg="DodgerBlue2",fg="white",width=12 )
submitbtn.grid(row=4,column=0,padx=13,pady=13)

viewtn=Button(root,command=viewexpense,text="View expenses",font=('arial',15,'bold'),bg="DodgerBlue2",fg="white",width=12 )
viewtn.grid(row=4,column=1,padx=13,pady=13)

# all saved expenses--------------
Elist=['Date','Name','Title','Expense']
Etable=ttk.Treeview(root,column=Elist,show='headings',height=7)
for c in Elist:
    Etable.heading(c,text=c.title())
Etable.grid(row=5,column=0,padx=7,pady=7,columnspan=3)

mainloop()
We will call the init function for database connectivity.
Steps for database connectivity:
1. Import sqlite3
2. Create a connection object
connectionObjn = db.connect(“expenseTracker.db”)
3. Create cursor object
curr = connectionObjn.cursor()
4. Execute required query
5. Commit
We will follow the above steps in every function that requires interaction with the database. Here we need to create a table if it does not exist so the query statement is written accordingly.
We will ask the user to enter date of the expenditure and after that, we will store the same in dateEntry.
Name of the user and expense details like title and the amount spent is asked and stored in Title and Expense respectively. We have a submit button that calls the SubmitExpense method.
SubmitExpense: It reads dateEntry, Name, Title, and Expense and stores it in ‘Etable’ in a new row. Also, we will store each of these rows in our database by following the above-explained five steps. Now, we will show all the expenses in a tabular form using the Treeview widget of tkinter.
Finally, we have the view expenses button which calls viewexpense method.
viewExpense: It reads every row of expenses table displays on the tkinter window.
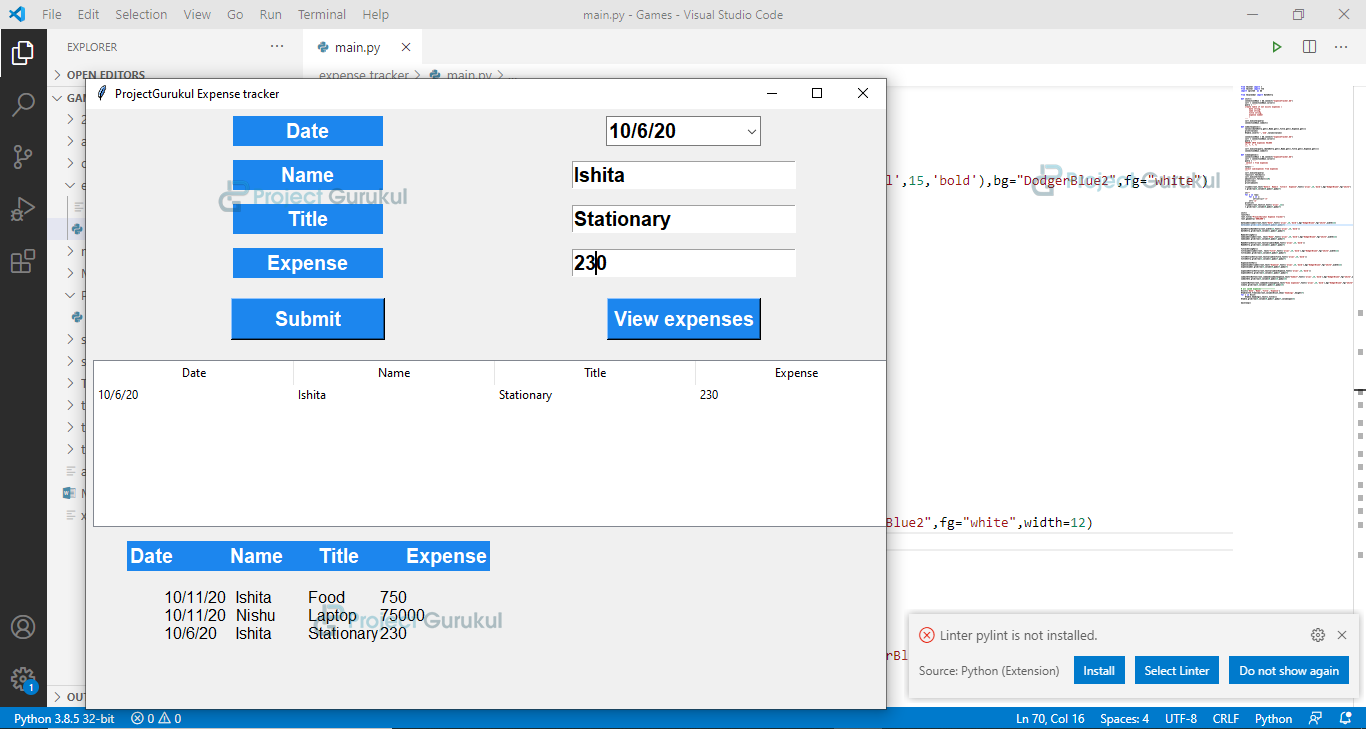
Expense Tracker Project Output
![]()
Summary
We have successfully completed Expense Tracker Python Project. This Python project is for beginners here we used tkinter and few basic concepts of Python.
These is a very good Project..
can you send me the code
Can you please provide any video link to see the overall process.
Hey I have used your code to build my project but I added one more functionality to it. I would love to contribute my additions here. How can I??
Can you please send me the code