Android Kotlin Project – Step Counter App
FREE Online Courses: Enroll Now, Thank us Later!
Hello there, Android enthusiasts! Today, we will look at and learn how to develop an Android project that is a Step Counter application in Android Studio. In this android kotlin step counter project, we’ll learn about the entire project’s development.
A step counter app developed in Kotlin is a mobile application that uses the device’s accelerometer sensor to detect the user’s steps and track their physical activity. The app displays the user’s steps. An effective and dependable programming language known as Kotlin makes it possible to create apps for Android devices.
About Android Kotlin Step Counter App
This is a simple project for those just learning the fundamentals of developing Android applications. This Android app’s user interface contains two text fields displaying the number of steps taken by the user and the daily goal, respectively.
Details about the user interface are as follows:
1. The user interface consists of a text view that displays the number of steps taken by the user and keeps on incrementing as the user moves around.
2. The user interface consists of a text view that displays the daily step goal set by the user.
3. At the bottom of both the textviews, a button ‘Reset’ is provided for the user to reset the number of steps taken to 0.
Prerequisites for Android Kotlin Step Counter App
To develop this Android Kotlin Step Counter application, the requirements and prerequisites are as follows:
1. Kotlin: You must become acquainted with Kotlin programming first. It is necessary because we’ll be writing the app’s code in the programming language Kotlin.
2. XML: XML is another essential part of our Android application. It will be used to create the user interface for the application.
3. Android Studio: Android Studio is at the core of our application because it is how we will create it. An Android virtual device that can be used to test an application’s functionality is also available with Android Studio.
Download Android Kotlin Step Counter App Project
Please download the source code of the Android Kotlin Step Counter App Project: Android Kotlin Step Counter App Project Code.
Develop an Android Kotlin Step Counter App in Android Studio
We’ll now start working on developing an Android Kotlin Step Counter application. Before actually implementing and executing the code, we will learn about its workings. So, let’s look at the files and functions needed to run the code:
In order to make this Android Kotlin Step Counter application, you must follow a set of instructions. We are available to assist you with every stage of developing an app.
1. At the location of your choice, extract all the files from the downloaded zip file.
2. Launch Android Studio.
3. Open by selecting File.
4. Locate and choose the extracted folder, then select OK.
The Android Kotlin Step Counter application’s source code has been successfully opened in Android Studio.
Before diving into the files that are responsible for the functioning of the Android Kotlin step counter app, we will have to set up some things that are essential in order to create the user interface and add certain functionality to the application.
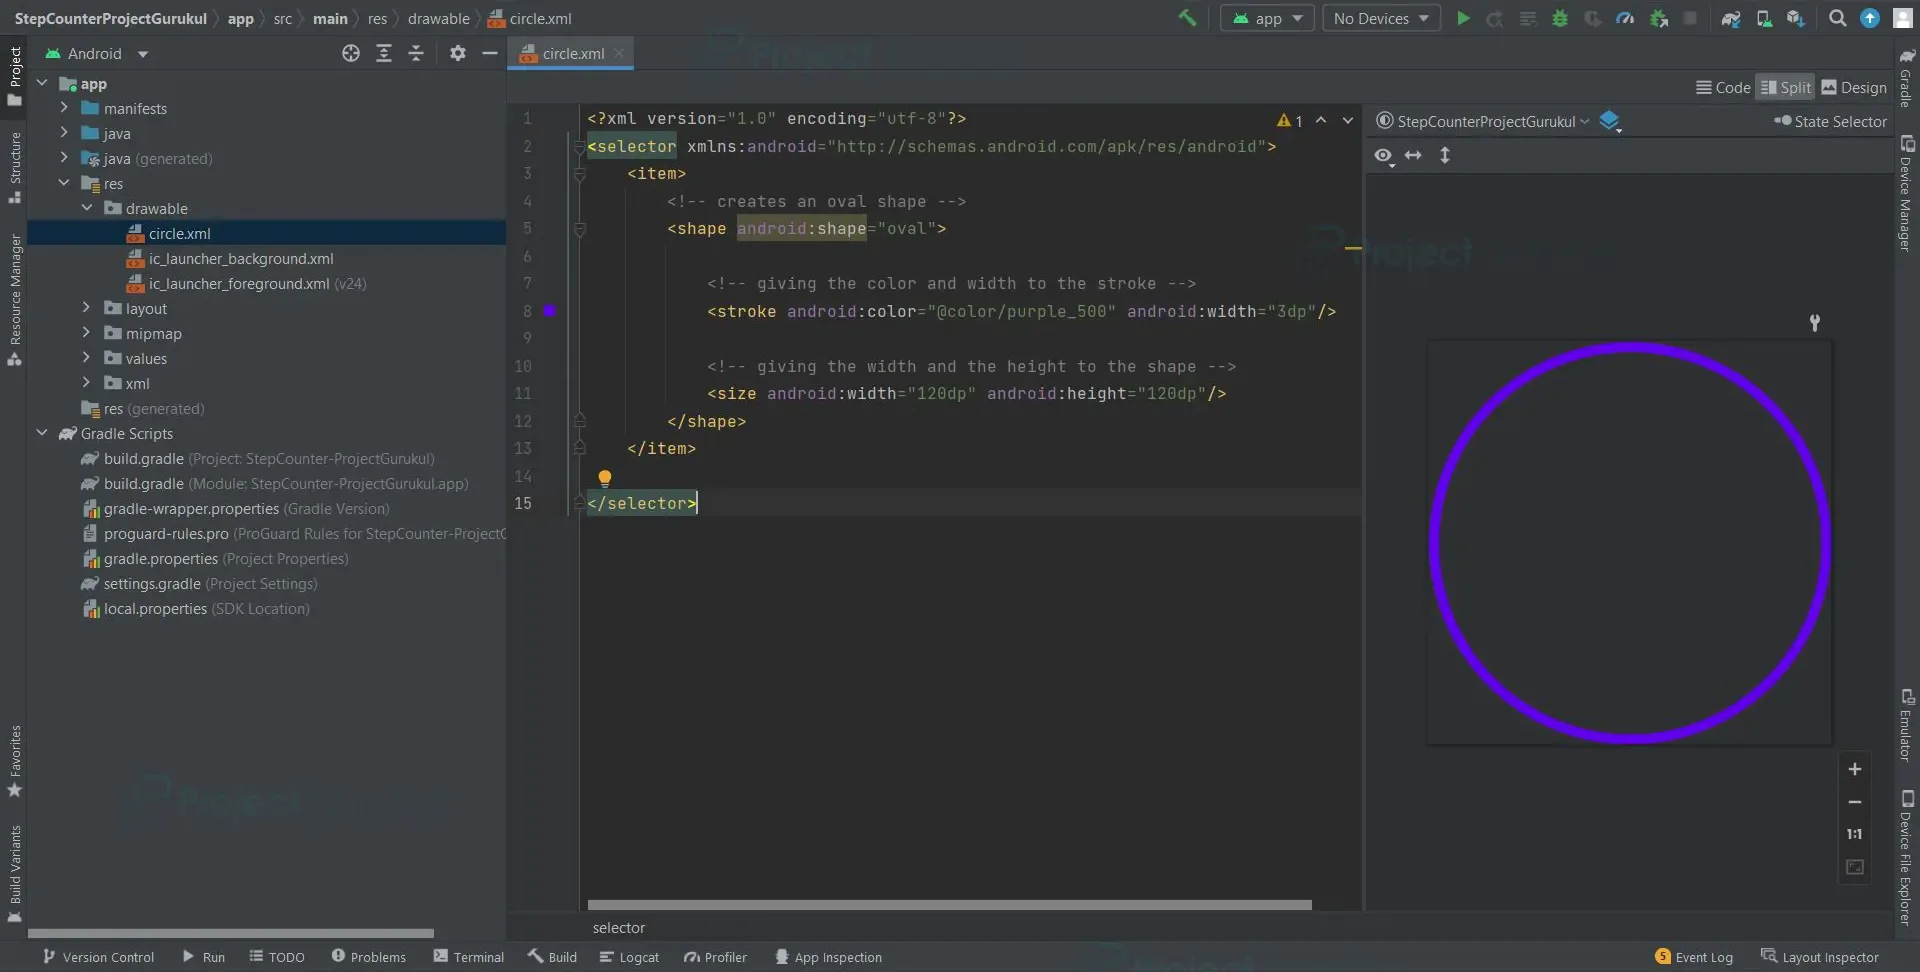
1. Go to the folder app/res/drawable, right-click it, and select New/Drawable Resource File. Click the ok button after naming the file “circle” and leaving the default settings.
<?xml version="1.0" encoding="utf-8"?>
<selector xmlns:android="http://schemas.android.com/apk/res/android">
    <item>
        <!-- creates an oval shape -->
        <shape android:shape="oval">

            <!-- giving the color and width to the stroke -->
            <stroke android:color="@color/purple_500" android:width="3dp"/>

            <!-- giving the width and the height to the shape -->
            <size android:width="120dp" android:height="120dp"/>
        </shape>
    </item>

</selector>
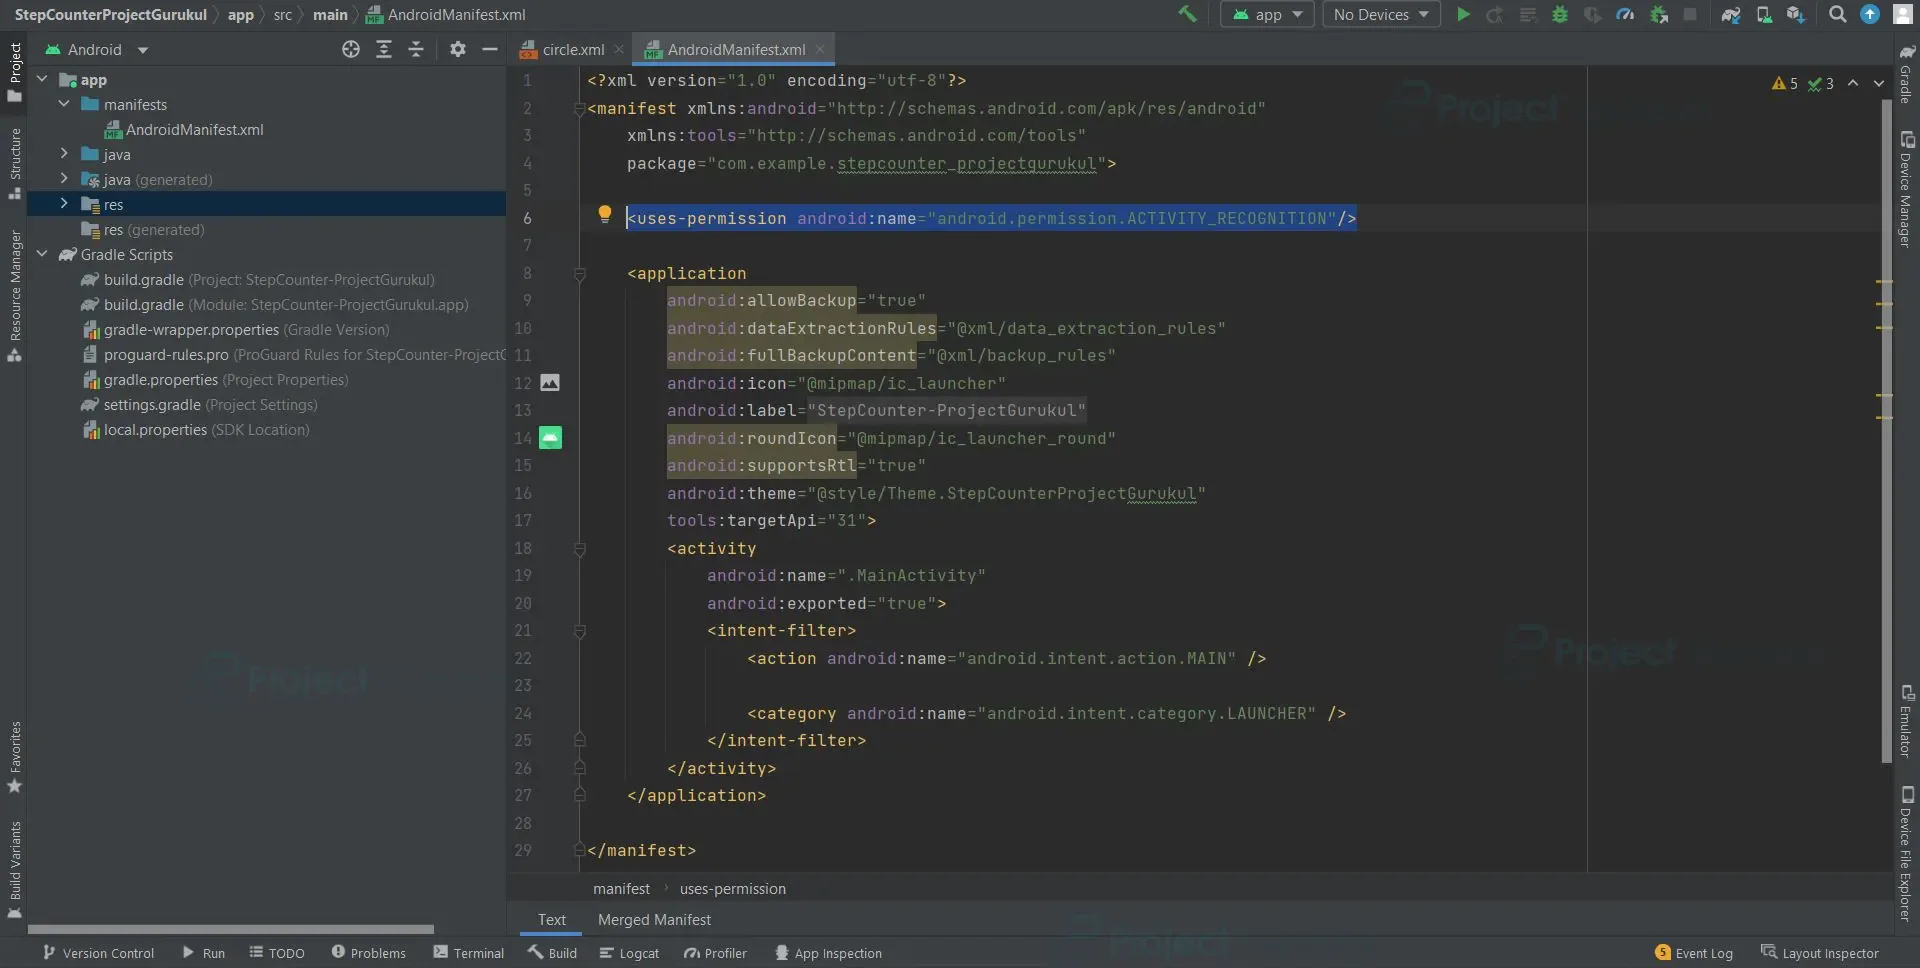
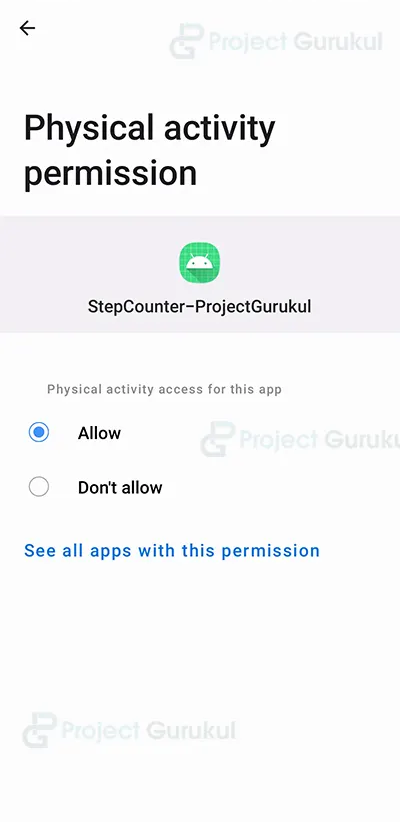
2. Go to app/manifests/AndroidManifest.xml and enter the following code to ask the user for permission to recognize activities.
The ‘android.permission.ACTIVITY_RECOGNITION’ permission allows an app to access the user’s physical activity data.
<uses-permission android:name="android.permission.ACTIVITY_RECOGNITION"/>
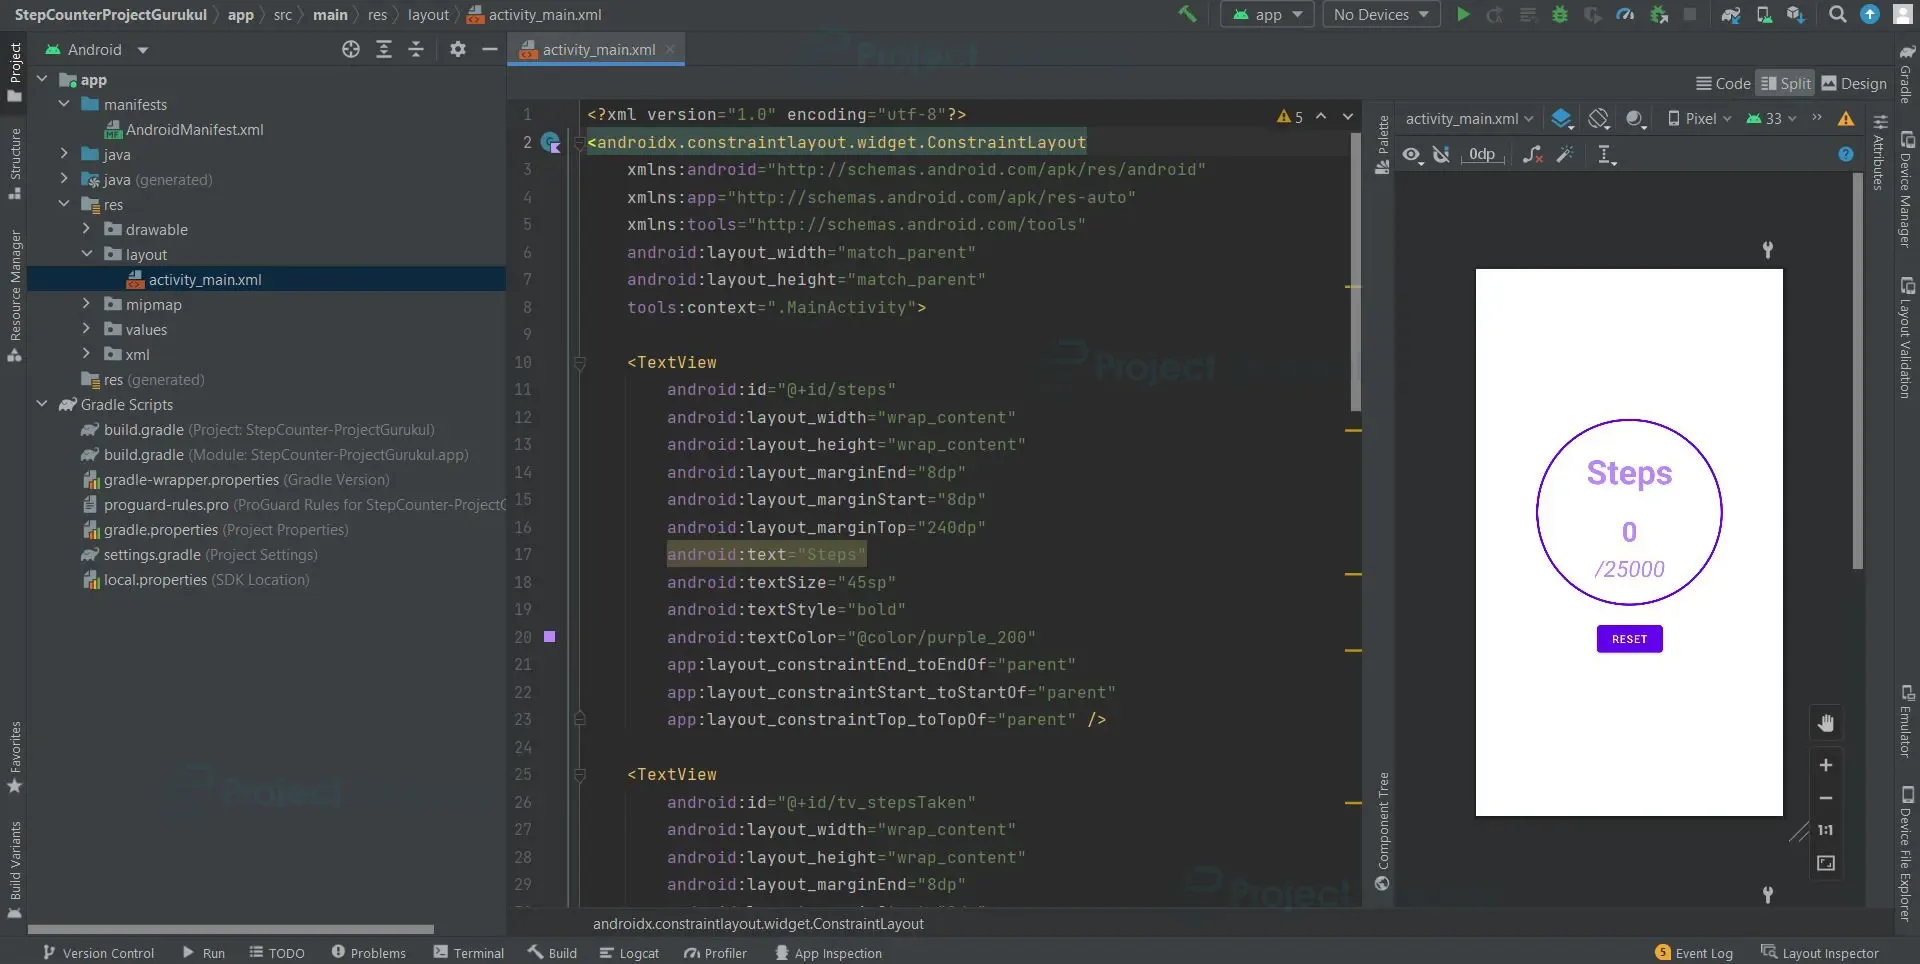
3. ‘activity_main.xml’ is an XML file that is responsible for creating the user interface on the home screen of our Android application that displays the two text views and a button.
The provided code is an XML layout file for an Android application’s main activity. It represents a profile picture screen with a circular image and some text elements.
Here is a summary of the code:
- The root layout is a ConstraintLayout, which allows for flexible positioning of UI elements.
- There is a TextView with an id of “steps” that displays the text “Steps” at the top of the screen.
- Below the “steps” TextView, there is another TextView with an id of “tv_stepsTaken” that initially displays the number “0”. This TextView represents the number of steps taken by the user.
- Next to the “tv_stepsTaken” TextView, there is a TextView with an id of “tv_goal” that displays the text “/25000”. This represents the goal number of steps the user wants to achieve.
- There is an ImageView with the id “circle” and a circular background picture in the middle of the layout.
- A Button with the id “reset_button” is present at the bottom of the layout and has the text “Reset” displayed on it.
- Various constraints are applied to position the elements relative to each other or the parent layout.
<?xml version="1.0" encoding="utf-8"?>
<androidx.constraintlayout.widget.ConstraintLayout
    xmlns:android="http://schemas.android.com/apk/res/android"
    xmlns:app="http://schemas.android.com/apk/res-auto"
    xmlns:tools="http://schemas.android.com/tools"
    android:layout_width="match_parent"
    android:layout_height="match_parent"
    tools:context=".MainActivity">

    <TextView
        android:id="@+id/steps"
        android:layout_width="wrap_content"
        android:layout_height="wrap_content"
        android:layout_marginEnd="8dp"
        android:layout_marginStart="8dp"
        android:layout_marginTop="240dp"
        android:text="Steps"
        android:textSize="45sp"
        android:textStyle="bold"
        android:textColor="@color/purple_200"
        app:layout_constraintEnd_toEndOf="parent"
        app:layout_constraintStart_toStartOf="parent"
        app:layout_constraintTop_toTopOf="parent" />

    <TextView
        android:id="@+id/tv_stepsTaken"
        android:layout_width="wrap_content"
        android:layout_height="wrap_content"
        android:layout_marginEnd="8dp"
        android:layout_marginStart="8dp"
        android:layout_marginTop="25dp"
        android:text="0"
        android:textStyle="bold"
        android:textSize="37sp"
        android:textColor="@color/purple_200"
        app:layout_constraintEnd_toEndOf="parent"
        app:layout_constraintStart_toStartOf="parent"
        app:layout_constraintTop_toBottomOf="@+id/steps" />

    <TextView
        android:id="@+id/tv_goal"
        android:layout_width="wrap_content"
        android:layout_height="wrap_content"
        android:layout_marginEnd="8dp"
        android:layout_marginStart="8dp"
        android:layout_marginTop="5dp"
        android:text="/25000"
        android:textStyle="italic"
        android:textSize="30sp"
        android:textColor="@color/purple_200"
        app:layout_constraintEnd_toEndOf="parent"
        app:layout_constraintStart_toStartOf="parent"
        app:layout_constraintTop_toBottomOf="@+id/tv_stepsTaken" />

    <ImageView
        android:id="@+id/circle"
        android:layout_width="250dp"
        android:layout_height="250dp"
        android:layout_marginTop="200dp"
        android:background="@drawable/circle"
        app:layout_constraintEnd_toEndOf="parent"
        app:layout_constraintHorizontal_bias="0.497"
        app:layout_constraintStart_toStartOf="parent"
        app:layout_constraintTop_toTopOf="parent" />

    <Button
        android:id="@+id/reset_button"
        android:layout_width="wrap_content"
        android:layout_height="wrap_content"
        android:layout_marginTop="20dp"
        android:text="Reset"
        app:layout_constraintEnd_toEndOf="parent"
        app:layout_constraintStart_toStartOf="parent"
        app:layout_constraintTop_toBottomOf="@+id/circle" />

</androidx.constraintlayout.widget.ConstraintLayout>
4. ‘MainActivity.kt’ is a kotlin file that is responsible for the functioning of our Android step counter application.
The app uses the device’s step counter sensor to track the number of steps taken. The app also saves the number of steps taken to the device’s shared preferences so that the number of steps can be restored when the app is restarted. The app has a button that the user can press to reset the number of steps to zero.
Here are the steps involved in counting the number of steps taken by the user:
- The app gets the device’s step counter sensor.
- The app registers a listener for the step counter sensor.
- The app listens for changes in the number of steps taken.
- The app updates the number of steps displayed on the screen.
- The app saves the number of steps to the device’s shared preferences.
Here are the steps involved in resetting the number of steps to zero:
- The app gets the text view that displays the number of steps.
- The app sets the text view to display zero.
- The app saves the number of steps to the device’s shared preferences.
class MainActivity : AppCompatActivity(), SensorEventListener {
    private var sensorManager: SensorManager? = null
    private var running = false
    private var totalSteps = 0f
    private var previousTotalSteps = 0f
    private lateinit var reset: Button

    override fun onCreate(savedInstanceState: Bundle?) {
        super.onCreate(savedInstanceState)
        setContentView(R.layout.activity_main)

        loadData()
        resetSteps()
        sensorManager = getSystemService(Context.SENSOR_SERVICE) as SensorManager

        reset = findViewById(R.id.reset_button)

        reset.setOnClickListener {
            resetSteps()
        }
    }

    override fun onResume() {
        super.onResume()
        running = true
        val stepSensor = sensorManager?.getDefaultSensor(Sensor.TYPE_STEP_COUNTER)


        if (stepSensor == null) {
            Toast.makeText(this, "No sensor detected on this device", Toast.LENGTH_SHORT).show()
        } else {
            sensorManager?.registerListener(this, stepSensor, SensorManager.SENSOR_DELAY_UI)
        }
    }

    override fun onSensorChanged(event: SensorEvent?) {

        var tv_stepsTaken = findViewById<TextView>(R.id.tv_stepsTaken)

        if (running) {
            totalSteps = event!!.values[0]

            val currentSteps = totalSteps.toInt() - previousTotalSteps.toInt()

            tv_stepsTaken.text = ("$currentSteps")
        }
    }

    fun resetSteps() {
        var tv_stepsTaken = findViewById<TextView>(R.id.tv_stepsTaken)
            previousTotalSteps = totalSteps
            tv_stepsTaken.text = 0.toString()
            saveData()
    }

    private fun saveData() {

        val sharedPreferences = getSharedPreferences("myPrefs", Context.MODE_PRIVATE)

        val editor = sharedPreferences.edit()
        editor.putFloat("key1", previousTotalSteps)
        editor.apply()
    }

    private fun loadData() {

        val sharedPreferences = getSharedPreferences("myPrefs", Context.MODE_PRIVATE)
        val savedNumber = sharedPreferences.getFloat("key1", 0f)

        previousTotalSteps = savedNumber
    }

    override fun onAccuracyChanged(sensor: Sensor?, accuracy: Int) {

    }
}
Android Kotlin Step Counter App Output:
1. Asking for permission
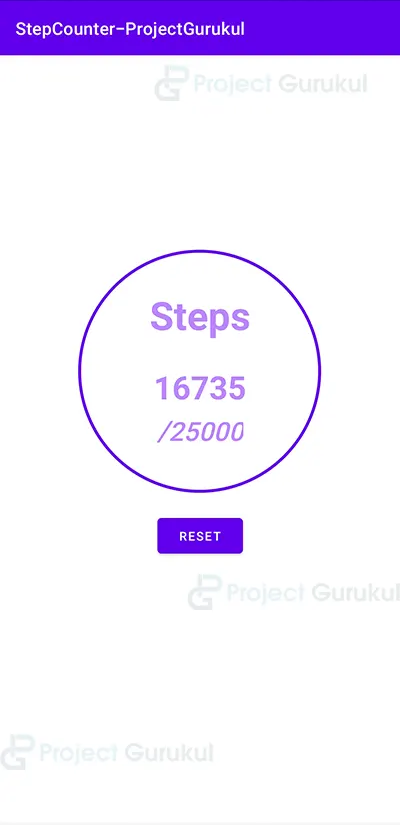
2. The app will show the total number of steps done since the device’s most recent reboot after the permission is granted
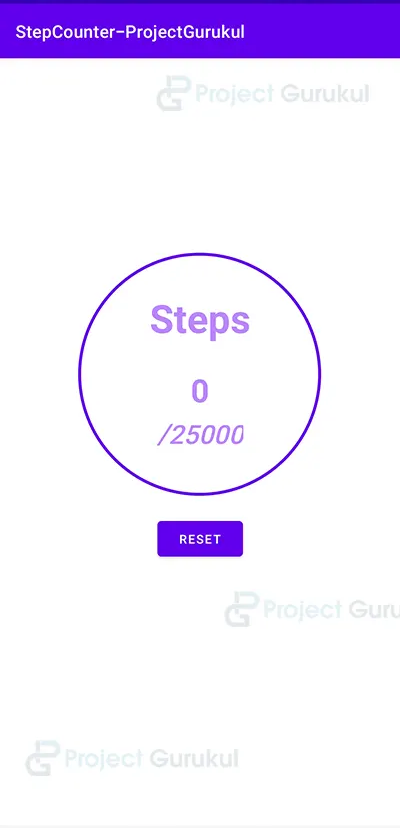
3. The Reset button is clicked
4. Step counter is working

Summary:
In this android kotlin step counter project, we learned how to use Android Studio to create an application that counts the user’s steps. This Android project is suitable for beginners as it will improve your ability to design the user interface as per the application’s needs and add basic functionality using some extra permissions from the user. We sincerely hope you enjoyed it, and we have no doubt that you will enjoy applying it.