Android Hello World – Develop Hello World Program in Android Studio
FREE Online Courses: Click for Success, Learn for Free - Start Now!
In this project tutorial, we’ll discuss how to create hello world android projects in Android Studio. When we are a beginner we start with the simplest program usually hello world program. Similarly in this tutorial, we’ll start the android application development right from the very beginning. So, today we’re beginning with our first android project – hello world that will display a message on the screen.

Android Hello World – Create Your First App in Android Studio
Let’s learn end to end steps from project creation to execution
Prerequisites
To begin with Android application development there are certain things that you must know well. Those things are provided in the following:
- Object Oriented Programming: You must know the basic concepts of Object Oriented Programming such as Encapsulation, Abstraction, Inheritance, Data Hiding, etc.
- Java: Java is the other important thing that you must know as Java will be used throughout our journey of Android Studio.
- Extensible Markup Language: XML is another important part of Android Studio. It will let us do the designing of the layout of the application or project that we make.
Android Hello World Program
Our first android project is a very simple application that is especially for the beginner, to begin with. To develop this android hello world program we won’t be needing a lot of coding in Java. And we’ll be working on it using XML only. All that we would need to do is to print a message on the screen. We’ll have the following mandatory files for every application to ensure that it works:
- Activity_main.xml: This is the first and foremost file that we interact with while developing a project. It is located in the Resource folder within the layout directory. It helps us create and develop the interface of the application and design it using User Interface components.
- MainActivity.java: This is the file that actually gets converted to Dalvik executable and runs the application. It manages all the functionalities of the applications as well as the methods and the packages required.
- AndroidManifest.xml: This is another mandatory file for any project as it contains all the information about it. It is also responsible to protect the app from being accessed without permissions. It has all the permissions of the app as well, such as the internet permission or some other.
Application Development in Android Studio
Now that we are ready to start our first project – hello world application, consider the following steps:
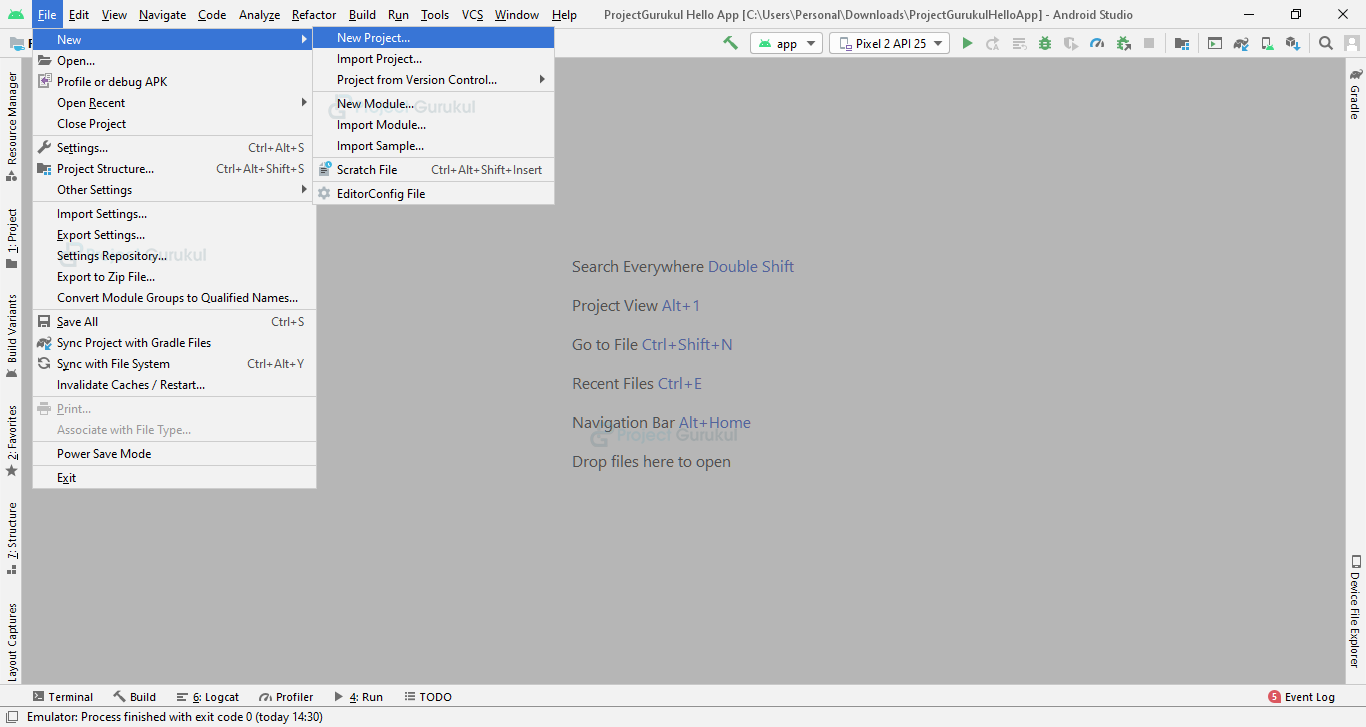
1. First of all, we will create a new project:
2. Choose the empty layout:

3. After that, we’ll name our application and click on next:

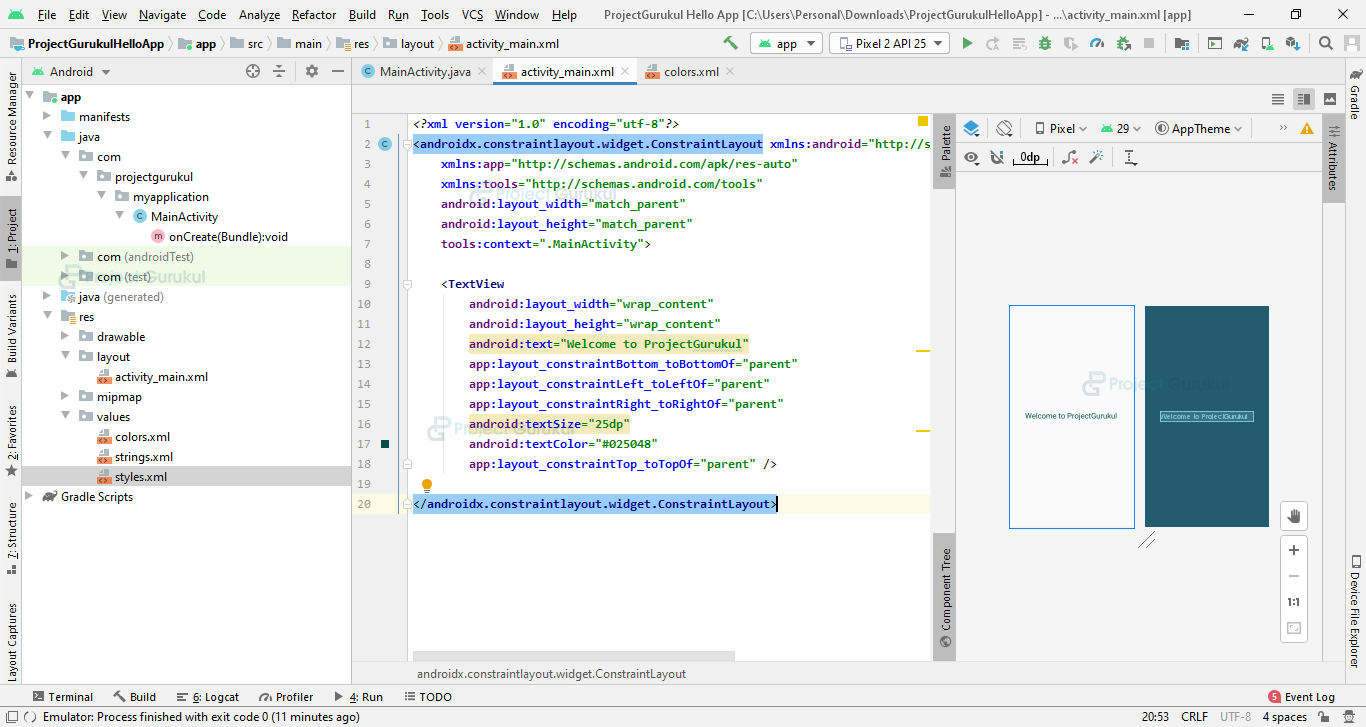
4. Now the following code would be written in the main_activity.xml file:
<?xml version="1.0" encoding="utf-8"?>
<androidx.constraintlayout.widget.ConstraintLayout xmlns:android="http://schemas.android.com/apk/res/android"
   xmlns:app="http://schemas.android.com/apk/res-auto"
   xmlns:tools="http://schemas.android.com/tools"
   android:layout_width="match_parent"
   android:layout_height="match_parent"
   tools:context=".MainActivity">

   <TextView
       android:layout_width="wrap_content"
       android:layout_height="wrap_content"
       android:text="Welcome to ProjectGurukul"
       app:layout_constraintBottom_toBottomOf="parent"
       app:layout_constraintLeft_toLeftOf="parent"
       app:layout_constraintRight_toRightOf="parent"
       android:textSize="25dp"
       android:textColor="#025048"
       app:layout_constraintTop_toTopOf="parent" />

</androidx.constraintlayout.widget.ConstraintLayout>
In the following screenshot, you can see how it shows the code and the application layout together:
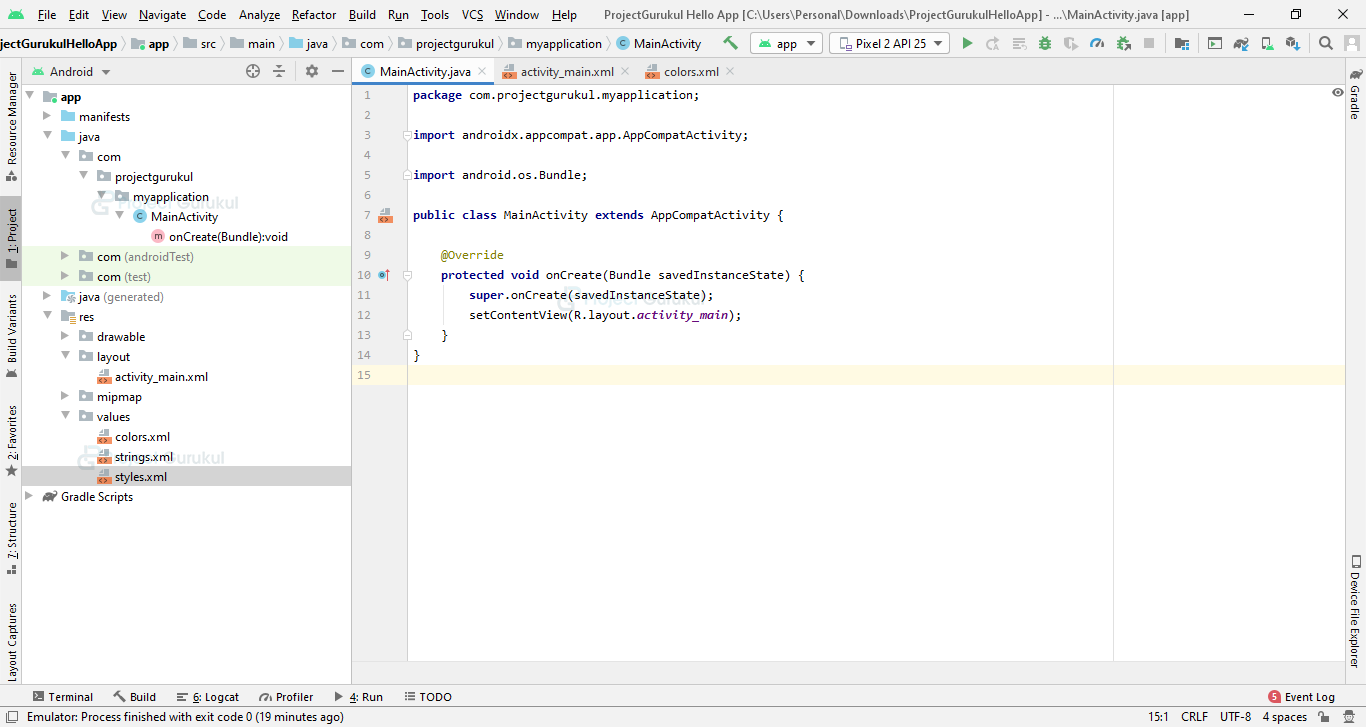
5. Following code would be written in the MainActivity.java file:
package com.projectgurukul.myapplication;

import androidx.appcompat.app.AppCompatActivity;

import android.os.Bundle;

public class MainActivity extends AppCompatActivity {

   @Override
   protected void onCreate(Bundle savedInstanceState) {
       super.onCreate(savedInstanceState);
       setContentView(R.layout.activity_main);
   }
}
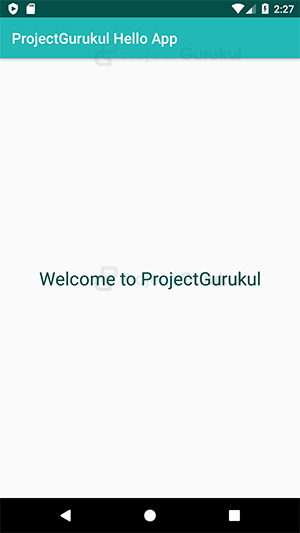
6. Now we will run our application for that we will click on the green run button to execute android hello world program:
7. So, once we clicked the run button, we will find the following as the result:
Summary
In this tutorial, we developed hello world program in Android Studio. Along with this, we learned step by step process to create a project in android studio. After that, we discussed how to execute an android project. Hello world is usually the first program when we learn any language, which helps us in understanding end to end flow.
We hope you liked it and it was a useful tutorial for you. Thank You.