Advanced Java Project – Online Blog (CMS)
FREE Online Courses: Transform Your Career – Enroll for Free!
An online blog CMS, or Content Management System, is software that allows users to create blogs creatively and embed pictures and videos without any technical knowledge.
Overall, an online Blog CMS provides a robust and user-friendly solution for individuals and organisations to maintain an active online presence through regular blog postings, thereby connecting with their audience and enhancing their digital footprint.
About Advanced Java Online Blog(CMS)
There is only one use case for user cases. However, users can do many things.
- Users can log in to their accounts to access the blog page.
- New users can register on our website to access all the functionality.
- Users can view their profile, where they can view all the blogs they have posted.
- Users can go to the community blog page to view all the blogs posted by other users.
Prerequisites For Advanced Java Online Blog(CMS)
- IDE Used: Eclipse 4.26.0 Version Enterprise Edition for dynamic web projects.: 2022-12 (4.26.0)
- Java and MySql should be installed on the machine.
- Database Used: MySQL 8.0.18
- A deeper understanding of Databases such as Mysql, including creating, inserting, deleting, updating, and joining two tables using primary and foreign keys.
- To build an online library management system using Java, we require basic knowledge of JSP(Java Server Pages), a Java web API for building web applications and servlets.
- Knowledge of JDBC(Java Database Connectivity) will help establish a connection between the database and the front end of our project.
- HTML/CSS/JAVASCRIPT for creating a user-friendly User Interface and making the website interactive.
- Eclipse provides J2EE to download and develop dynamic web projects, and we need more libraries such as MySQL-JDBC-connector.
- Server: Tomcat Apache v10.1 for localhost deployment.
Download Advanced Java Online Blog (CMS):
Please download the source code for the Advanced Java Online Blog(CMS): Advanced Java Online Blog (CMS) Using JSP Project Code.
Steps to Create an Advanced Java Online Blog(CMS) (HTML/CSS, Javascript, Java, JSP, MySql)
These are the steps to build an Online Blog(CMS) in Java:
- Setting up Eclipse IDE for dynamic web projects
- Downloading the OJDBC JAR and adding it to the libraries
- Creating Database
- Creating Java Classes for backend functionality
- Creating FrontEnd
- Creating JSP pages for the backend API
1. Setting up Eclipse IDE
Setting up Eclipse for dynamic web projects.
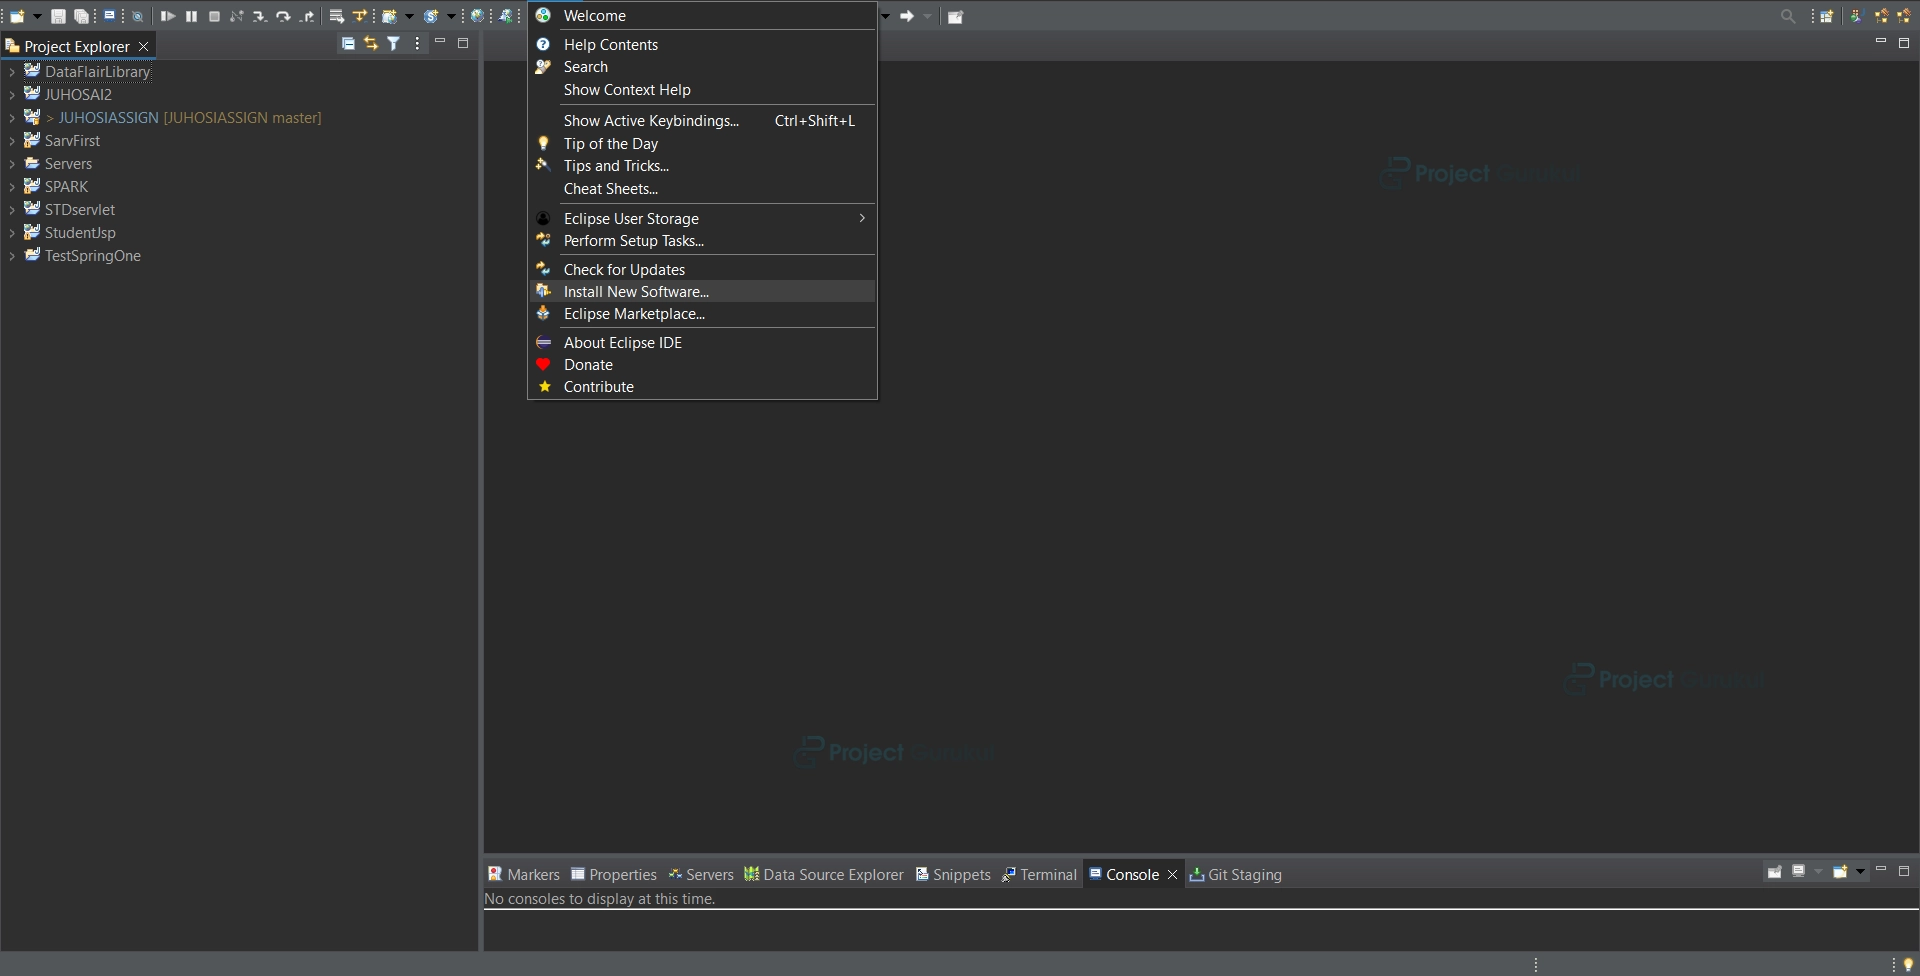
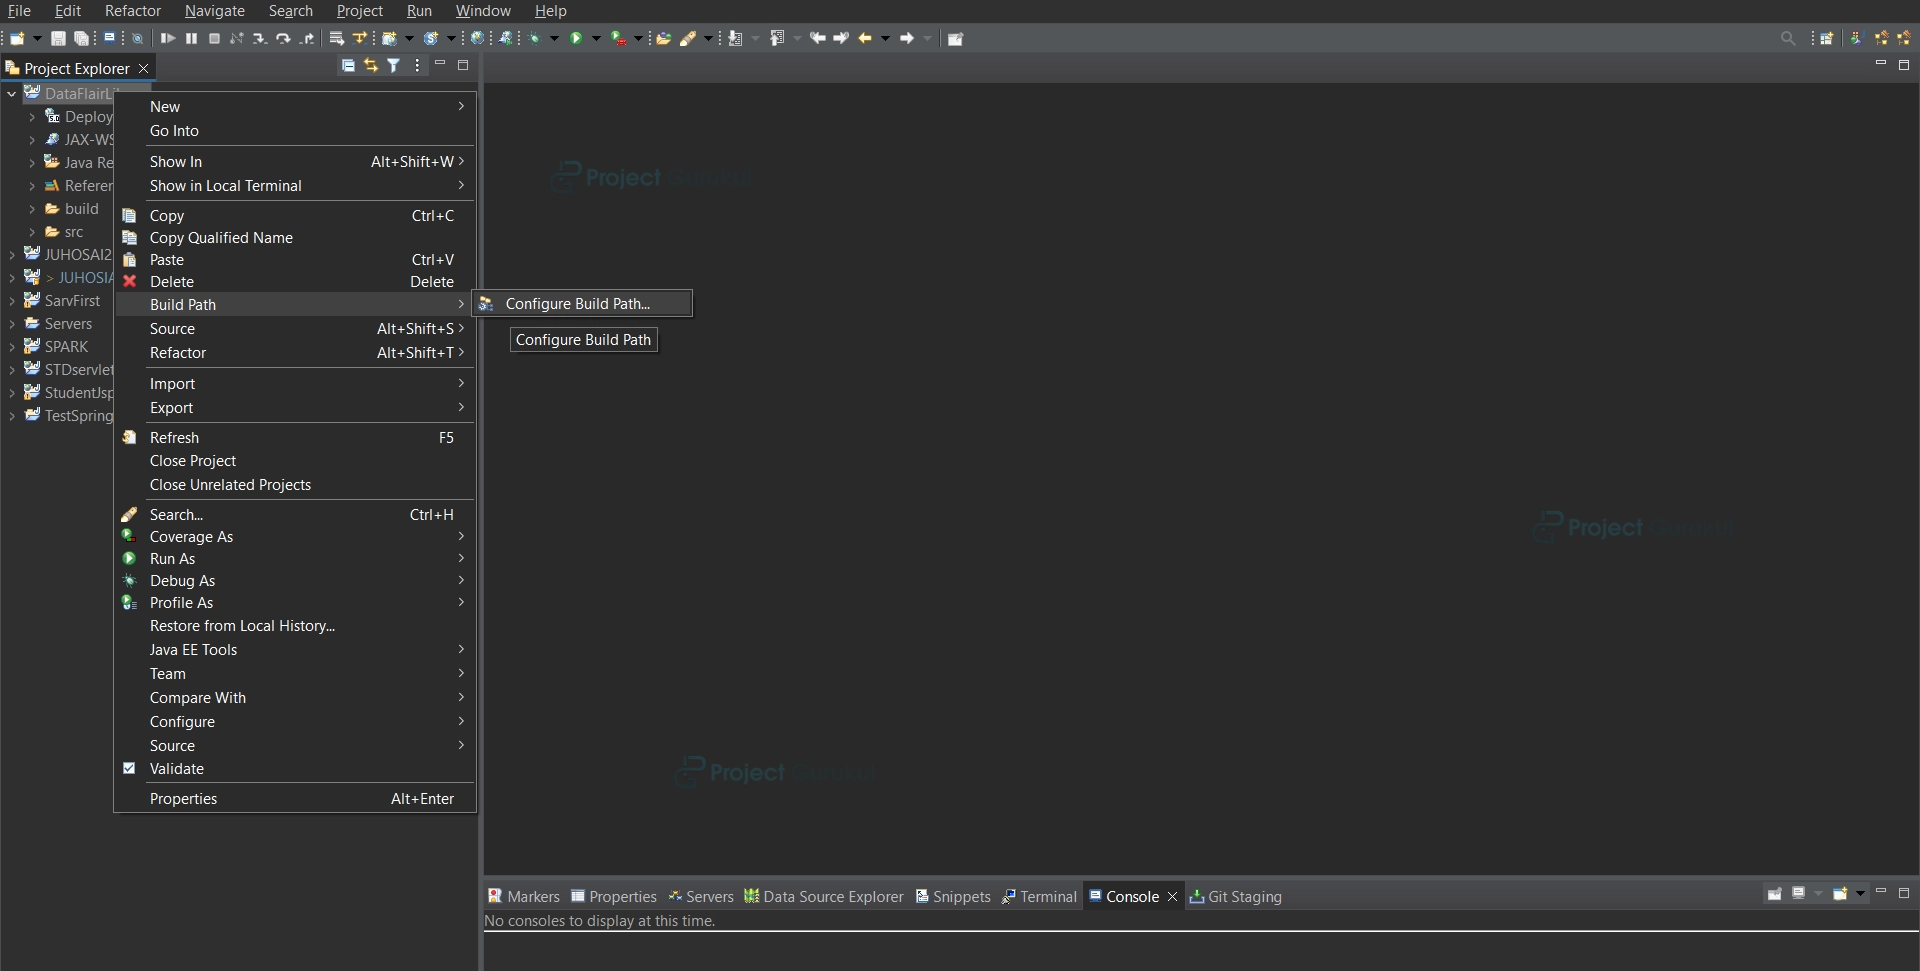
a. Open Eclipse IDE and go to Help>>Install New Software.
b. Go to search, check for releases, and download the web, XML, and Java EE options.
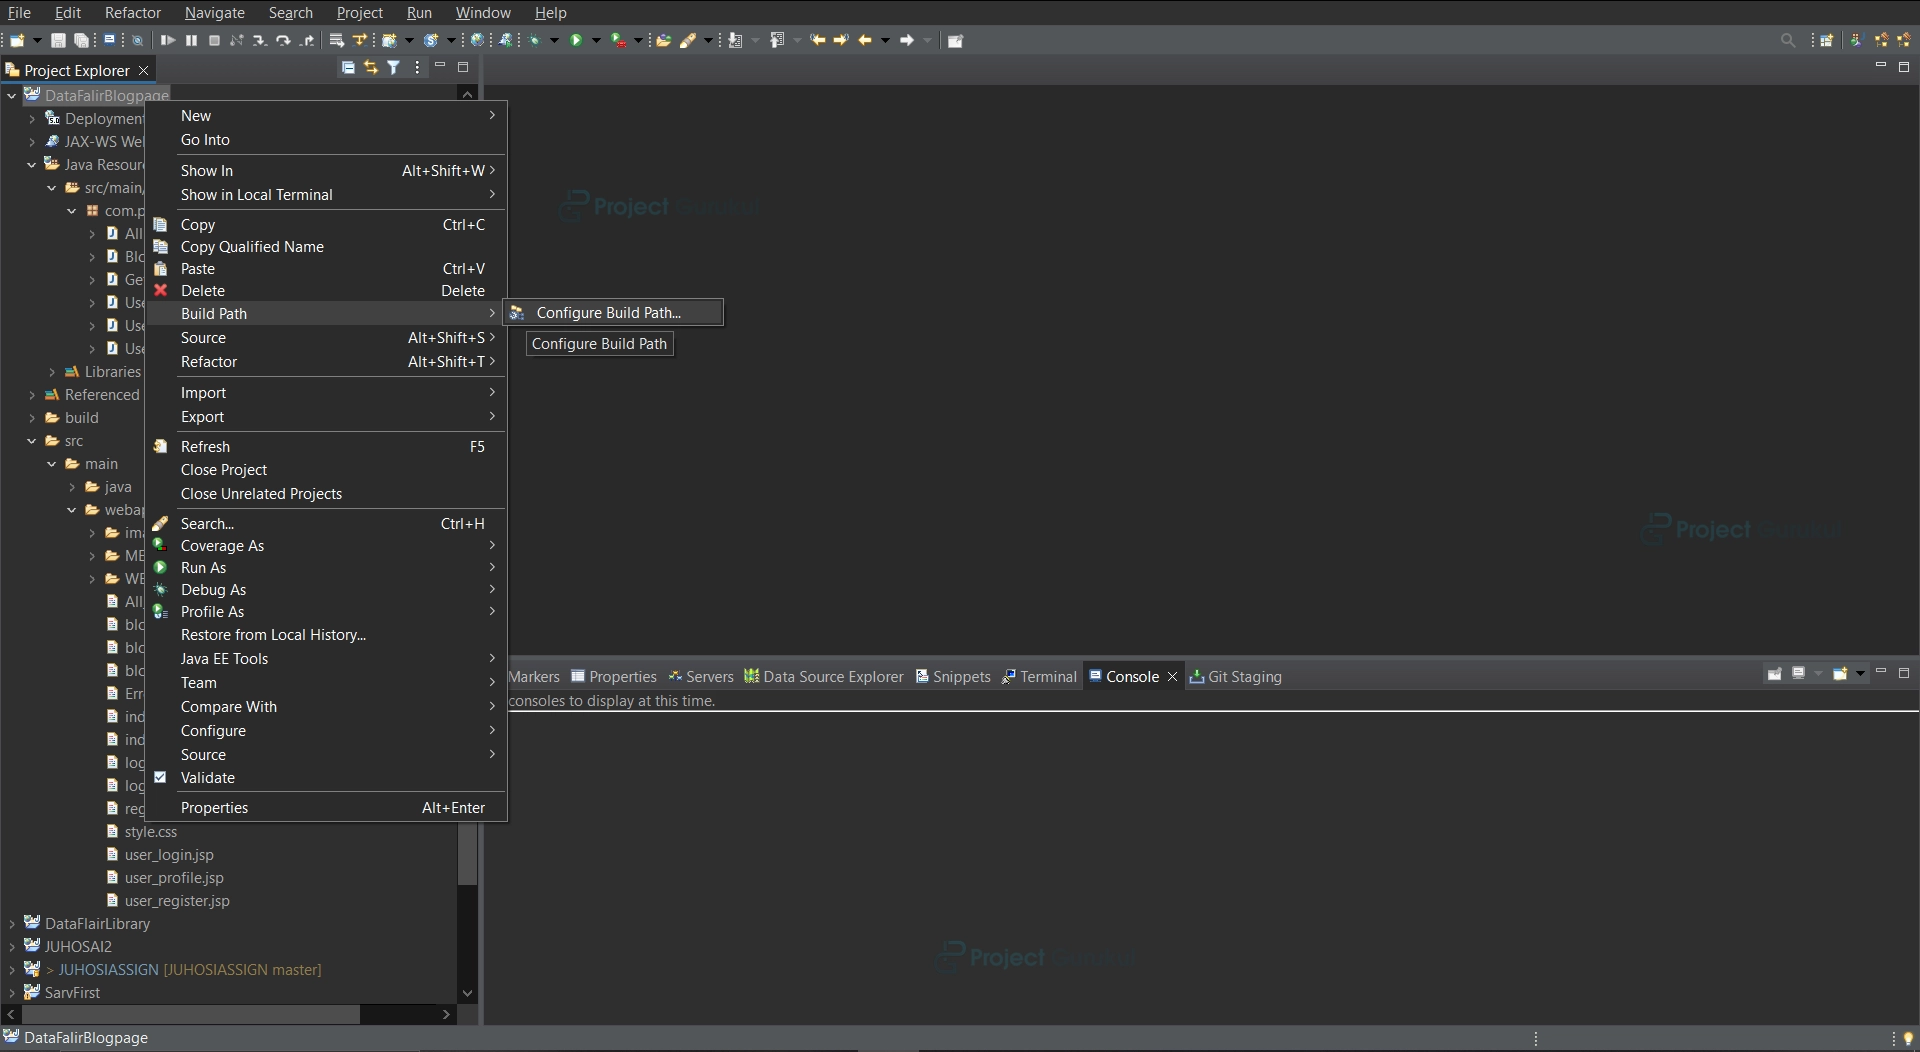
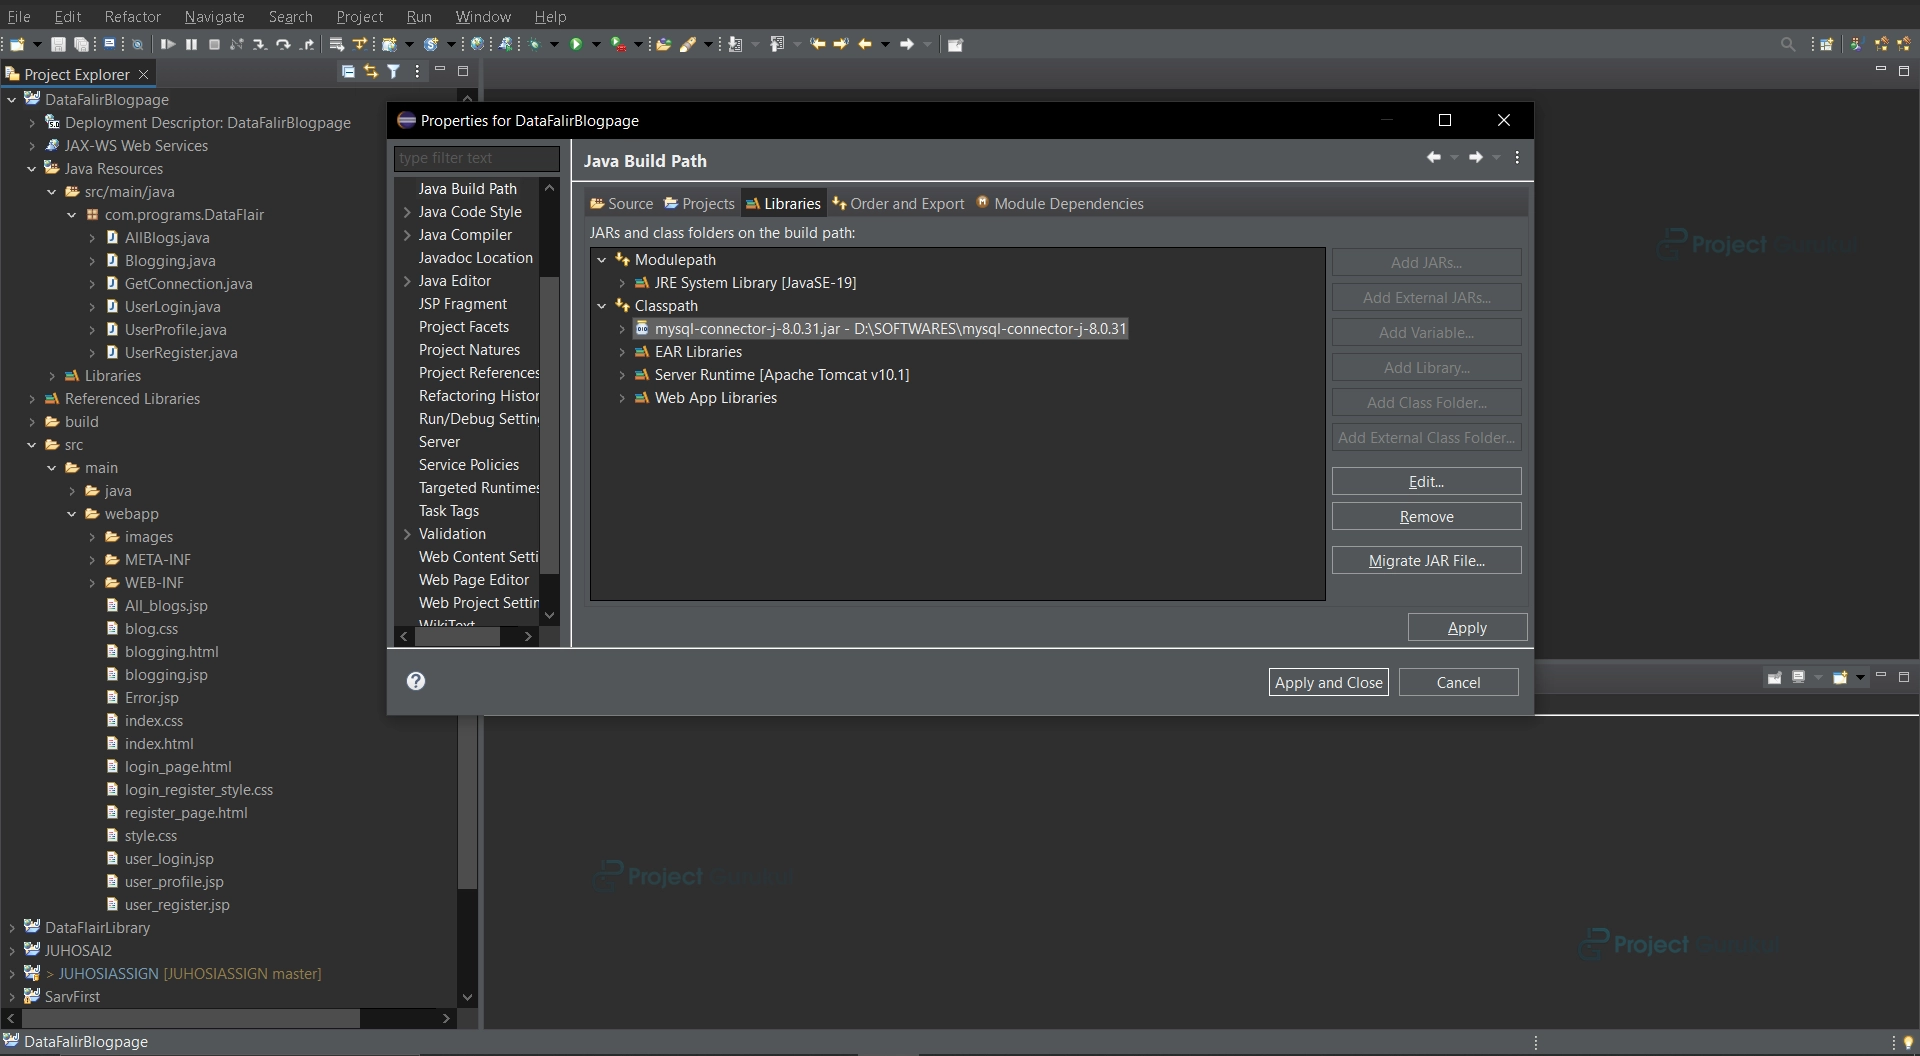
2. Installing and setting up the MySQL Connector JAR file.
3. Creating Databases and Tables, Insertion, Update
We need 3 tables in our database
1. user_login: The table will help to keep information regarding current customers’ logins to their accounts and registrations for new users.
2. blog1: The table will store the user’s name, the title of the blog, any video or image links, and a unique blog ID that will be created when blog data is inserted.
3. Blog2: This table will store the user’s blog and caption and the unique blog ID for the blog from the table blog1. It will also save the users’ names.
a. Creating a database:
create database blogging;
b. Creating a table user_login for user login and registration.
Create table user_login(name varchar(255),username varchar(255)primary key,password varchar(255));
c. Create table blog1:
CREATE TABLE blog1 (
blog_id mediumint AUTO_INCREMENT primary key,
Name varchar(200),
Title longtext,
Vid_link longtext,
Img_link longtext
)
d. Create table blog2:
CREATE TABLE blog2 (
Blog_id mediumint references blog1(blog_id),
name varchar(200),
Blog longtext,
Caption longtext
)
4. Creating Java Classes for backend functionality.
a. GetConnection.java
Creating a connection for MySql database using java.sql.* package.package com.programs.DataFlair;
package com.programs.DataFlair;

import java.sql.Connection;
import java.sql.DriverManager;
public class GetConnection
{
    /*
     * This class is used to create a Mysql connection once so that everytime we need a Mysql connection
     * we can call this method of MyConnection class which will return the Connection
     * */
    Connection cn=null;
    public Connection doConnect()
    {
        try
        {
            Class.forName("com.mysql.jdbc.Driver");//Driver setting
            String s1="jdbc:mysql://localhost:3306/blogging"; //Path for connection
            String s2="root";	//user name
            String s3="sarvottammk14"; //password for database
            cn=DriverManager.getConnection(s1,s2,s3);//Connection set up
        }
        catch(Exception e)
        {
            e.printStackTrace();
        }

        //Returning connection

        return cn;
    }
}
b. UserLogin.java
The program is used to check the login credentials of the user.
package com.programs.DataFlair;
import java.sql.*;
public class UserLogin {


    String username;
    String password;

    /*
     * This program shall perform checking of the student in the student_login table in library database
     * */
    Connection cn=null;
    public String getUsername() {
        return username;
    }
    public void setUsername(String username) {
        this.username = username;
    }
    public String getPassword() {
        return password;
    }
    public void setPassword(String password) {
        this.password = password;
    }
    public int check_Login()
    {
        int count=0;
        try
        {
            cn=new GetConnection().doConnect();
            String s="select count(*) as total_rows from user_login where username=? and password=?";

            PreparedStatement ps=cn.prepareStatement(s);
            ps.setString(1,username);
            ps.setString(2, password);
            ResultSet resultSet=ps.executeQuery();

            //resultSet will receive the number of fields that match the condition
            //for an ideal case and successful login the count should always be 1

             if (resultSet.next()) {
     count = resultSet.getInt("total_rows");
     //As we have given the name total_rows to the count(*) we shall receive the value stored in this field
     }
        }
        catch(Exception e)
        {
            e.printStackTrace();
        }
        return count;
        //returning the no of fields that match the given criteria
    }
}
c.UserRegister.java
This program shall be used to register a new user into the database
With a unique username.
package com.programs.DataFlair;

import java.sql.Connection;
import java.sql.PreparedStatement;

public class UserRegister {
    String username;
    String password;
    String name;


    /*
     * This program shall help in registering the new student into the table student_login
     * so that he can take books from library
     * */
    public String getName() {
        return name;
    }
    public void setName(String name) {
        this.name = name;
    }
    public String getUsername() {
        return username;
    }
    public void setUsername(String username) {
        this.username = username;
    }
    public String getPassword() {
        return password;
    }
    public void setPassword(String password) {
        this.password = password;
    }
    public boolean register()
    {
boolean ch=false;

        try
        {
            GetConnection ob=new GetConnection();
            Connection cn=ob.doConnect();

            //The process will enter the details for registering
            String qry="insert into user_login values(?,?,?)";
            PreparedStatement ps=cn.prepareStatement(qry);
            ps.setString(1,name);
            ps.setString(2, username);
            ps.setString(3,password);
            ps.executeUpdate();

            //on successful registration
            return true;
        }
        catch(Exception e)
        {
            //An exception can occur if the username is duplicate in a table which is not possible
            //because the username field is made primary key
            e.printStackTrace();
        }

        return ch;
    }
}
d. UserProfile.java
This program will retrieve all the blogs that the user posts from the database to display them on the profile page.
package com.programs.DataFlair;
import java.sql.*;
public class UserProfile {

    /*
     * This program shall retrieve all the blogs and data of the blogs from the database
     * of a particular user in the session when he views his profile.
     * */
    ResultSet rs=null;
    Connection cn=null;
    public ResultSet retrieve(String name)
    {
        try {
            cn=new GetConnection().doConnect();
            String s="select b1.blog_id,b1.name,b1.title,b1.vid_link,b1.img_link,b2.blog,b2.caption from blog1 b1,blog2 b2 where b1.name=? and b1.blog_id=b2.blog_id;";
            //THIS sql command joins the blog1 and blog2 table to retrieve all the data and checks
            //whether the name of the customer is matching or not

            PreparedStatement ps=cn.prepareStatement(s);
            ps.setString(1, name);
            rs=ps.executeQuery();


        }
        catch(Exception e)
        {
            e.printStackTrace();
        }
        return rs;
    }
}
e. AllBlogs.java
When the user goes to the community blogs page, this program shall retrieve the data of all the blogs posted by all the users and help display them on the community blog page.
package com.programs.DataFlair;
import java.sql.*;
public class AllBlogs {

    /*
     * This program shall retrieve all the blogs from the database of all the users.
     * */


    Connection cn=null;
    ResultSet rs=null;

    public ResultSet retrieve_all()
    {
        try
        {
            cn=new GetConnection().doConnect();
            String s="select b1.blog_id,b1.name,b1.title,b1.vid_link,b1.img_link,b2.blog,b2.caption from blog1 b1,blog2 b2 where b1.blog_id=b2.blog_id;";

            //The following statement joins two tables blog1 and blog2 to retrieve all the data.
            PreparedStatement ps=cn.prepareStatement(s);

            rs=ps.executeQuery();
        }
        catch(Exception e)
        {
            e.printStackTrace();
        }

        return rs;
    }
}
f. Blogging.java
This program will save the blog data into the blog1 and blog2 tables whenever the user goes to the blogging page and submits the blog details.
package com.programs.DataFlair;
import java.sql.*;
public class Blogging {

    /*
     * This class is used to save data of the blogs into the database whenever the user
     * wants to create a new blog.
     * */


    /*
     * There are two tables that are created because there is large data and storing in one table is not feasible.
     * */
    String title,blog,caption;
    public String getTitle() {
        return title;
    }
    public void setTitle(String title) {
        this.title = title;
    }
    public String getBlog() {
        return blog;
    }
    public void setBlog(String blog) {
        this.blog = blog;
    }
    public String getCaption() {
        return caption;
    }
    public void setCaption(String caption) {
        this.caption = caption;
    }
    public boolean blog_insert(String name,String img_link,String vid_link)
    {
        try
        {
            Connection cn=new GetConnection().doConnect();
            String s="insert into blog1(name,title,vid_link,img_link) values(?,?,?,?)";


            PreparedStatement ps=cn.prepareStatement(s);
            ps.setString(1, name);
            ps.setString(2, title);
            ps.setString(3, vid_link);
            ps.setString(4, img_link);
            ps.executeUpdate();
            //Inserting values in first table.

            s="Insert into blog2 select blog_id,name,?,? from blog1 where name=? order by blog_id desc LIMIT 1";
        /*
         * This particular command will insert the values into the second table which is blog2
         *
         * The logic applied is this that if two users enter the blog details at same time,so to not cause
         * ambiguity and confusion we are inserting the blog id that has already been created for the first
         * user and is automatically incremented.
         * */
            ps=cn.prepareStatement(s);
            ps.setString(1, blog);
            ps.setString(2, caption);
            ps.setString(3, name);
            ps.executeUpdate();

            //ON successful blog upload.
            return true;
        }
        catch(Exception e)
        {
            e.printStackTrace();
        }
        return false;
    }

}
5. Creating a Frontend User Interface
HTML, JSP, CSS, JAVASCRIPT pages.
a. index.html
<!DOCTYPE html>
<html lang="en">
<!--
The first opening page of the project of ONLINE BLOG CMS
-->
<head>
<meta charset="UTF-8">
<meta name="viewport" content="width=device-width, initial-scale=1.0">
<link rel="stylesheet" href="index.css" type="text/css">
<title>HOME</title>
</head>
<body>
<div class="top">
<nav class="navbar">
<ul>
<li><a href="index.html">HOME</a></li>
<li><a href="login_page.html">Login</a></li>
<li><a href="register_page.html">Register</a></li>
</ul>
</nav>
<div class="logo">
<img src="./images/projectgurukul.png" width="70px">
</div>
</div>
<div class="mid">
<h2 class="head2">
Online Blogging Platform By
</h2>
<h1 class="head1">
ProjectGurukul
</h1>
<div class="content">
<main>
<article>
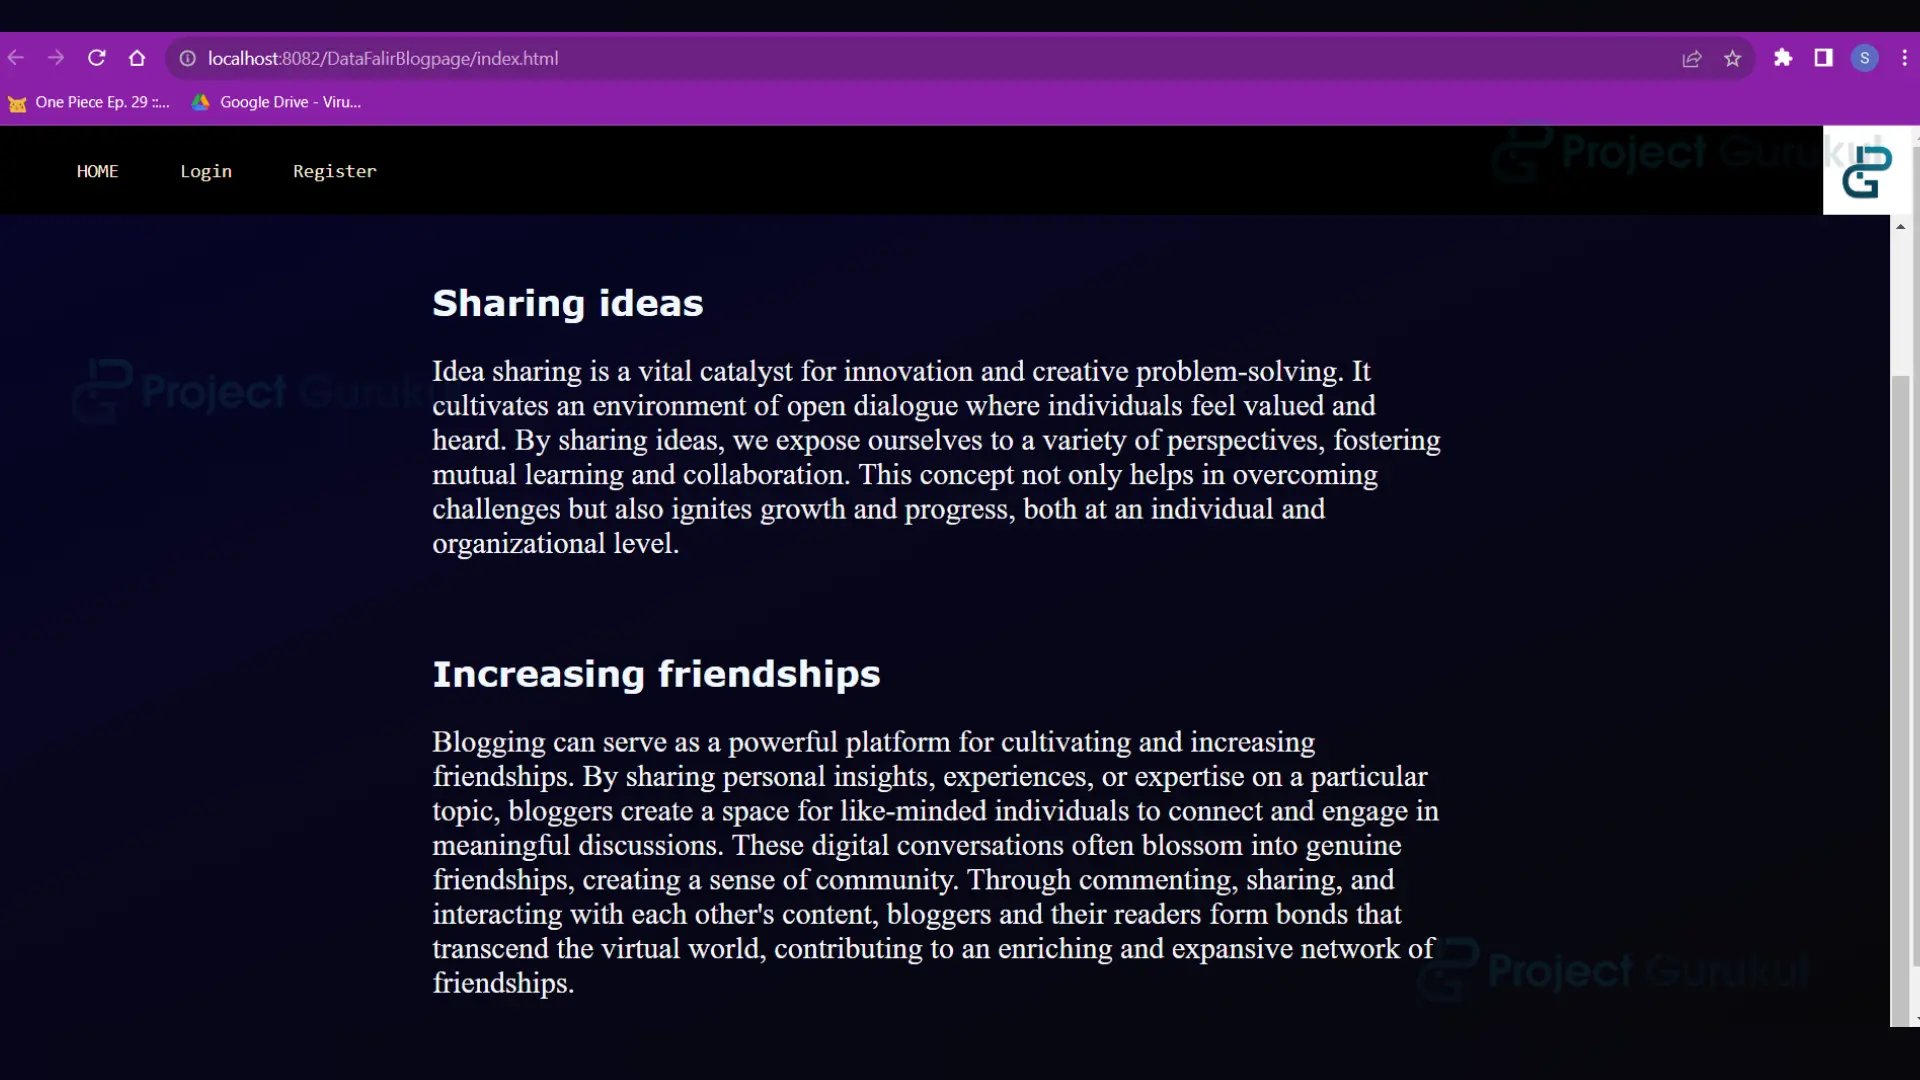
<h2>Sharing ideas</h2>
<p>Idea sharing is a vital catalyst for innovation and creative problem-solving. It cultivates an environment of open dialogue where individuals feel valued and heard. By sharing ideas, we expose ourselves to a variety of perspectives, fostering mutual learning and collaboration. This concept not only helps in overcoming challenges but also ignites growth and progress, both at an individual and organizational level.</p>
</article>
<br>
<article>
<h2>Increasing friendships</h2>
<p>Blogging can serve as a powerful platform for cultivating and increasing friendships. By sharing personal insights, experiences, or expertise on a particular topic, bloggers create a space for like-minded individuals to connect and engage in meaningful discussions. These digital conversations often blossom into genuine friendships, creating a sense of community. Through commenting, sharing, and interacting with each other's content, bloggers and their readers form bonds that transcend the virtual world, contributing to an enriching and expansive network of friendships.</p>
</article>
<br>
</main>
</div>
</div>
</body>
</html>
b. index.css
The css styling for index.html.
.top
{
top:0px;
left:0px;
position: absolute;
height:70px;
width: 100%;
padding: 0%;
background-color: black;
display: flex;
}
.mid
{
position: absolute;
left: 0px;
top:70px;
width: 100%;
min-height:42.7rem;
overflow: auto;
background-image: linear-gradient(to left top, #070708, #070713, #07061a, #070621, #050528);
}
.mid .head2
{
left:100px;
position: inherit;
font-family: sans-serif;
color: #e5e5e5;
animation-delay: 0.5s;
animation: slidein 2s ease-in;
}
.mid .head1
{
position: inherit;
left:600px;
font-style: italic;
font-family: Verdana, Geneva, Tahoma, sans-serif;
color: #e5e5e5e5;
animation-delay: 0.5s;
animation: slidein 2s ease-in;
}
@keyframes slidein {
0%
{
transform: translateX(-100%);
opacity: 0;
}
100%{
transform:translateX(0);
opacity: 1;
}
}
.navbar
{
width: 100%;
height: auto;
}
.navbar ul
{
overflow: auto;
}
.navbar li{
float: left;
list-style: none;
padding:10px;
}
.navbar li a
{
padding: 6px;
border:2px solid black;
border-radius: 25%;
margin-left: 13px;
text-decoration: none;
color: antiquewhite;
font-family: monospace;
font-weight: 200;
font-size: 15px;
}
.navbar li a:hover
{
background-color: antiquewhite;
color: black;
transition-duration: 0.5s;
}
.logo
{
left:700px;
}
.content
{
position: relative;
top:150px;
width: auto;
height:auto;
}
main {
max-width: 800px;
margin: 0 auto;
padding: 20px;
}
article {
margin-bottom: 30px;
}
article h2 {
font-size: 28px;
margin-bottom: 10px;
color: aliceblue;
font-family: Verdana, Geneva, Tahoma, sans-serif;
}
article p {
margin-bottom: 20px;
color: whitesmoke;
font-size: x-large;
}
article a {
display: inline-block;
padding: 10px 20px;
background-color: #333;
color: #fff;
text-decoration: none;
border-radius: 1em;
}
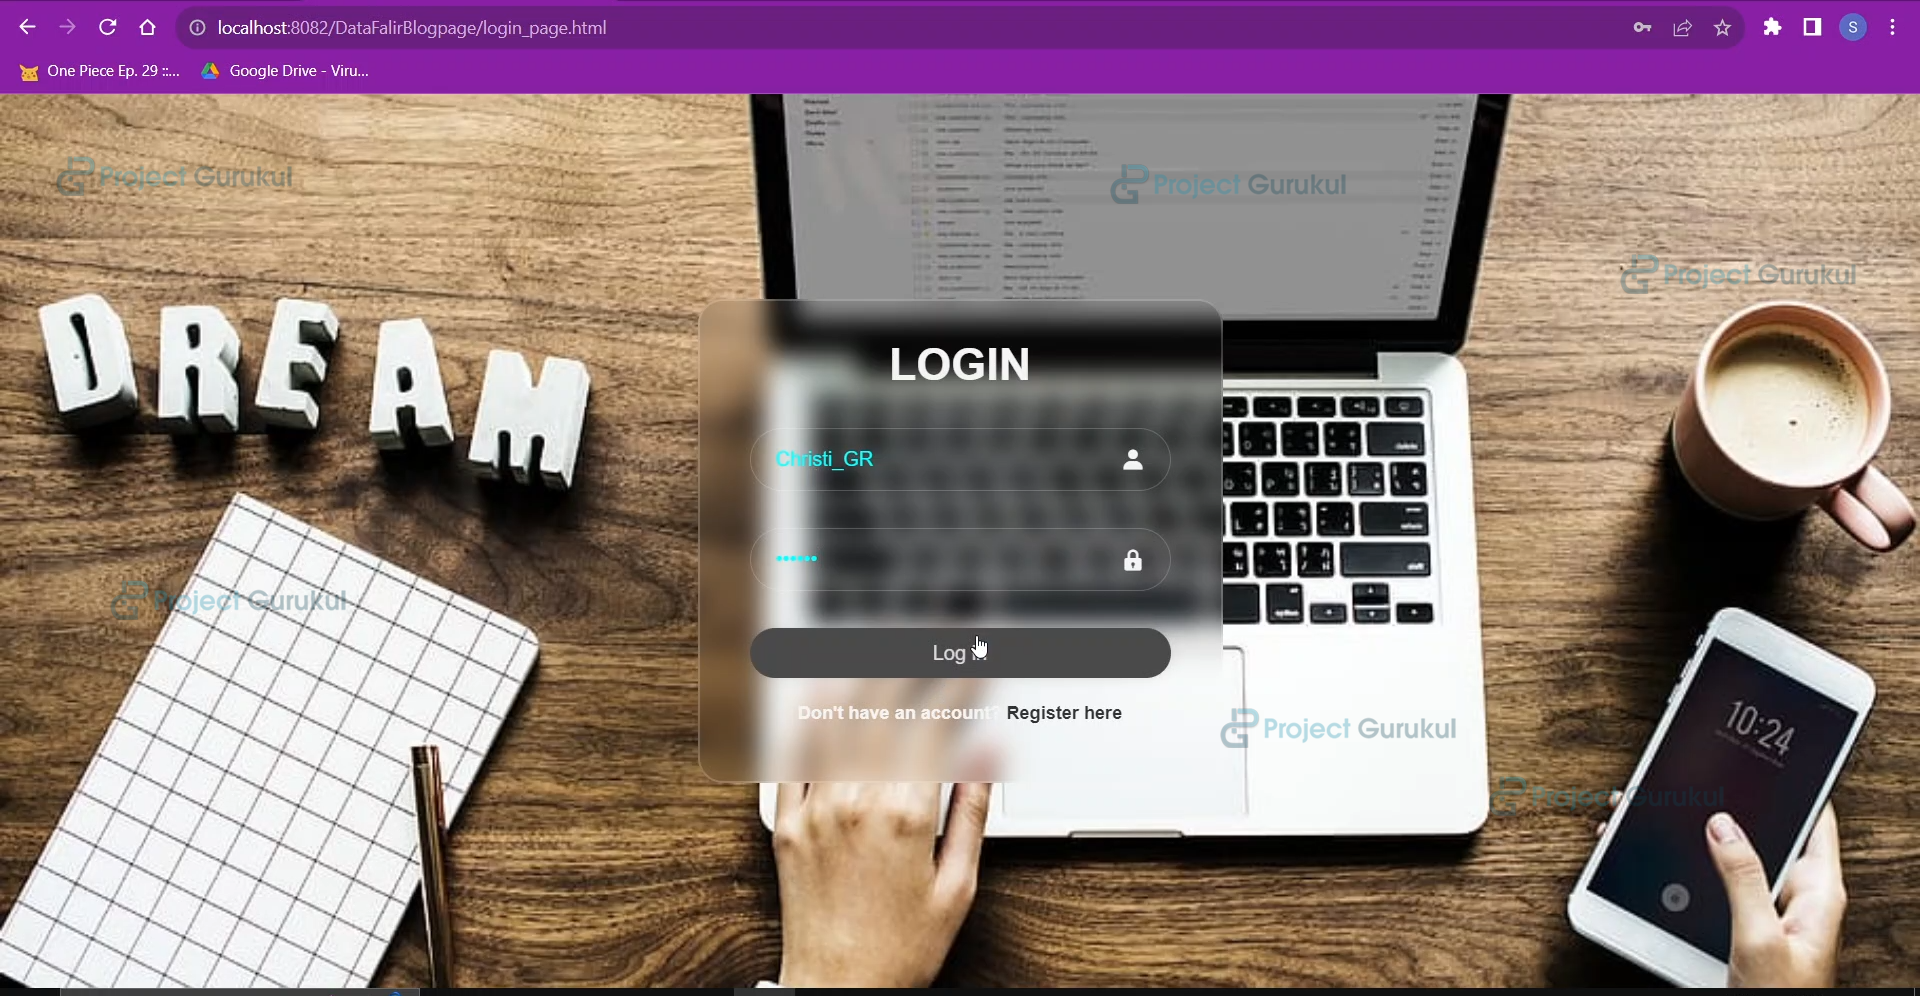
c. login_page.html
The login page for users to log into their accounts
<!DOCTYPE html>
<html lang="en">
<!--
    The login page through which users can access the Blog website to upload blogs and view
    all blogs.
-->
<head>
<meta charset="UTF-8">
<meta name="viewport" content="width=device-width, initial-scale=1.0">
<link rel="stylesheet" href="login_register_style.css">
<title>Login</title>
<link href='https://unpkg.com/[email protected]/css/boxicons.min.css' rel='stylesheet'>
</head>
<body>
<div class="wrapper">
<form action="user_login.jsp">
<h1>LOGIN</h1>
<div class="input-box">
<input type="text" placeholder="Username" name="username" id="username" required>
<i class='bx bxs-user'></i>
</div>
<div class="input-box">
<input type="password" placeholder="Password" name="password" id="password" required>
<i class='bx bxs-lock' ></i>
</div>
<button class="btn" type="submit">Log in</button>
<div class="register-link">
<p>
Don't have an account?
<a href="register_page.html">Register here</a>
</p>
</div>
</form>
</div>
</body>
</html>
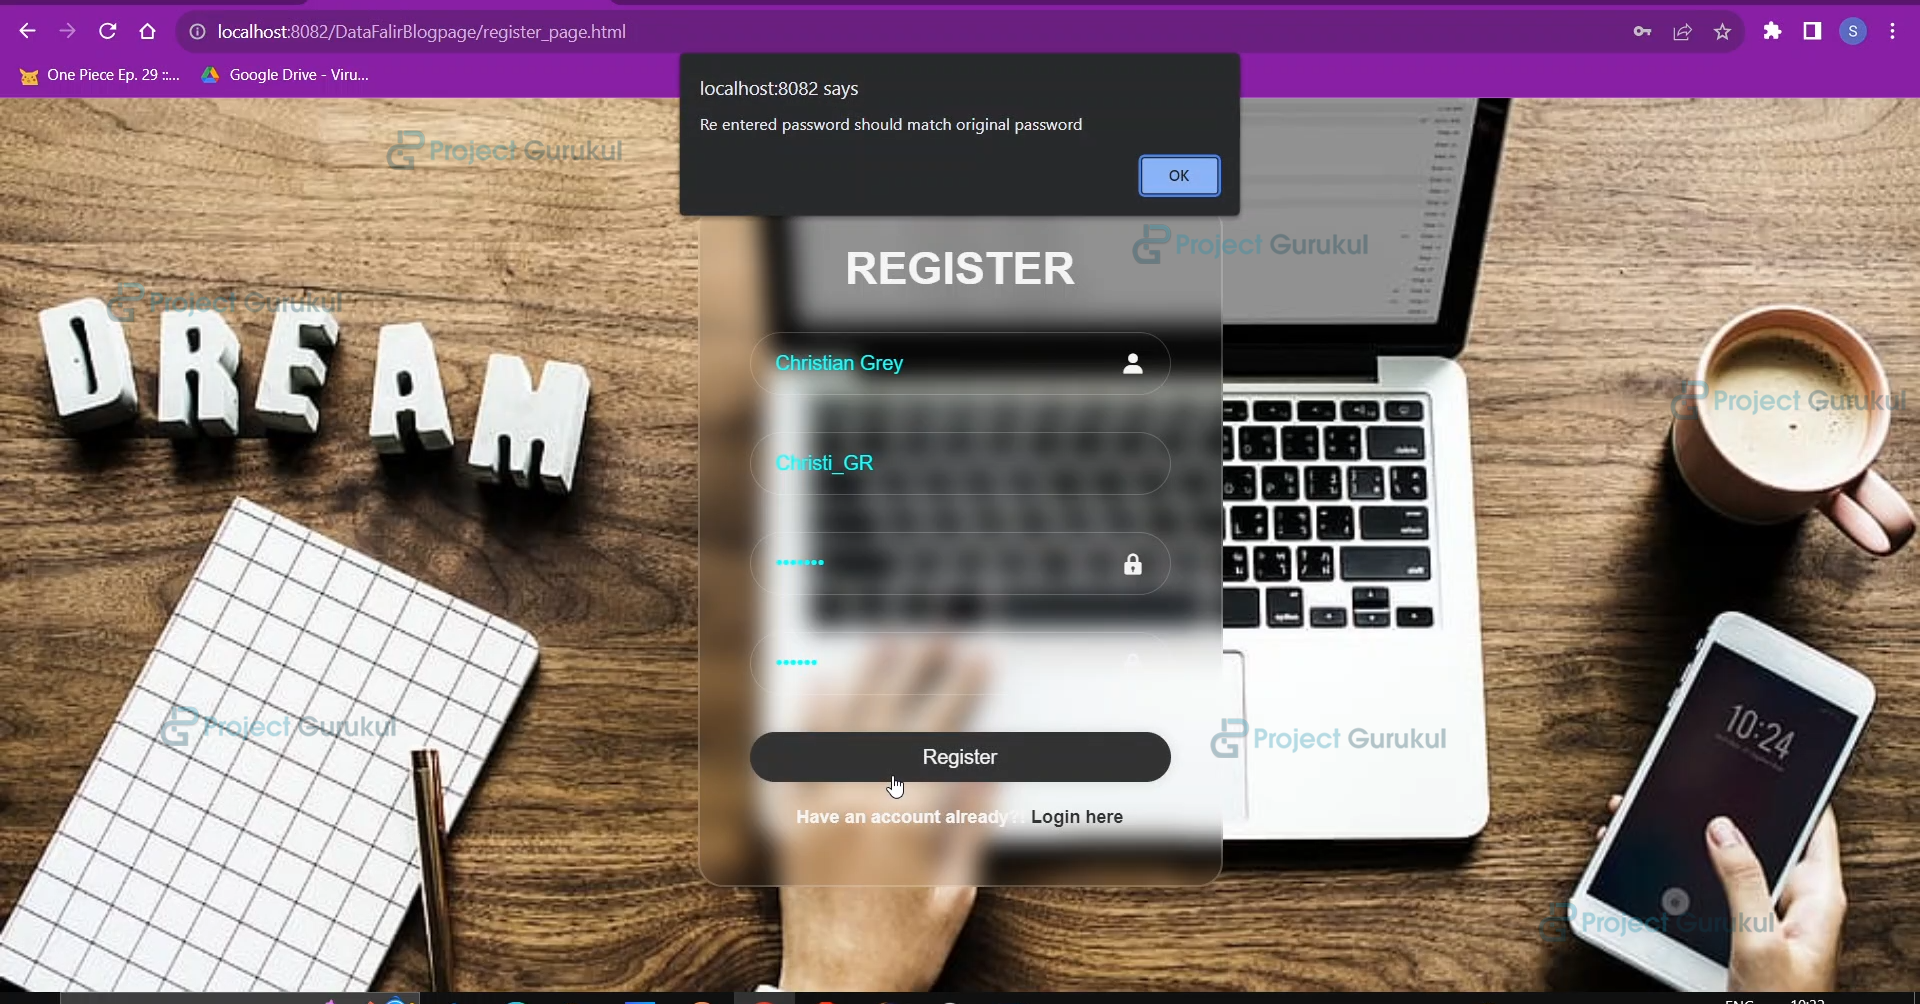
d. register_page.html
The register page is where new users can create their accounts and use the online blogging platform.
<!DOCTYPE html>
<html lang="en">
<!--
    The register page in order to create username and password for new users and use the blog page.
-->
<head>
<meta charset="UTF-8">
<meta name="viewport" content="width=device-width, initial-scale=1.0">
<link rel="stylesheet" href="login_register_style.css">
<title>Register</title>
<!--
    For the use of amazing box icons we need to include this webpage
-->
<link href='https://unpkg.com/[email protected]/css/boxicons.min.css' rel='stylesheet'>
</head>
<body>
<div class="wrapper">
<form action="user_register.jsp">
<h1>REGISTER</h1>
<div class="input-box">
<input type="text" placeholder="Full name" name="full_name" id="full_name" required>
<i class='bx bxs-user'></i>
</div>
<div class="input-box">
<input type="text" placeholder="Username" required name="username" id="username" >
</div>
<div class="input-box">
<input type="password" placeholder="Password" required name="password" id="password">
<i class='bx bxs-lock' ></i>
</div>
<div class="input-box">
<input type="password" placeholder="Re-enter Password" required name="re_password" id="re_password">
<i class='bx bxs-lock' ></i>
</div>
<button class="btn" type="submit" onclick="return performChecks()">Register</button>
<div class="register-link">
<p>
Have an account already?!
<a href="login_page.html">Login here</a>
</p>
</div>
</form>
</div>
<script>
function performChecks() {
var input2 = document.getElementById("password").value;
     var input3 = document.getElementById("re_password").value;
     //to check whether the re-entered password matches or not
if(input2!=input3)
     {
     alert("Re entered password should match original password");
     return false;
     }
else
     {
     //After all fields entry
     alert("Do you wish to continue?!");
     document.getElementById("my-form").submit();
     }
return false; // Prevent immediate form submission
}
</script>
</body>
</html>
e. login_register_style.css
The CSS file for styling the login and register pages.
*
{
margin: 0;
padding: 0;
box-sizing: border-box;
font-family: "Poppins",sans-serif;
}
body
{
display: flex;
justify-content: center;
align-items: center;
min-height: 100vh;
background: url('images/login2.jpg');
background-size: cover;
background-position: center;
background-repeat: no-repeat;
}
.wrapper
{
width: 420px;
background:transparent;
border: 2px solid rgba(255,255,255,0.2);
backdrop-filter: blur(10px);
border-radius: 20px;
box-shadow: rgba(0,0,0,0.2);
color: whitesmoke;
padding:30px 40px;
}
.wrapper h1{
font-size: 36px;
text-align: center;
}
.wrapper .input-box
{
width: 100%;
height: 50px;
position: relative;
margin:30px 0;
}
.wrapper input
{
width: 100%;
height: 100%;
background: transparent;
border: none;
outline: none;
border: 1px solid rgba(255,255,255,0.2);
border-radius: 40px;
font-size: 16px;
color: cyan;
padding: 20px 45px 20px 20px;
}
.input-box ::placeholder
{
color: black;
}
.input-box i
{
position: absolute;
top:50%;
right:20px;
transform: translateY(-50%);
font-size: 20px;
}
.wrapper .btn
{
width: 100%;
height: 40px;
outline: none;
border-radius: 40px;
border:none;
background-color: whitesmoke;
box-shadow: 0 0 10px rgba(0,0,0,0.1);
cursor: pointer;
font-size: 16px;
color: #333;
}
.wrapper .btn:hover
{
background-color: #333;
color: whitesmoke;
transition-delay: 0.15s;
transition-duration: 0.5s;
}
.wrapper .register-link
{
font-size: 14.5px;
margin: 20px 0 15px;
font-weight: 700;
text-align: center;
}
.wrapper p a
{
color: #333;
text-decoration: none;
}
.wrapper p a:hover
{
text-decoration: underline;
}
f. All_blogs.jsp
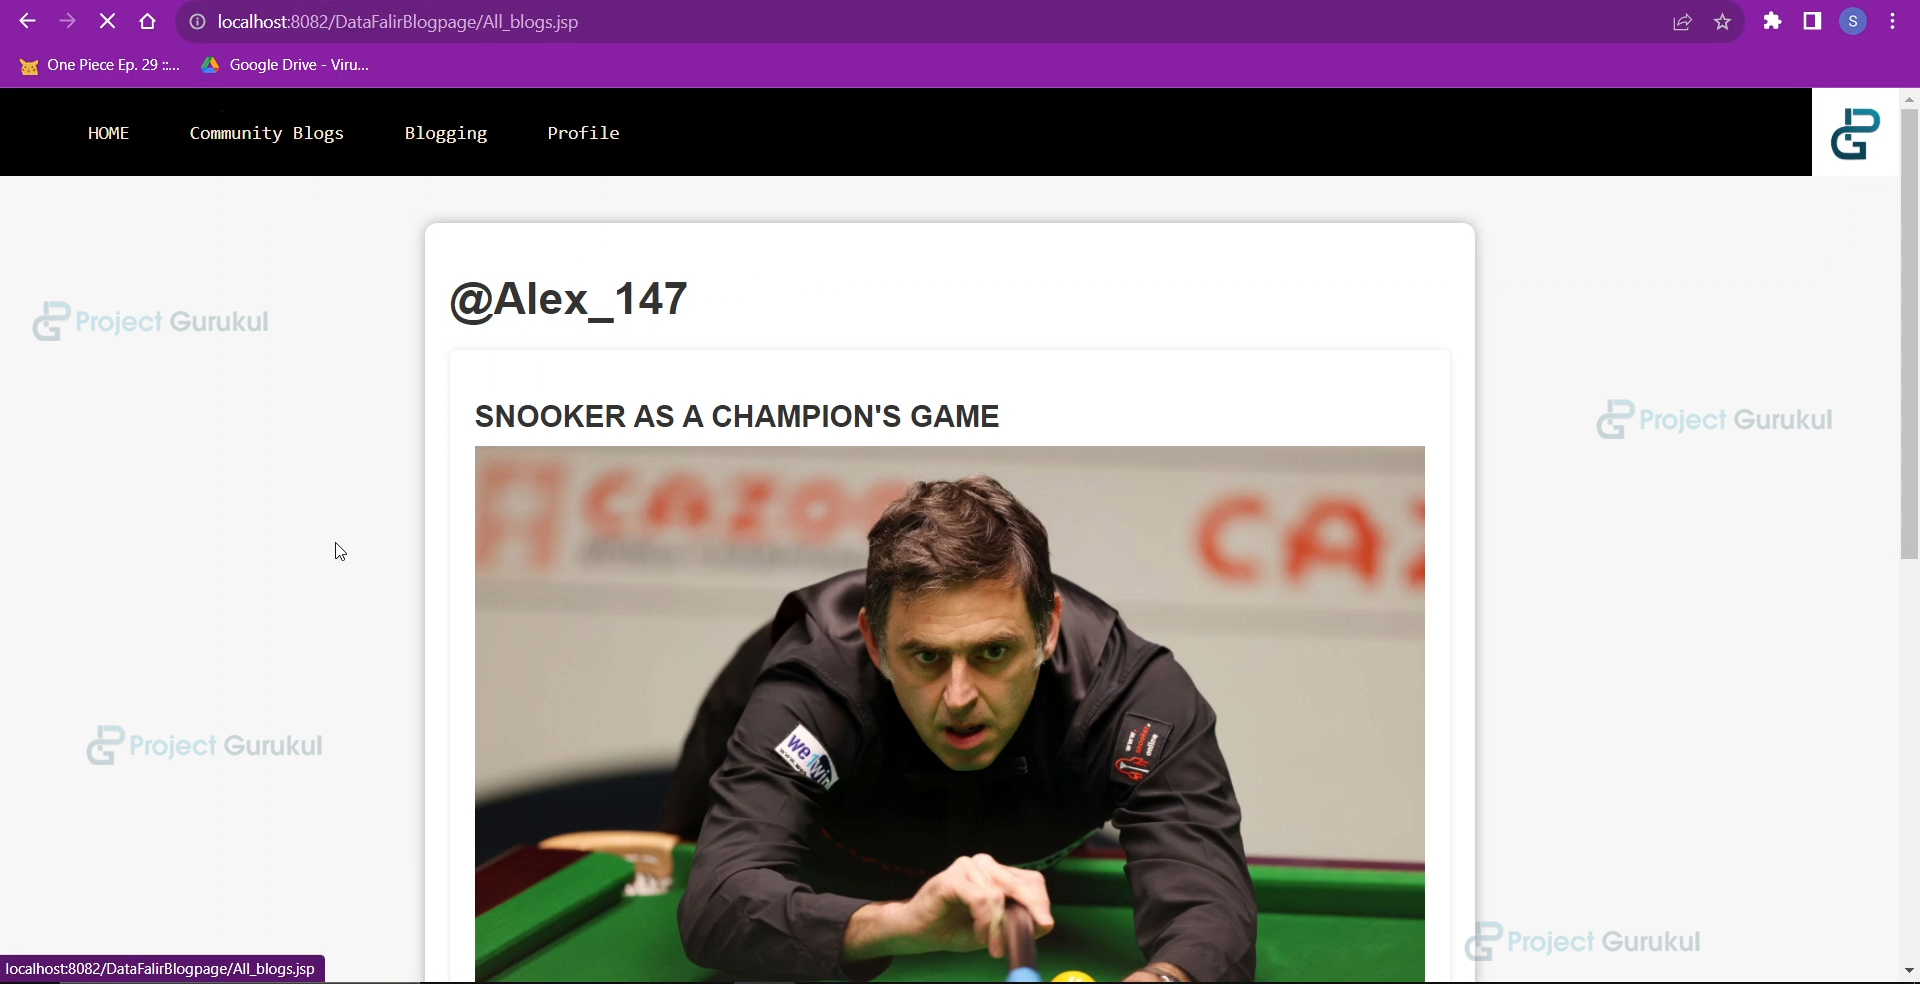
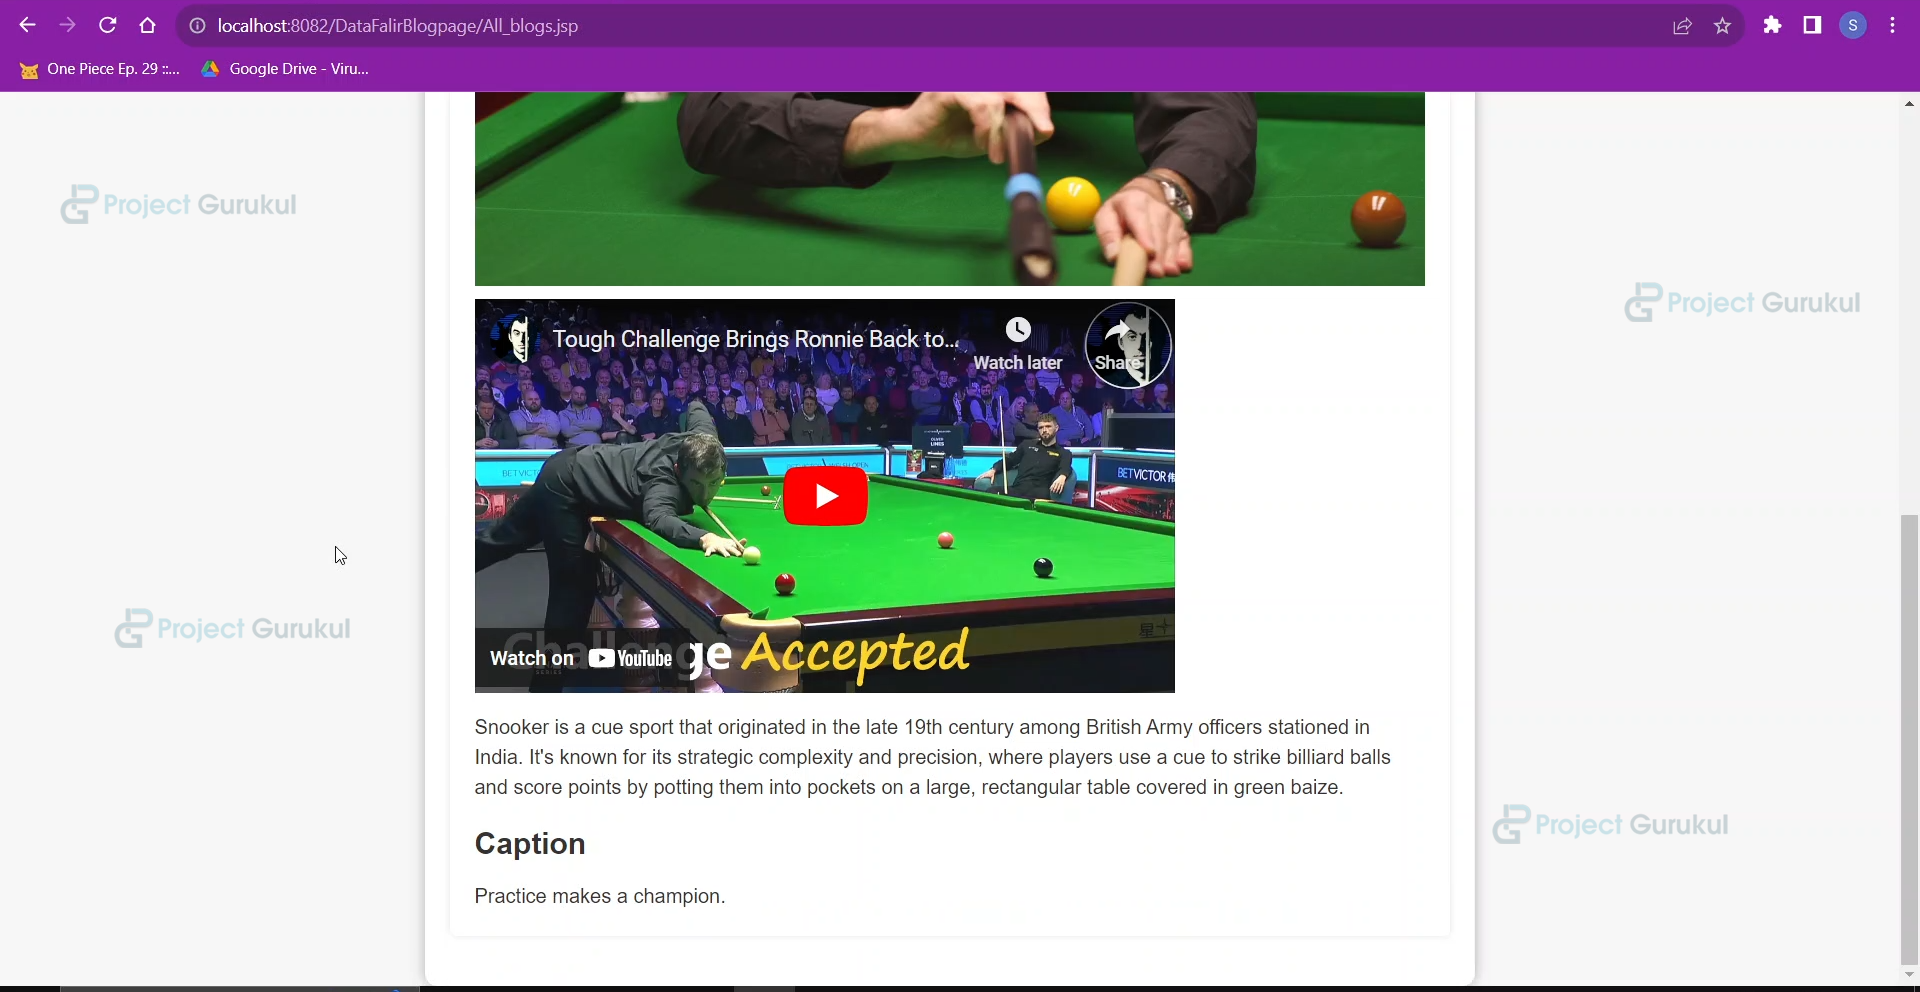
When the user clicks on the community Blogs page, the user will be redirected to this page, where all the blogs of all the users will be shown.
<%@page import="com.programs.DataFlair.AllBlogs"%>
<%@page import="com.programs.DataFlair.UserProfile"%>
<%@ page import="java.sql.*"%>
<!--
    The following program is the front end for Community Blogs where all the blogs that have been posted
    will be shown.
-->
<%
    ResultSet rs=new AllBlogs().retrieve_all();

            //The function retrieve_all() will return a resultset with all the blogs data.
%>
<html>
<head>
<link rel="stylesheet" href="blog.css">
    <title>Community Blogs</title>
    <style>
        body {
            background-color: #f7f7f7;
            color: #333;
            font-family: Arial, sans-serif;
        }
        .container {
position: relative;
top:100px;
            max-width: 800px;
            margin: 0 auto;
            padding: 20px;
            background-color: #fff;
            border-radius: 10px;
            box-shadow: 0 0 10px rgba(0, 0, 0, 0.3);
        }
        h1 {
            color: #333;
            font-size: 36px;
            margin-bottom: 20px;
margin-top: 20px;
        }
        .post {
            margin-bottom: 20px;
            padding: 20px;
            background-color: #fff;
            border-radius: 5px;
            box-shadow: 0 0 5px rgba(0, 0, 0, 0.1);
        }
        .post h2 {
            color: #333;
            font-size: 24px;
            margin-bottom: 10px;
        }
        .post p {
            font-size: 16px;
            line-height: 1.5;
            margin-bottom: 0;
        }
        .post img {
            max-width: 100%;
            margin-bottom: 10px;
        }
        .post a {
            display: inline-block;
            padding: 5px 10px;
            background-color: #333;
            color: #fff;
            font-size: 14px;
            text-align: center;
            border-radius: 5px;
            text-decoration: none;
            margin-right: 10px;
            margin-bottom: 10px;
        }
    </style>
</head>
<body>
<div class="top">
<nav class="navbar">
<ul>
<li><a href="index.html">HOME</a></li>
<li><a href="All_blogs.jsp">Community Blogs</a></li>
<li><a href="blogging.html">Blogging</a></li>
<li><a href="user_profile.jsp">Profile</a></li>
</ul>
</nav>
<div class="logo">
<img src="./images/projectgurukul.png" width="70px">
</div>
</div>
    <div class="container">

    <% if(rs.next()) //Checking if there is data in the resultset so ww will dispaly all the blogs.
    {
        do
        {
    %>
    <h1>@<%=rs.getString(2)%></h1>
        <div class="post">
            <h2><%=rs.getString(3)%></h2>
            <%
                if(rs.getString(5)!=null)
                {
            %>
            <img src="<%=rs.getString(5)%>" alt="Image">
            <% }
            %>
            <%=rs.getString(4)%>

            <p><%=rs.getString(6)%></p>
            <div class="caption">
                <h2>Caption</h2>
                <p>
                    <%=rs.getString(7)%>
                </p>
            </div>
        </div>


    <%
        }while(rs.next());
    }
    else //If there is no blog that has been posted by any user.
    {
    %>
        NO BLOGS TO SHOW RIGHT NOW!!!!!!!!
    <% }%>

    </div>
    </body>
    </html>
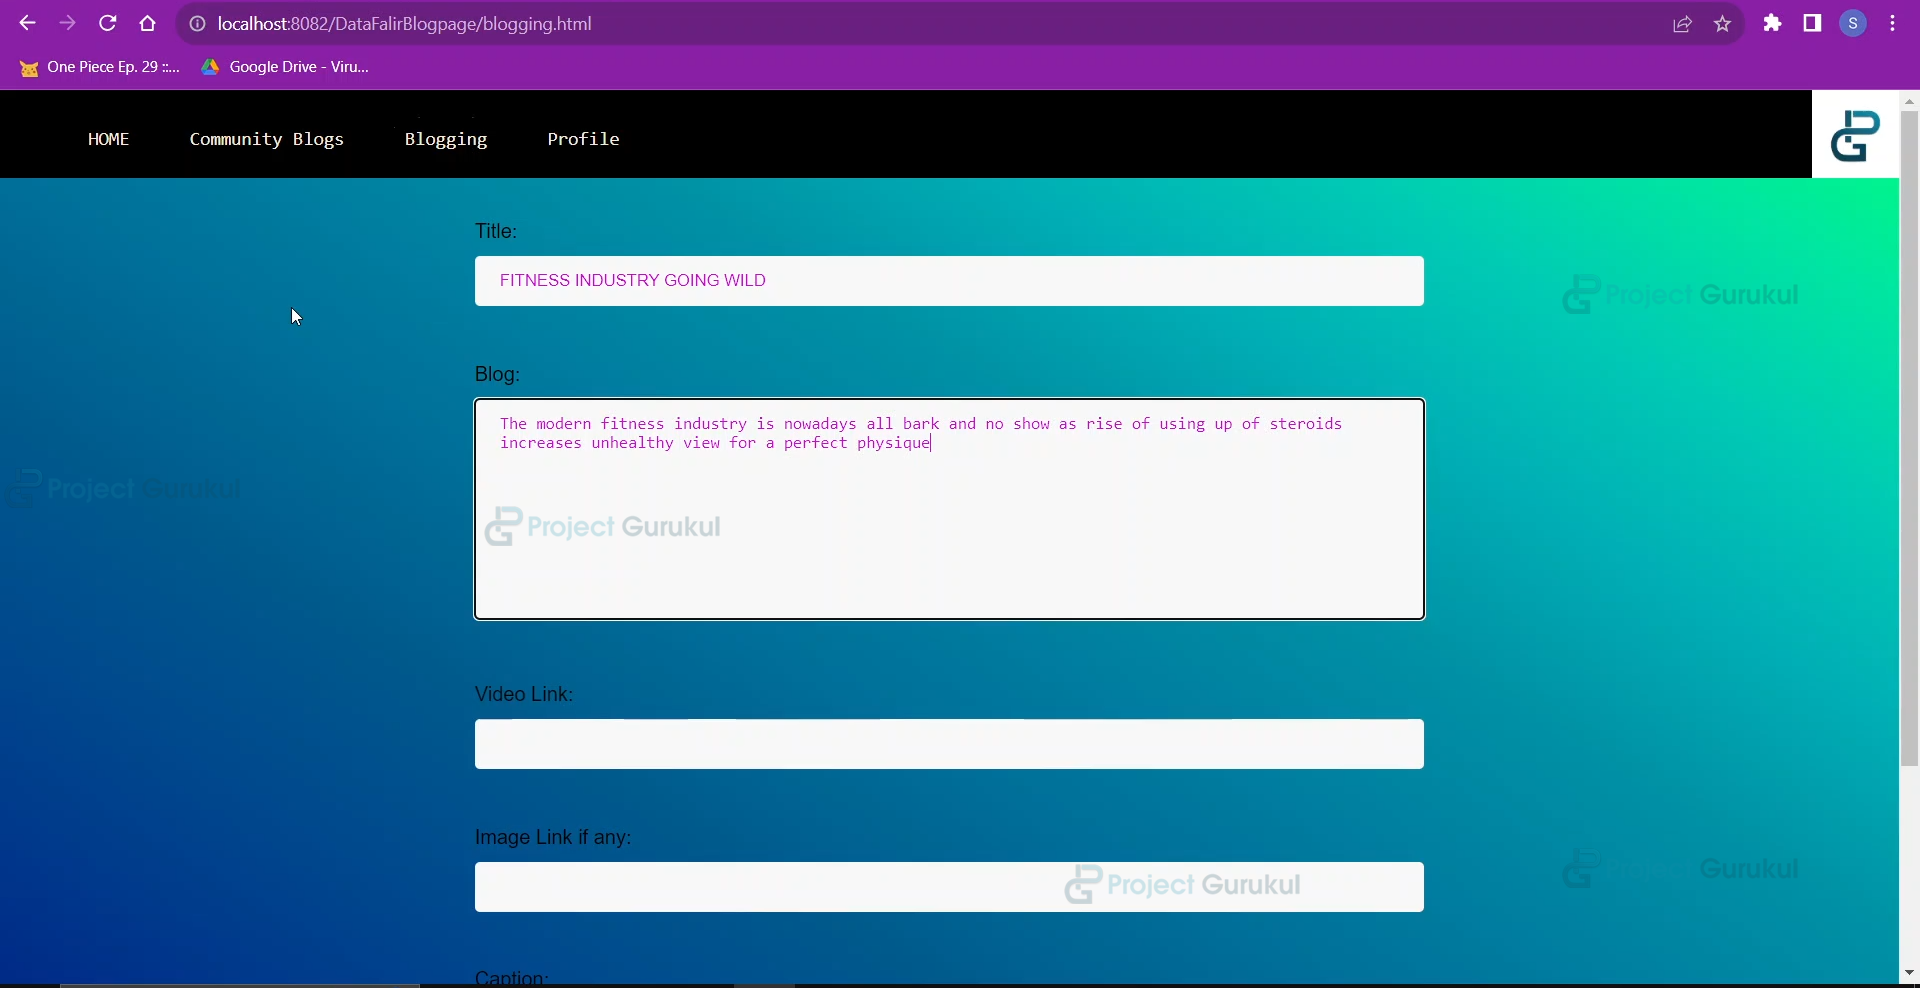
g. blogging.html
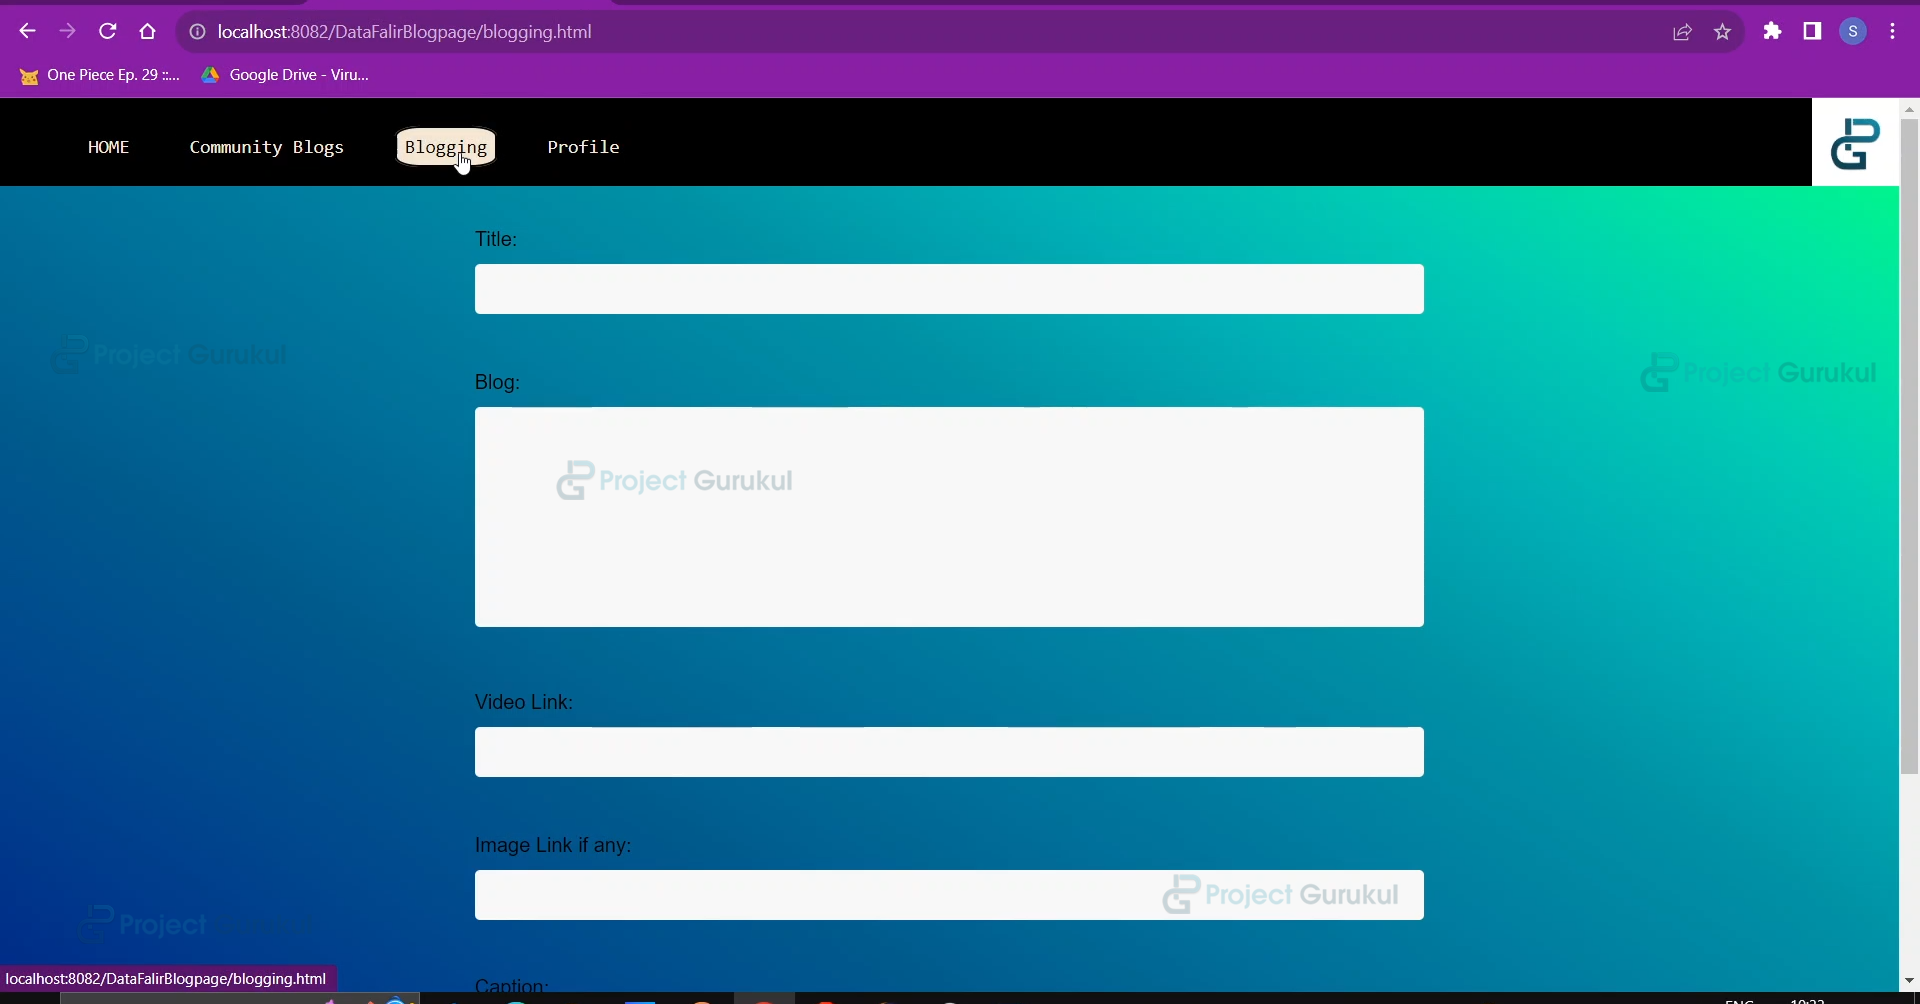
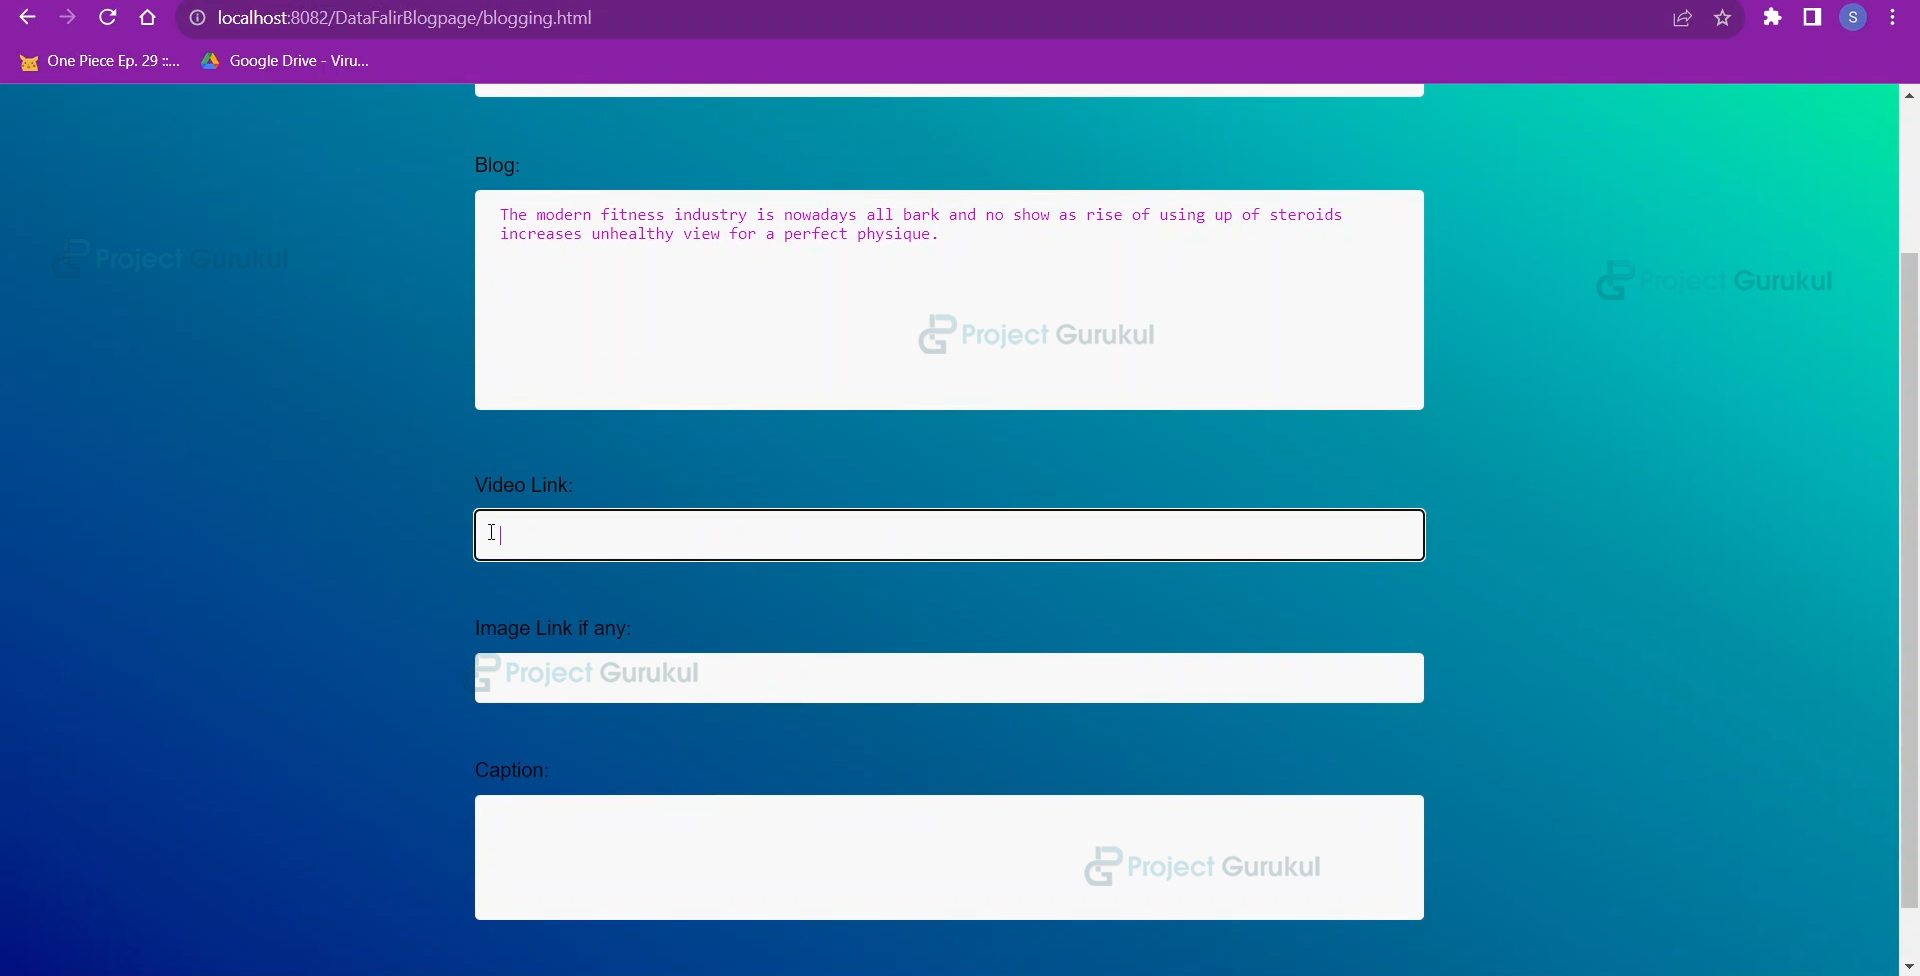
Whenever the user clicks on the blogging option on the navbar menu, he will be redirected to this page where he will enter the blog details.
<!DOCTYPE html>
<html>
<!--
The following front end will ask the user to input the details for the blog.
-->
<head>
<title>Blogging</title>
<link rel="stylesheet" type="text/css" href="style.css">
</head>
<body>
<div class="top">
<nav class="navbar">
<ul>
<li><a href="index.html">HOME</a></li>
<li><a href="All_blogs.jsp">Community Blogs</a></li>
<li><a href="blogging.html">Blogging</a></li>
<li><a href="user_profile.jsp">Profile</a></li>
</ul>
</nav>
<div class="logo">
<img src="./images/projectgurukul.png" width="70px">
</div>
</div>
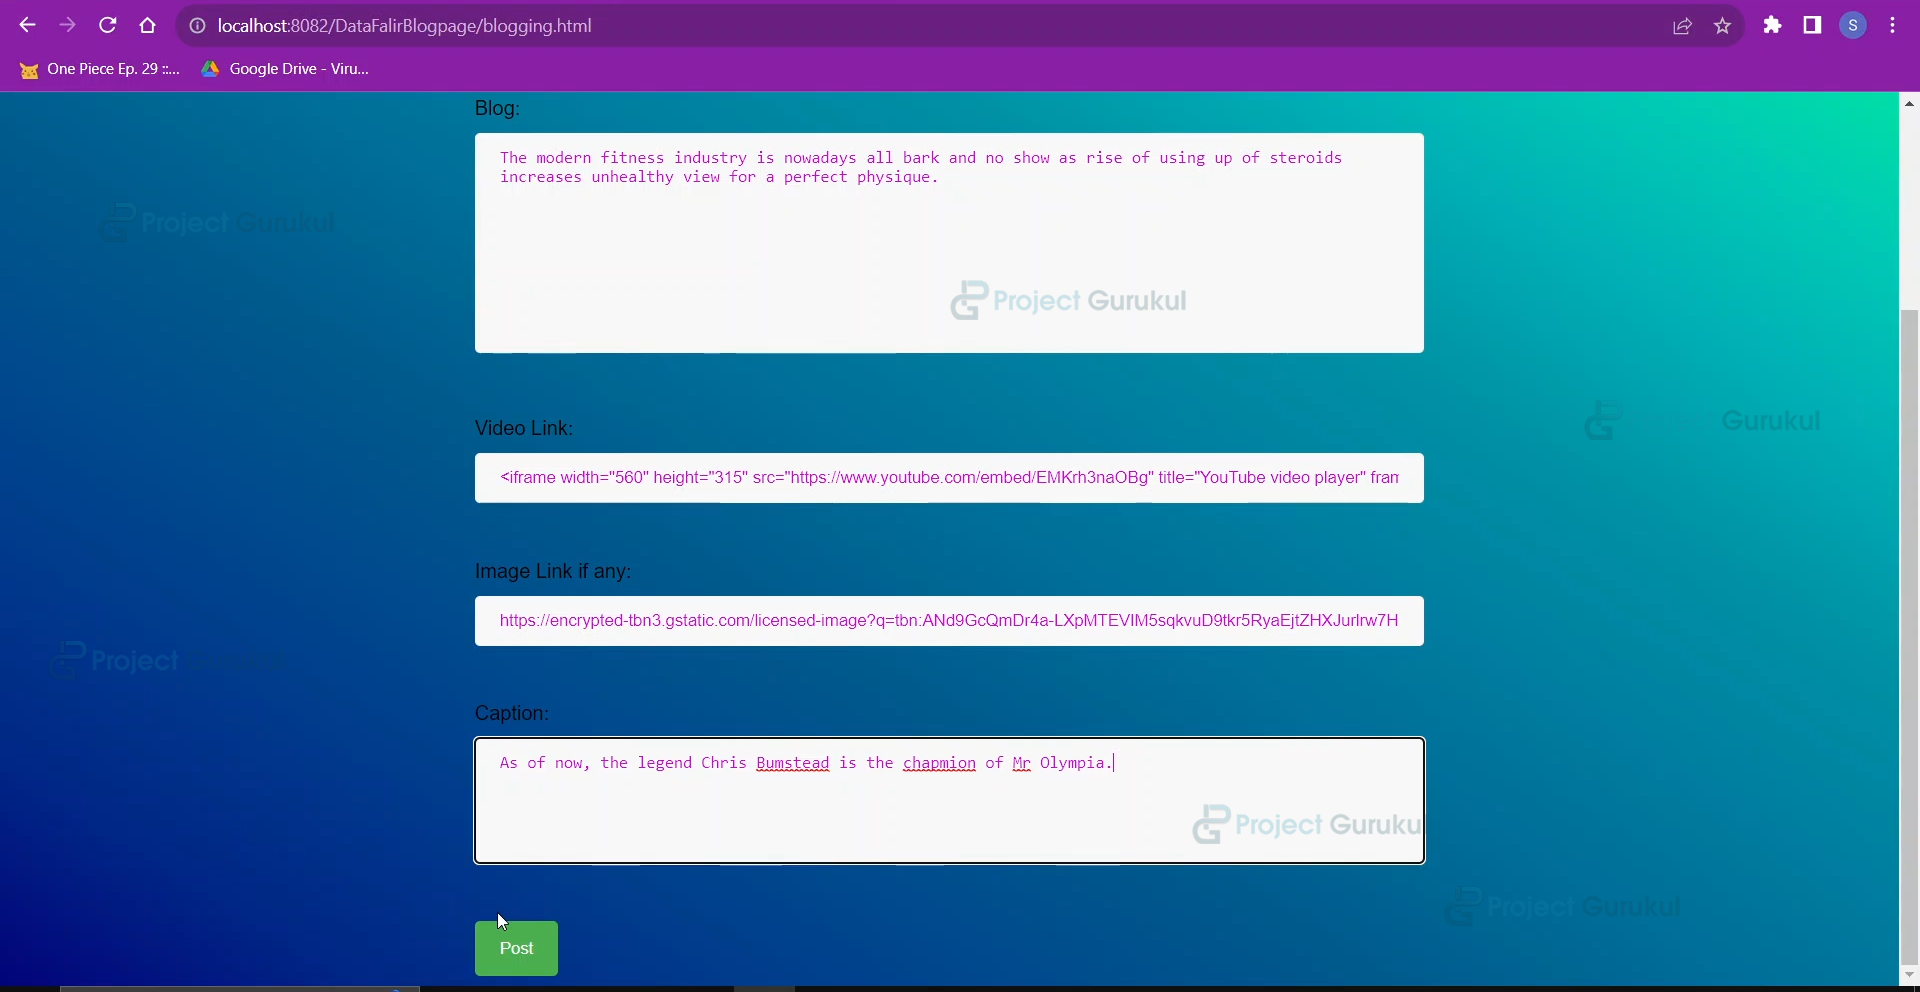
<form action="blogging.jsp" id="my-form">
<label for="title">Title:</label>
<input type="text" id="title" name="title" required><br><br>
<label for="blog">Blog:</label>
<textarea id="blog" name="blog" rows="10" cols="50" required></textarea><br><br>
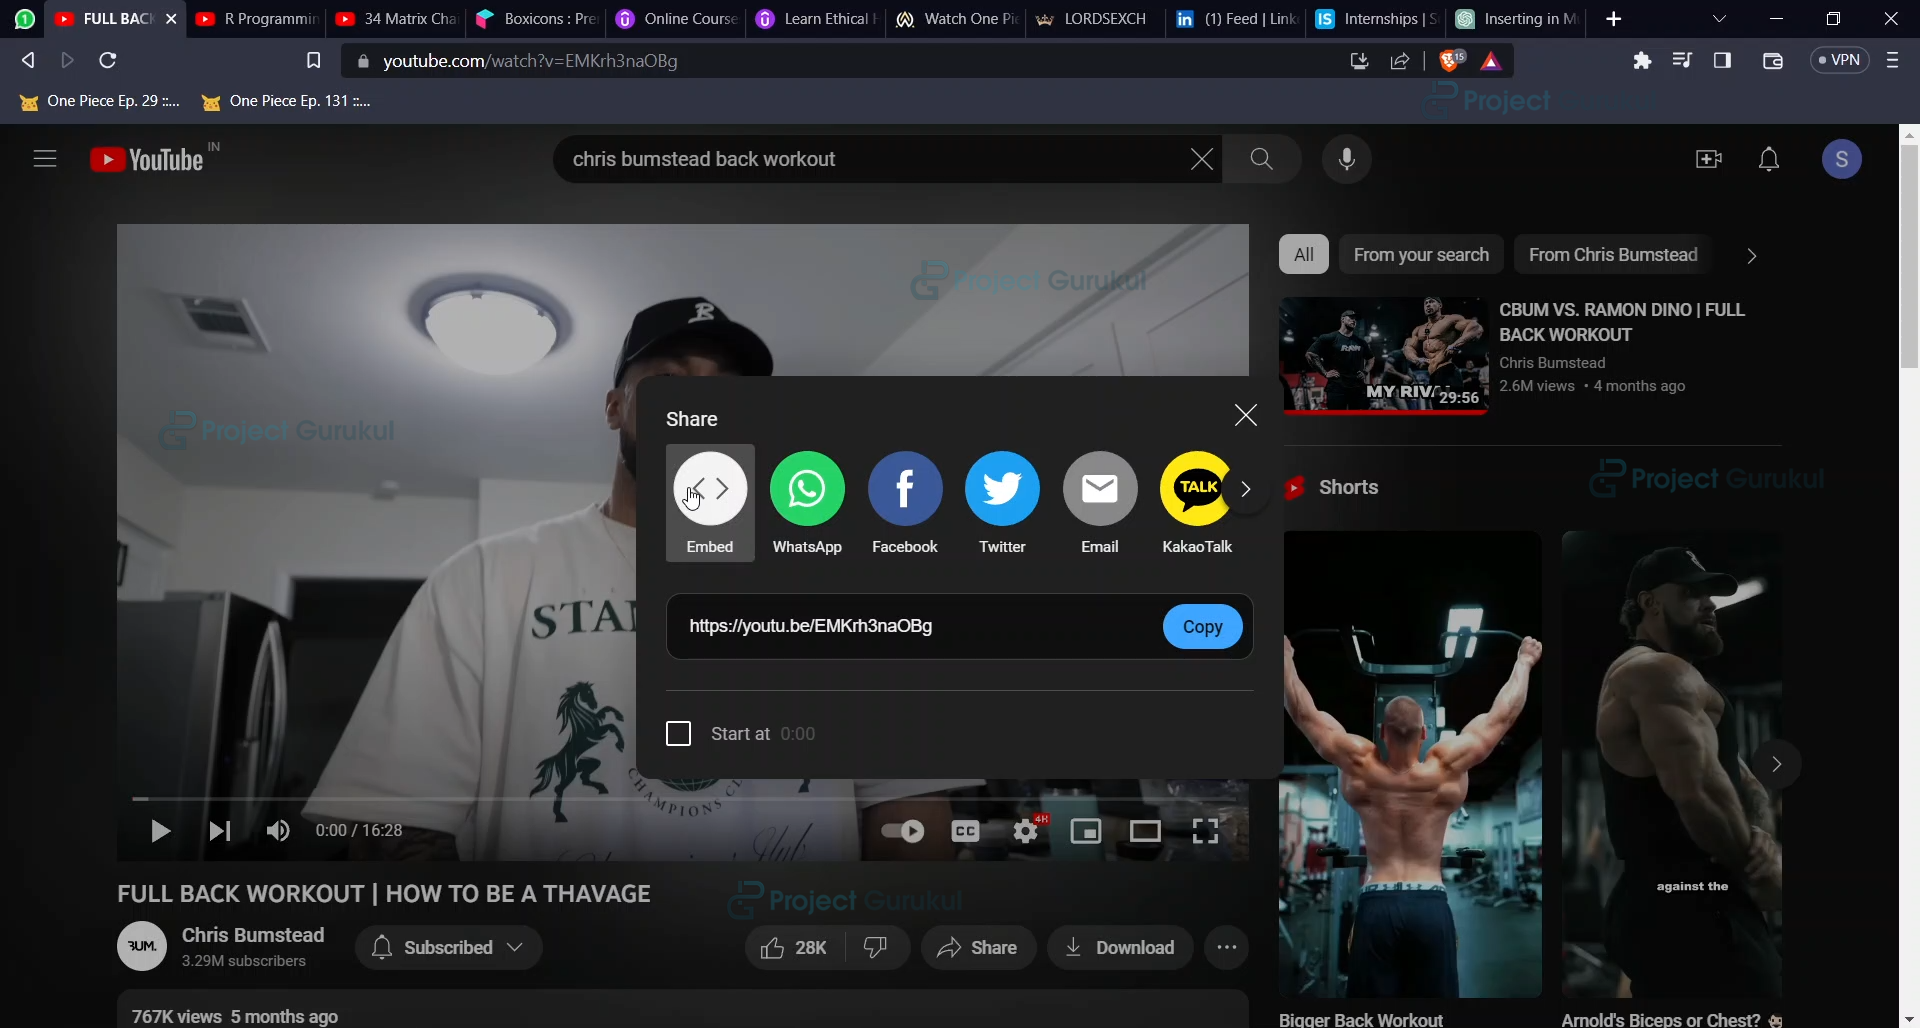
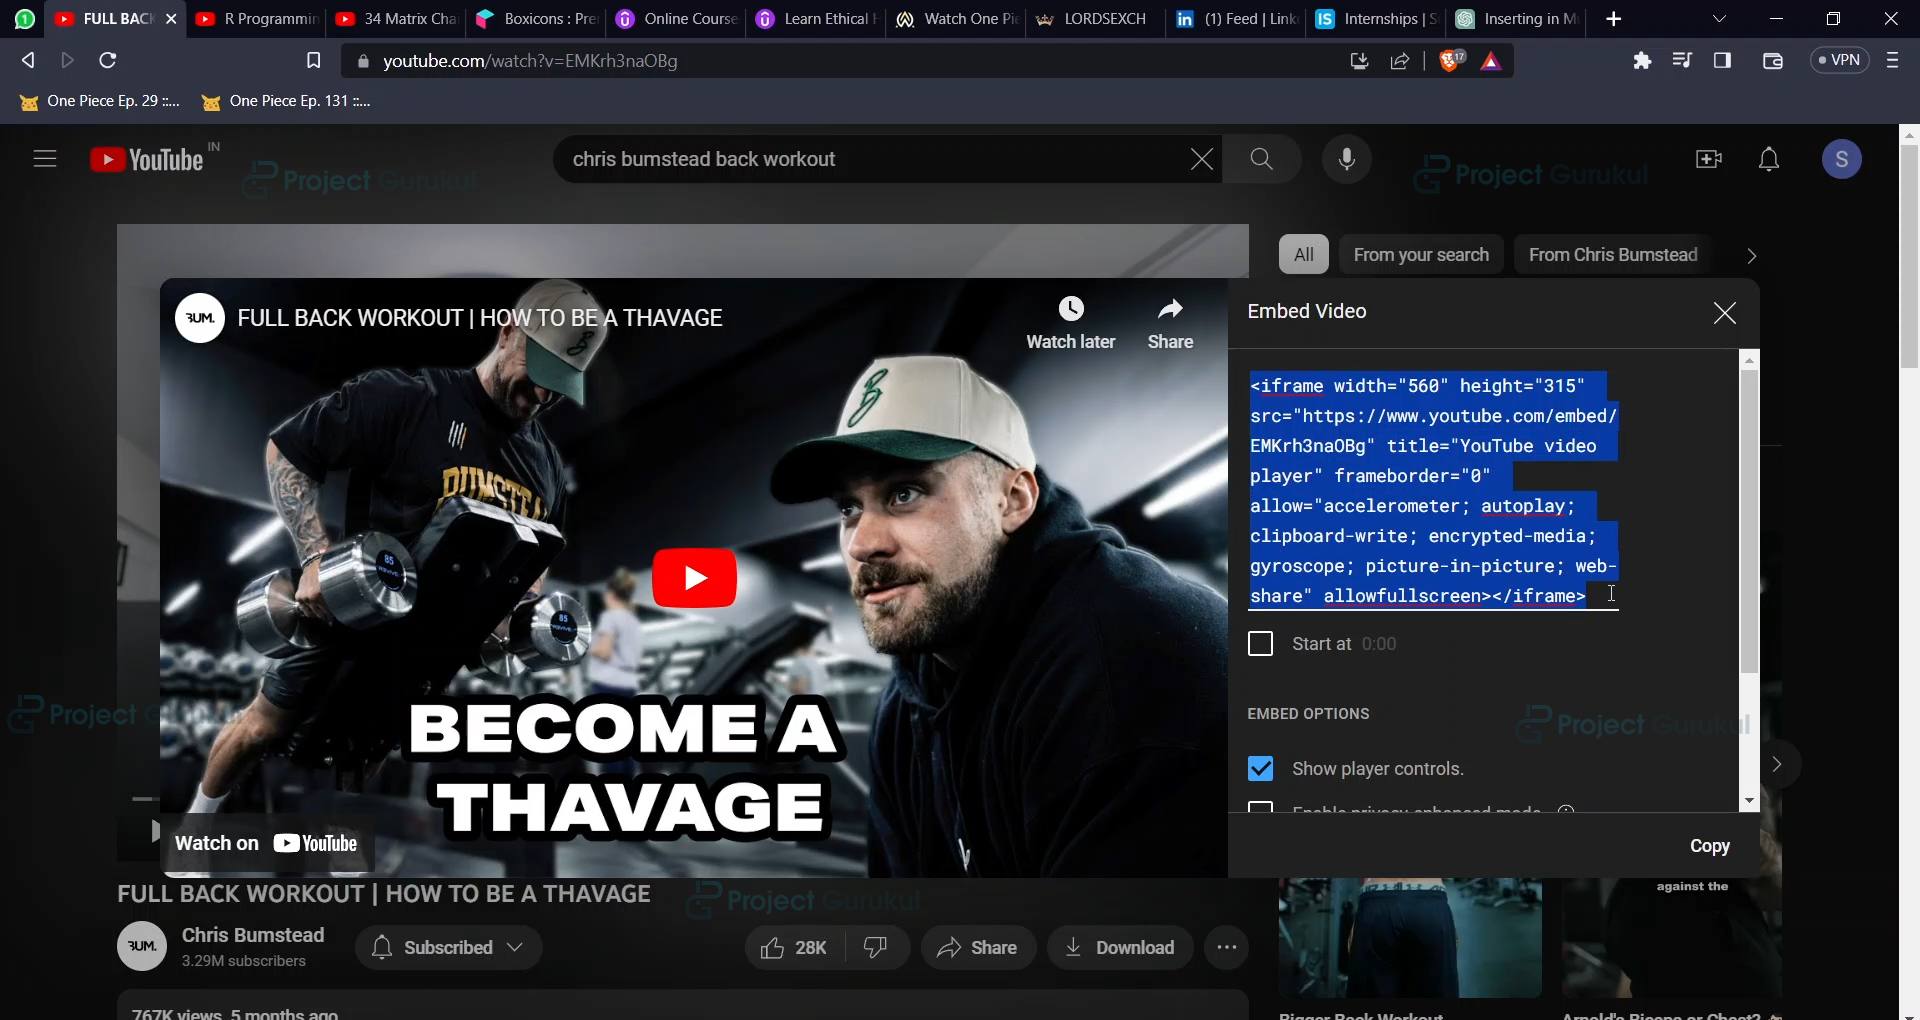
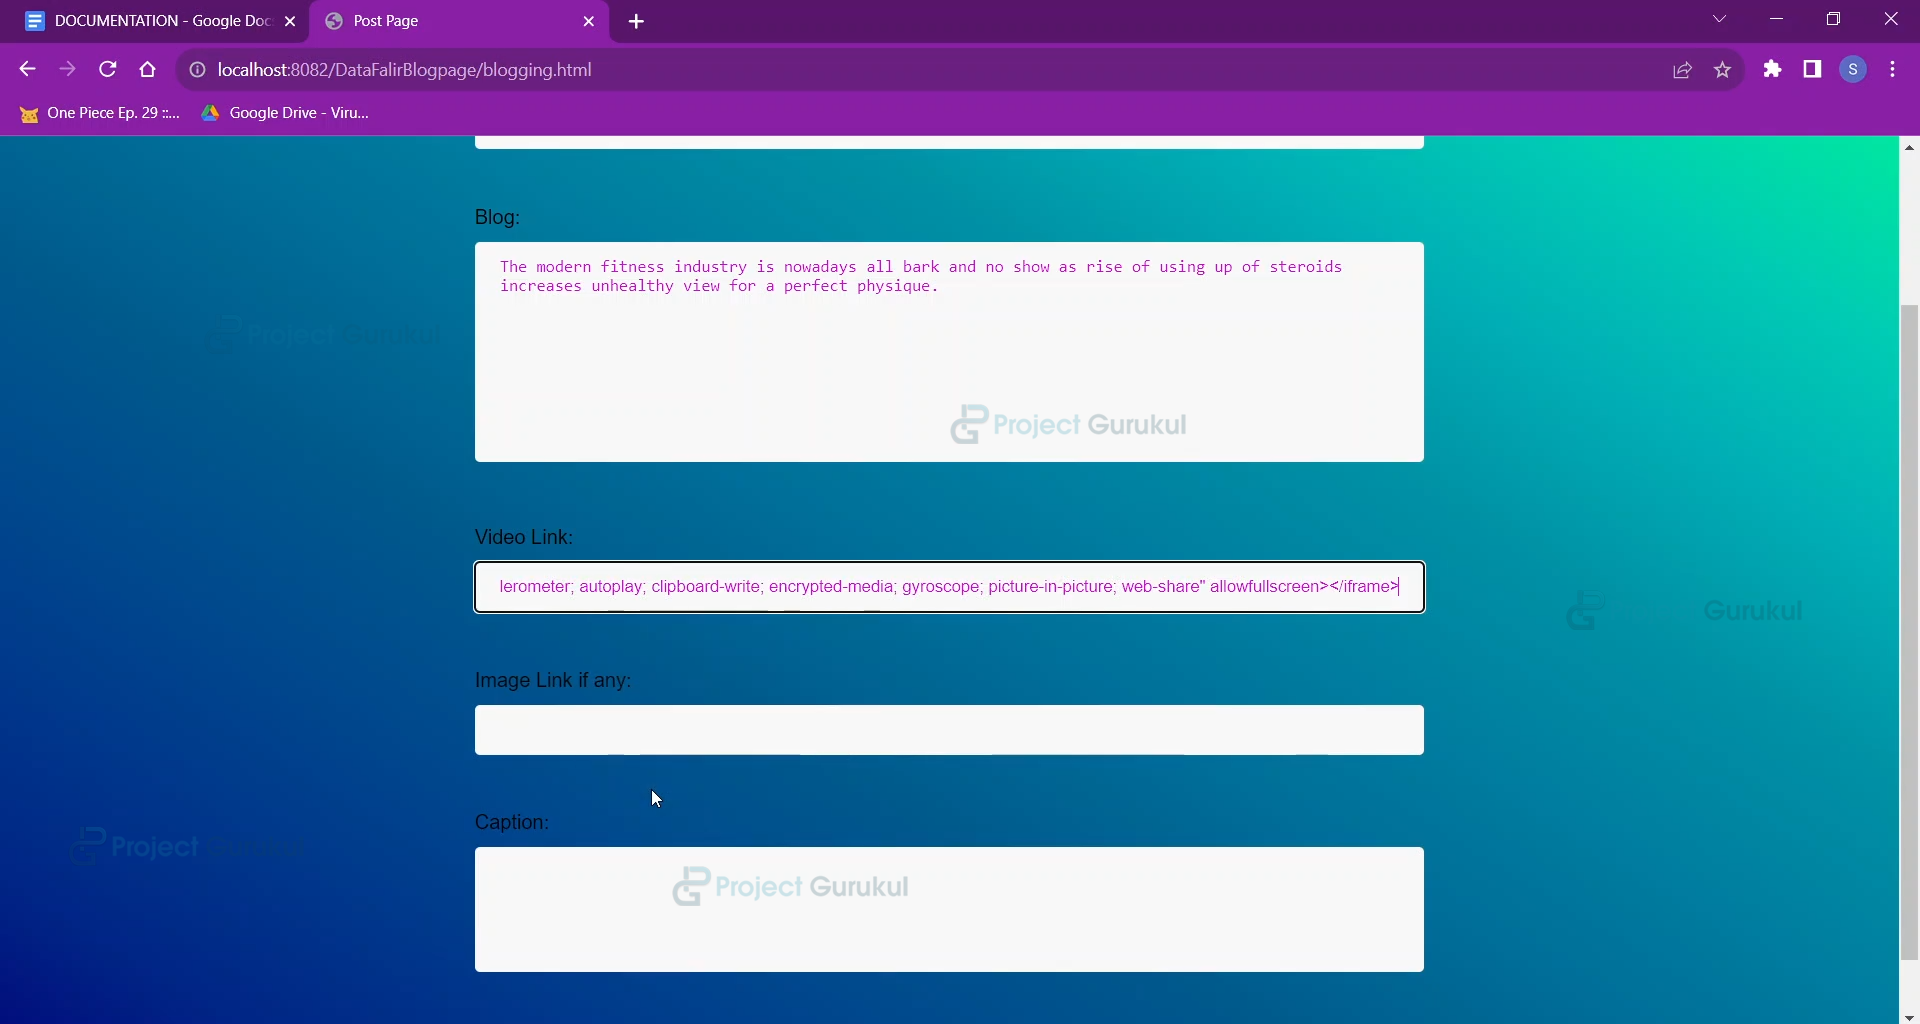
<label for="link">Video Link:</label>
<!--
The video link is the embed option that comes in youtube when you press share in order to embed a video
in your blog.
-->
<input type="text" id="vid_link" name="vidlink"><br><br>
<label for="link">Image Link if any:</label>
<!--
The image link is actually the image address that is to be copied from internet.
-->
<input type="text" id="img_link" name="imglink"><br><br>
<label for="caption">Caption:</label>
<textarea id="caption" name="caption" rows="5" cols="50" required></textarea><br><br>
<input type="submit" value="Post" onclick="return performCheck()">
</form>
<script>
function performCheck() {
var input3=document.getElementById("img_link").value;
//Checking whether the image link inserted is valid or not
var img = new Image();
if(input3!=null)
{
img.onload = function() {
alert("Image is valid and loaded successfully.");
document.getElementById("my-form").submit();
return true;
};
//if image link is invalid
img.onerror = function() {
alert("Invalid image URL or unable to load the image.");
return false;
// Prevent form submission
};
img.src = input3;
return false; // Prevent immediate form submission
}
return false; // Prevent immediate form submission
}
</script>
</body>
</html>
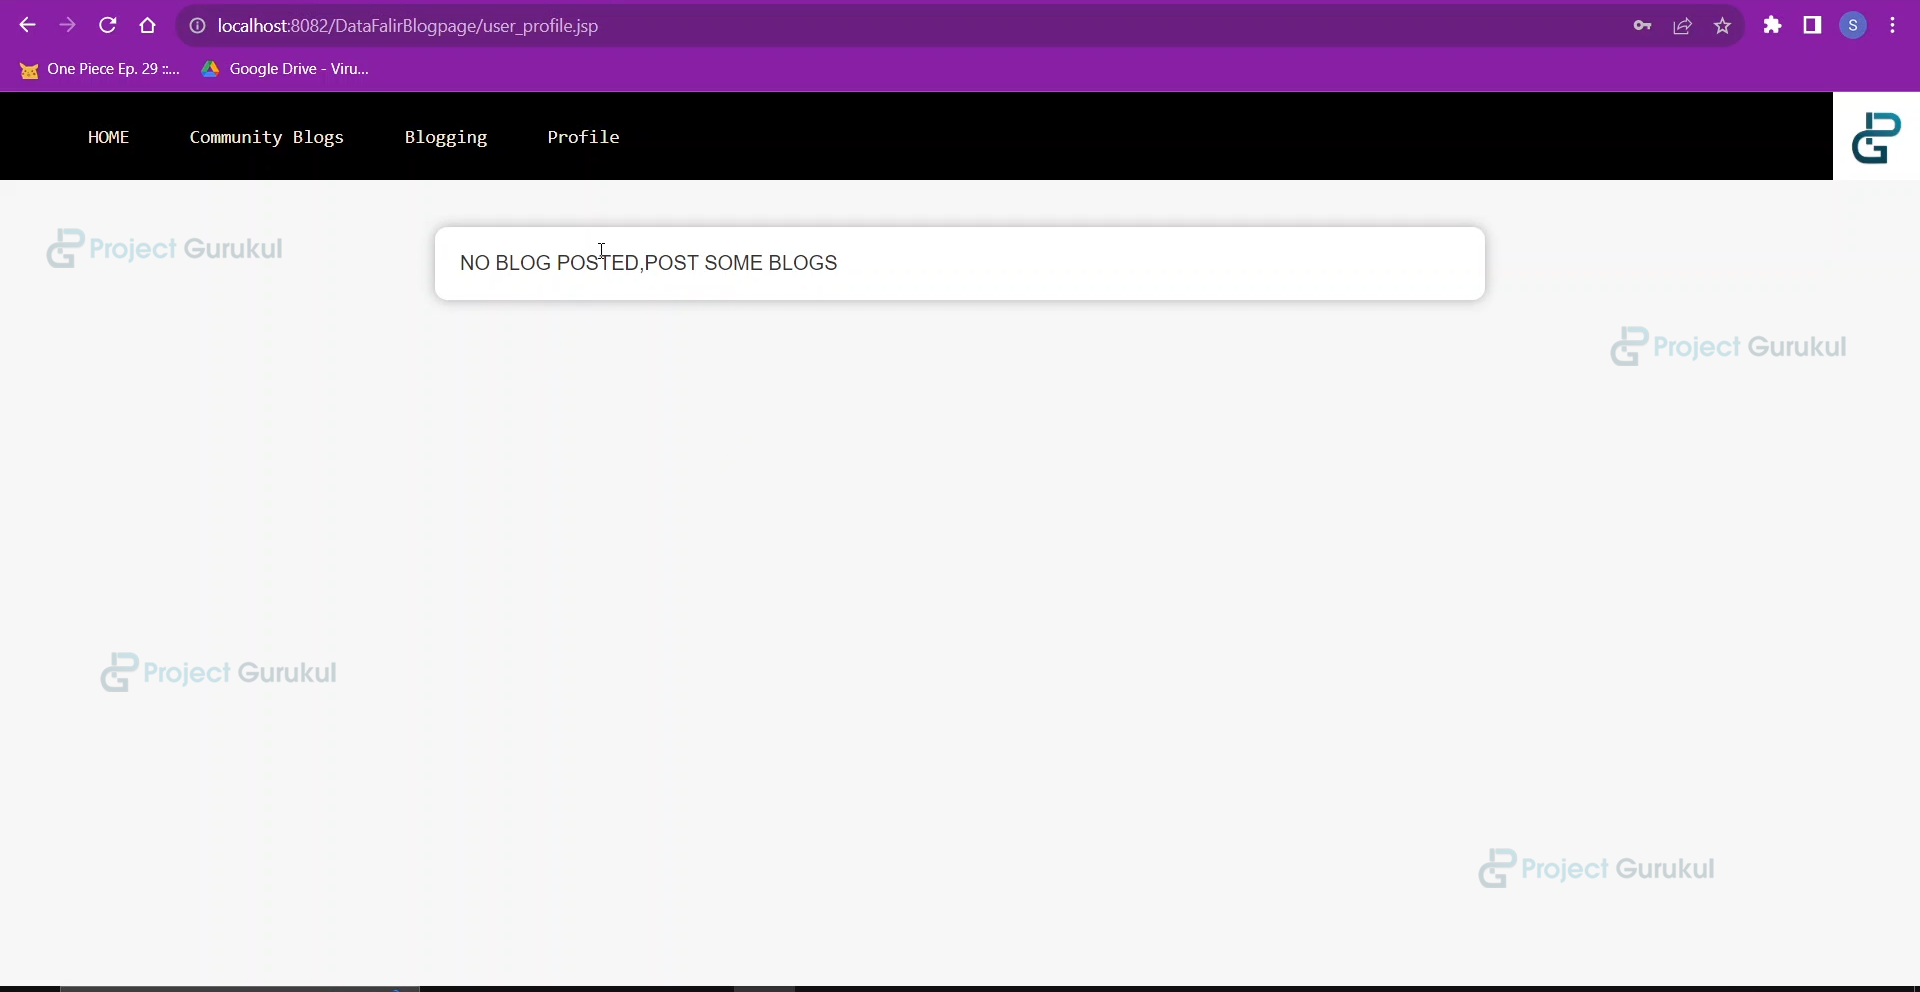
h. user_profile.jsp
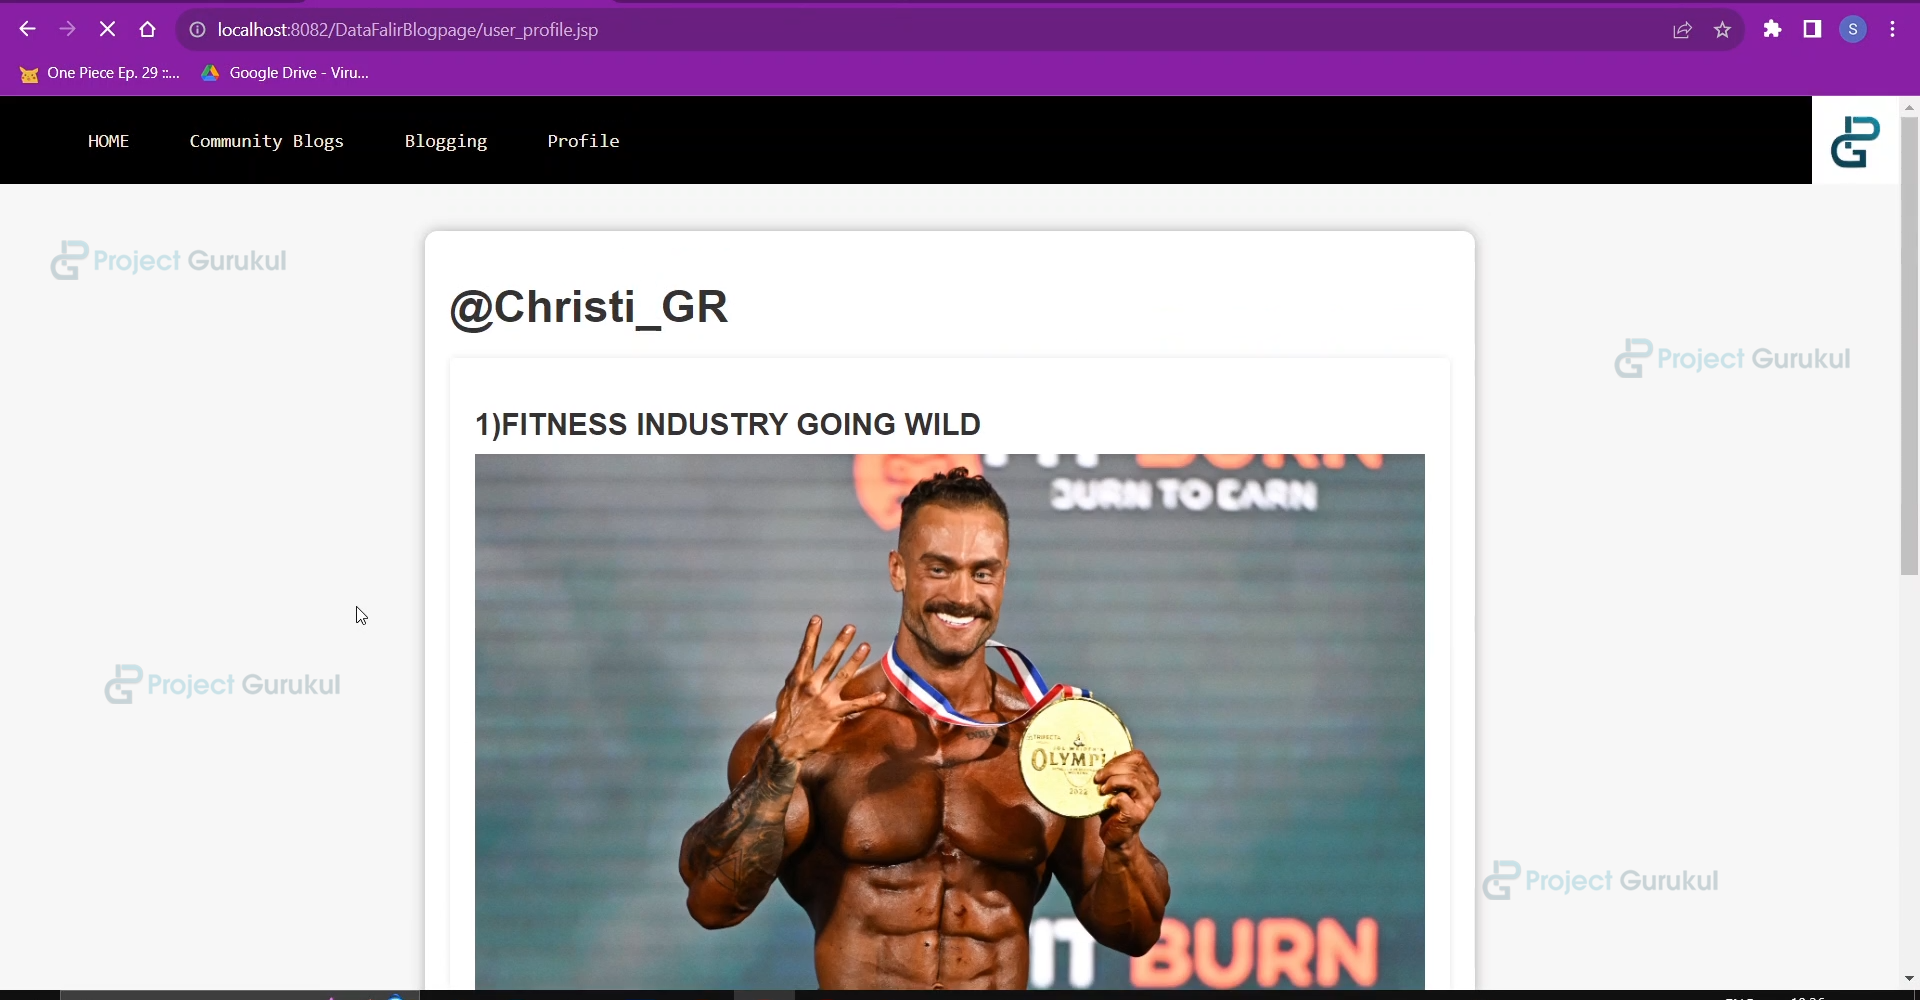
Whenever the user clicks on the profile option, they will be redirected to this page where they can view all the blogs posted by them.
<%@page import="com.programs.DataFlair.UserProfile"%>
<%@ page import="java.sql.*"%>
<%
    ResultSet rs=new UserProfile().retrieve((String)session.getAttribute("name"));
int count=1;
    /*
    The following program will display all the blogs posted by the current user along with count.

    */
%>
<html>
<head>
<link rel="stylesheet" href="blog.css">
    <title>Profile Page</title>
    <style>
        body {
            background-color: #f7f7f7;
            color: #333;
            font-family: Arial, sans-serif;
        }
        .container {
position: relative;
top:100px;
            max-width: 800px;
            margin: 0 auto;
            padding: 20px;
            background-color: #fff;
            border-radius: 10px;
            box-shadow: 0 0 10px rgba(0, 0, 0, 0.3);
        }
        h1 {
            color: #333;
            font-size: 36px;
            margin-bottom: 20px;
margin-top: 20px;
        }
        .post {
            margin-bottom: 20px;
            padding: 20px;
            background-color: #fff;
            border-radius: 5px;
            box-shadow: 0 0 5px rgba(0, 0, 0, 0.1);
        }
        .post h2 {
            color: #333;
            font-size: 24px;
            margin-bottom: 10px;
        }
        .post p {
            font-size: 16px;
            line-height: 1.5;
            margin-bottom: 0;
        }
        .post img {
            max-width: 100%;
            margin-bottom: 10px;
        }
        .post a {
            display: inline-block;
            padding: 5px 10px;
            background-color: #333;
            color: #fff;
            font-size: 14px;
            text-align: center;
            border-radius: 5px;
            text-decoration: none;
            margin-right: 10px;
            margin-bottom: 10px;
        }
    </style>
</head>
<body>
<div class="top">
<nav class="navbar">
<ul>
<li><a href="index.html">HOME</a></li>
<li><a href="All_blogs.jsp">Community Blogs</a></li>
<li><a href="blogging.html">Blogging</a></li>
<li><a href="user_profile.jsp">Profile</a></li>
</ul>
</nav>
<div class="logo">
<img src="./images/projectgurukul.png" width="70px">
</div>
</div>
    <div class="container">

    <% if(rs.next()) //Checking whether there are blogs in the rs or not
    {

        %>
        <h1>@<%=rs.getString(2)%></h1>

        <%

        do
        {
    %>


        <div class="post">
            <h2><%=count%>)<%=rs.getString(3)%></h2>
            <%
                if(rs.getString(5)!=null)
                {
            %>
            <img src="<%=rs.getString(5)%>" alt="Image">
            <% }
            %>
            <%=rs.getString(4)%>

            <p><%=rs.getString(6)%></p>
            <div class="caption">
                <h2>Caption</h2>
                <p>
                    <%=rs.getString(7)%>
                </p>
            </div>
        </div>


    <%count++;
        }while(rs.next());
    }
    else //If there are no blogs posted by the current user
    {
    %>
        NO BLOG POSTED,POST SOME BLOGS
    <% }%>

    </div>
    </body>
    </html>
i. Error.jsp
Whenever the error occurs on any of the pages, they will be redirected to this page with the error message set in the attribute.
<!--
        This is an error page which you can be redirected after getting an error in any of jsp or html
        page and an attribute error will be set to display the message and receive it here

-->
<%@ page isErrorPage="true"%>
<%
    String s=(String)session.getAttribute("error");
    //The error message has been received
%>
<!DOCTYPE html>
<html>
<head>
<title>Error Page</title>
<!--
    Simple css for an error page
-->
<style>
body {
margin: 0;
padding: 0;
font-family: Arial, sans-serif;
background: url('images/error.jpg');
background-repeat: no-repeat;
background-size: cover;
}
.container {
position: absolute;
top: 50%;
left: 50%;
transform: translate(-50%, -50%);
text-align: center;
background: transparent;
backdrop-filter: blur(10px);
border: 1px solid #ccc;
border-radius: 5px;
padding: 20px;
box-shadow: 0 2px 5px rgba(0, 0, 0, 0.1);
}
h1 {
margin: 0;
font-size: 24px;
color: #333;
}
.error-message {
font-size: 18px;
color: black;
}
.back-button
{
padding: 5px;
color: #ff0000;
background-color: aquamarine;
border-radius: 15px;
font-size: larger;
font-family: 'Segoe UI', Tahoma, Geneva, Verdana, sans-serif;
cursor: pointer;
}
.back-button:hover
{
background-color: #333;
color: #f5f5f5;
transition-delay: 0.1s;
transition-duration: 0.5s;
}
</style>
</head>
<body>
<div class="container">
<h1>Error</h1>
<!-- The error message is dispalyed -->
<p class="error-message"><%=s%></p>
<button class="back-button" onclick="goBack()">Go Back</button>
</div>
<!--
        Simple javascript that allows us to go back to the page from which the error occurred

-->
<script>
function goBack() {
window.history.back();
}
</script>
</body>
</html>
j. style.css
The CSS file provides styling to the blogging page.
/* Global styles */
body {
    background-image: linear-gradient(to left bottom, #01fe7f, #00e6a2, #00cbb5, #00afb6, #0092a6, #0080a1, #006e99, #005b8d, #004b8e, #00398c, #002586, #02037a);;
font-family: Arial, sans-serif;
font-size: 16px;
line-height: 1.5;
margin: 0;
padding: 0;
display: flex;
flex-direction: column;
min-height: 100vh;
}
/* Header styles */
header {
border-bottom: 0.25 solid #dee2e6;
display: flex;
justify-content: space-between;
align-items: center;
padding: 1rem;
}
header h1 {
margin: 0;
}
/* Main styles */
main {
flex: 1;
padding: 2rem;
}
/* Footer styles */
h1 {
    text-align: center;
}
form {
    margin: 0 auto;
    width: 50%;
}
label {
    display: block;
    margin-top: 10px;
}
input[type="text"], textarea {
    width: 100%;
    padding: 12px 20px;
    margin: 8px 0;
    box-sizing: border-box;
    border: none;
    border-radius: 4px;
    background-color: #f8f8f8;
    resize: none;
}
input[type="submit"] {
    background-color: #4CAF50;
    color: white;
    padding: 14px 20px;
    margin: 8px 0;
    border: none;
    border-radius: 4px;
    cursor: pointer;
}
input[type="submit"]:hover {
    background-color: #45a049;
}
.top
{
top:0px;
left:0px;
position: absolute;
height:70px;
width: 100%;
padding: 0%;
background-color: black;
display: flex;
}
.navbar
{
width: 100%;
height: auto;
}
.navbar ul
{
overflow: auto;
}
.navbar li{
float: left;
list-style: none;
padding:10px;
}
.navbar li a
{
padding: 6px;
border:2px solid black;
border-radius: 25%;
margin-left: 13px;
text-decoration: none;
color: antiquewhite;
font-family: monospace;
font-weight: 200;
font-size: 15px;
}
.navbar li a:hover
{
background-color: antiquewhite;
color: black;
transition-duration: 0.5s;
}
.logo
{
left:700px;
}
6. Creating JSP Pages for the backend API
a. user_login.jsp
This program uses the UserLogin class to check the user’s login credentials entered in the login page.
<jsp:useBean id="login" class="com.programs.DataFlair.UserLogin" scope="session"></jsp:useBean>
<jsp:setProperty name="login" property="*"/>
<%
    String s=request.getParameter("username");

    //check_login() returns 1 when it finds a field with given cnstraints
    if(login.check_Login()==1)
    {
        //if there is succesfull login check we can set the name of the user in the session to use it anywhere
        session.setAttribute("name",s);
        response.sendRedirect("user_profile.jsp");
    }
    else
    {
        //in case of wrong login try
        session.setAttribute("error", "Invalid username or password");
        response.sendRedirect("Error.jsp");
    }
%>
b. user_register.jsp
This program uses the UserRegister class to register a new user in the database.
<jsp:useBean id="Regid" class="com.programs.DataFlair.UserRegister" scope="session"></jsp:useBean>
<jsp:setProperty name="Regid" property="*"/>
<%
    //register() function returns true after succesful registration
    if(Regid.register())
        response.sendRedirect("login_page.html"); //After successful registration user will be redirected to login page
    else
    {
        //in case of failure in registration
        session.setAttribute("error","Try different username or try again later");
        response.sendRedirect("Error.jsp");
    }
%>
c. blogging.jsp
This uses the Blogging class to insert the blog details into the database table.
<jsp:useBean id="blog" class="com.programs.DataFlair.Blogging" scope="session"></jsp:useBean>
<jsp:setProperty name="blog" property="*"/>
<%
    String img_link="",vid_link="";
    img_link=request.getParameter("imglink");
    vid_link=request.getParameter("vidlink");

    //blog_insert() returns true when it recieves successful submission of blog.
    if(blog.blog_insert((String)session.getAttribute("name"),img_link,vid_link))
    {
        //if there is succesfull blog upload then the user will be redirected to its own profile page
        //where he can view all his blogs.
        response.sendRedirect("user_profile.jsp");
    }
    else
    {
        //in case of some error occuring.
        session.setAttribute("error", "Some error has occured....pls try again later!!!");
        response.sendRedirect("Error.jsp");
    }
%>
Advanced Java Online Blog (CMS) OUTPUT
1. Opening Page
2. Register Page after clicking register

3. Login Page after successful registration
4. After Successful Login (Profile Page) with no blogs
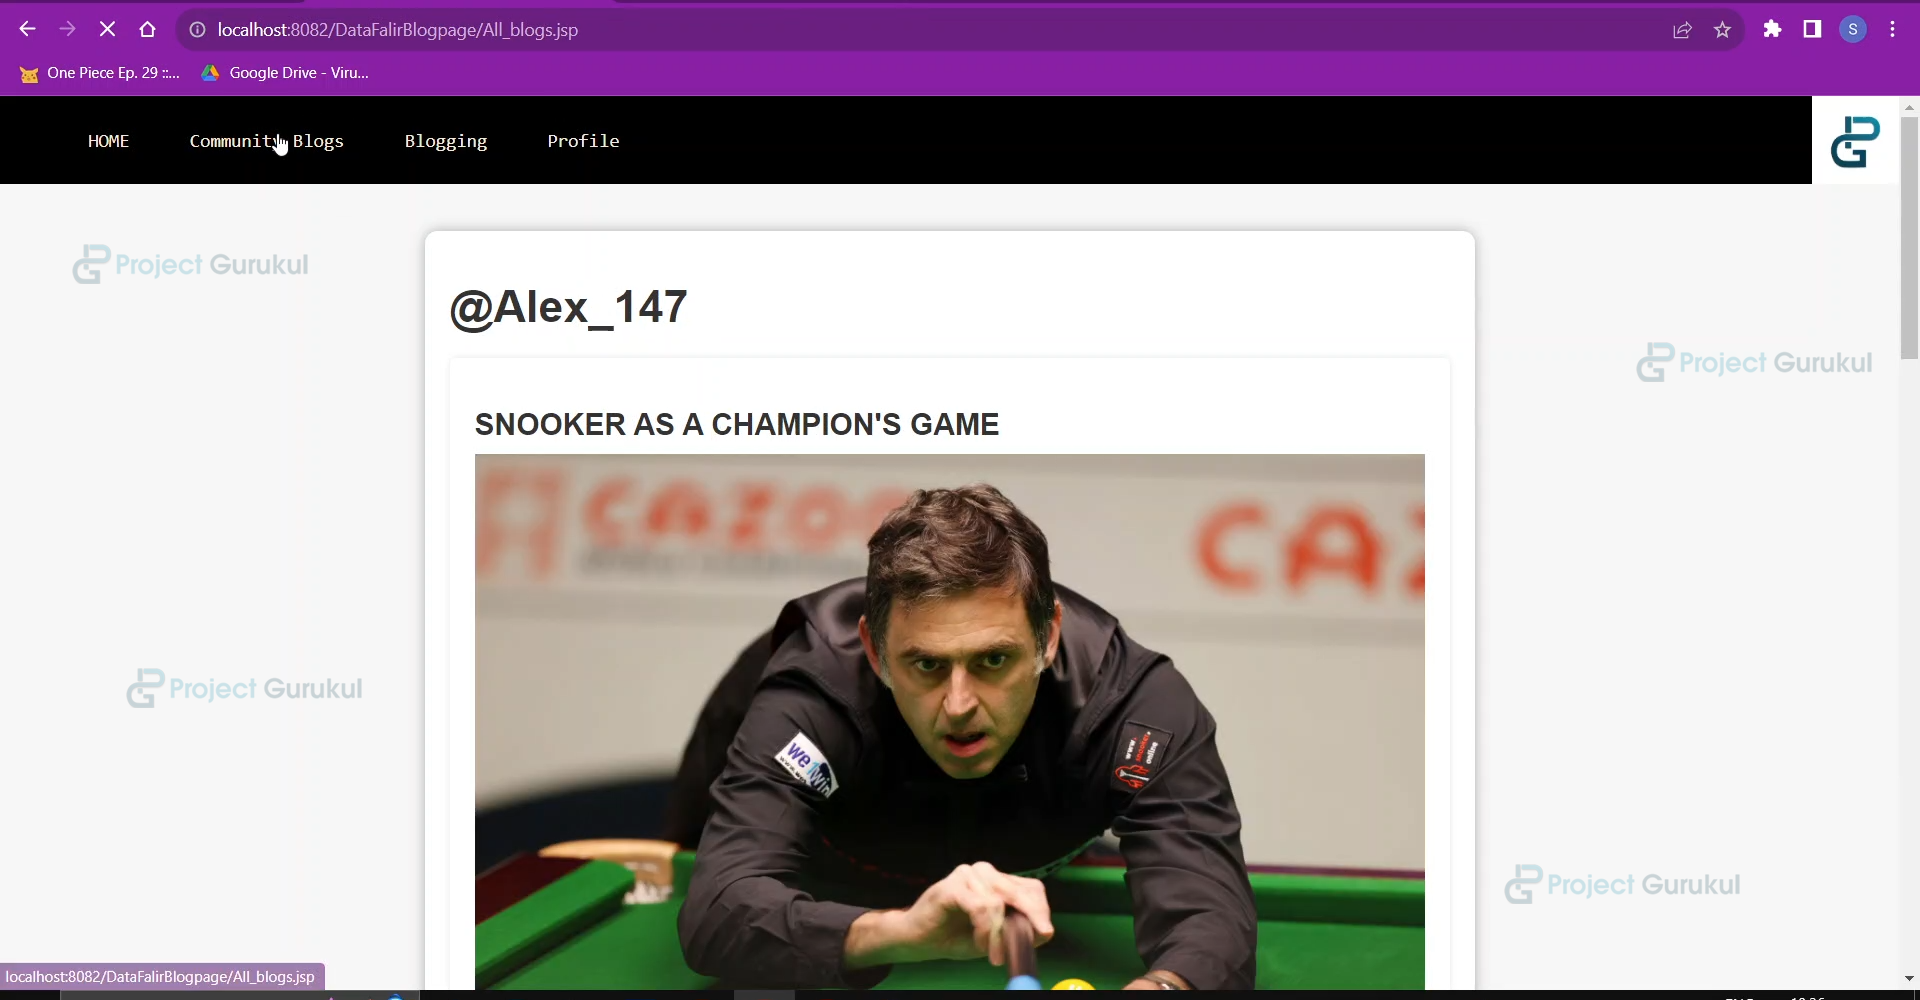
5. Community Blogs Page showing the blogs of other users.
6. Blogging Page to create a blog.
7. Creating a blog
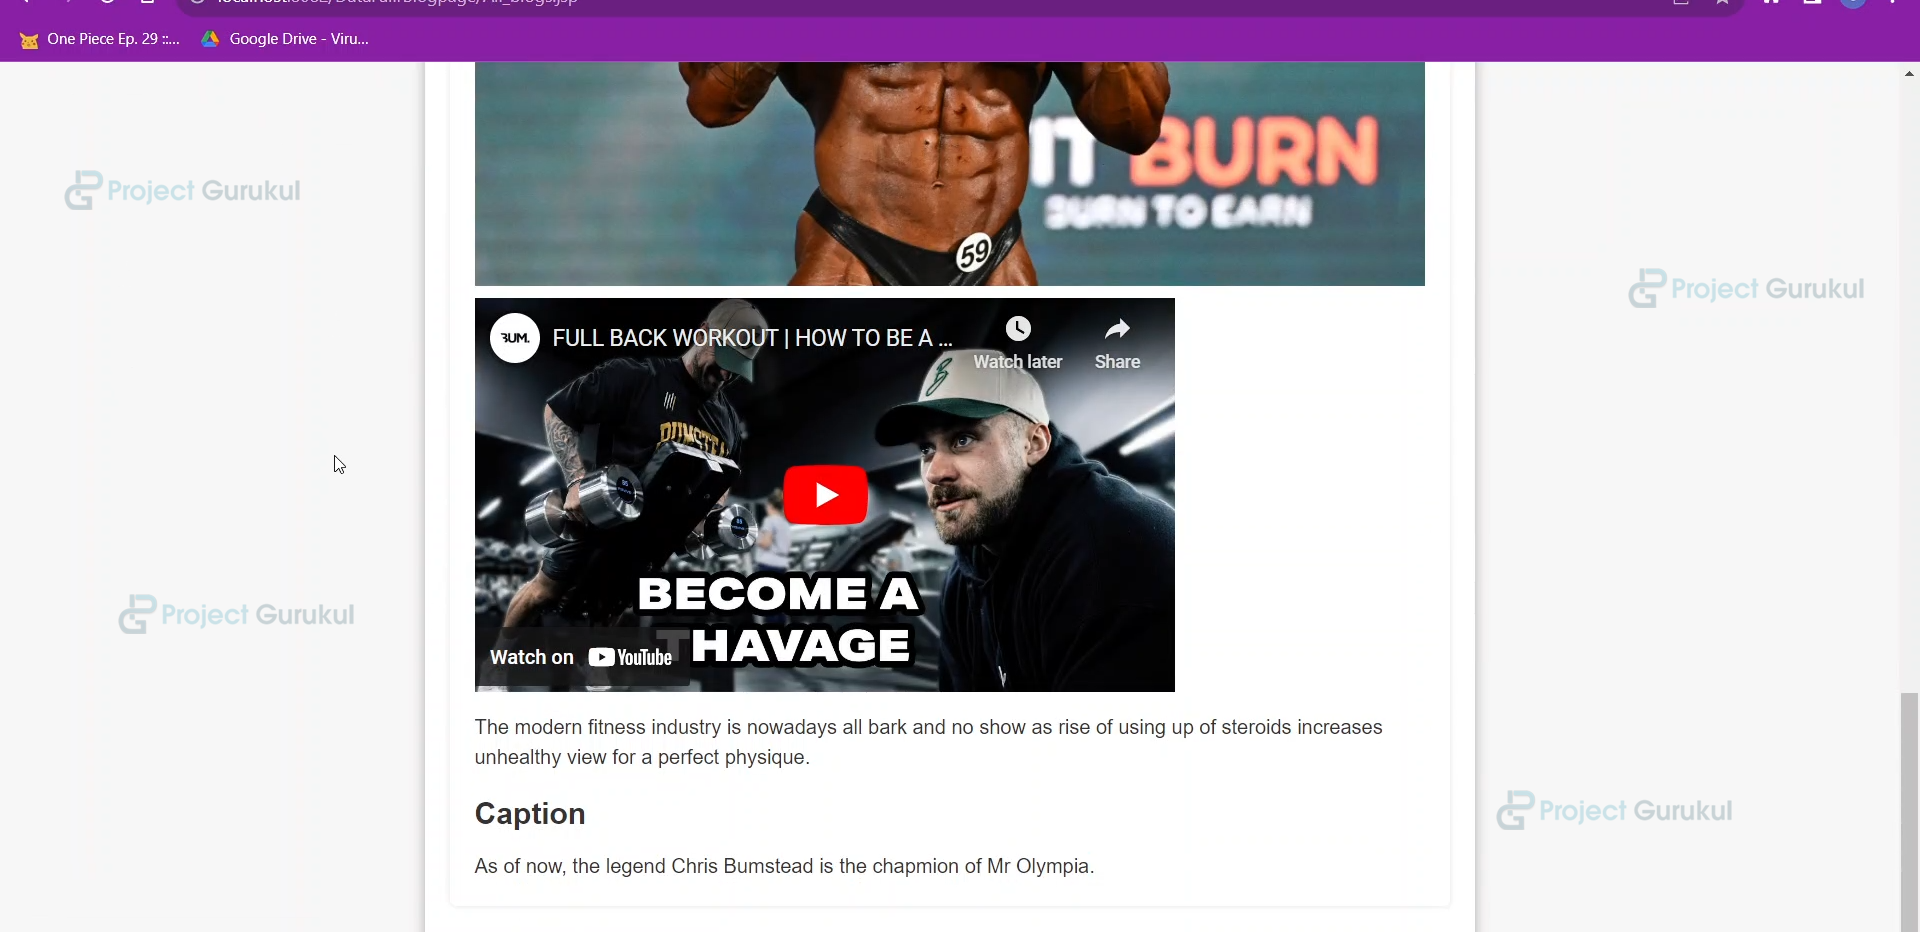
8. After successful Blog upload….User profile Page
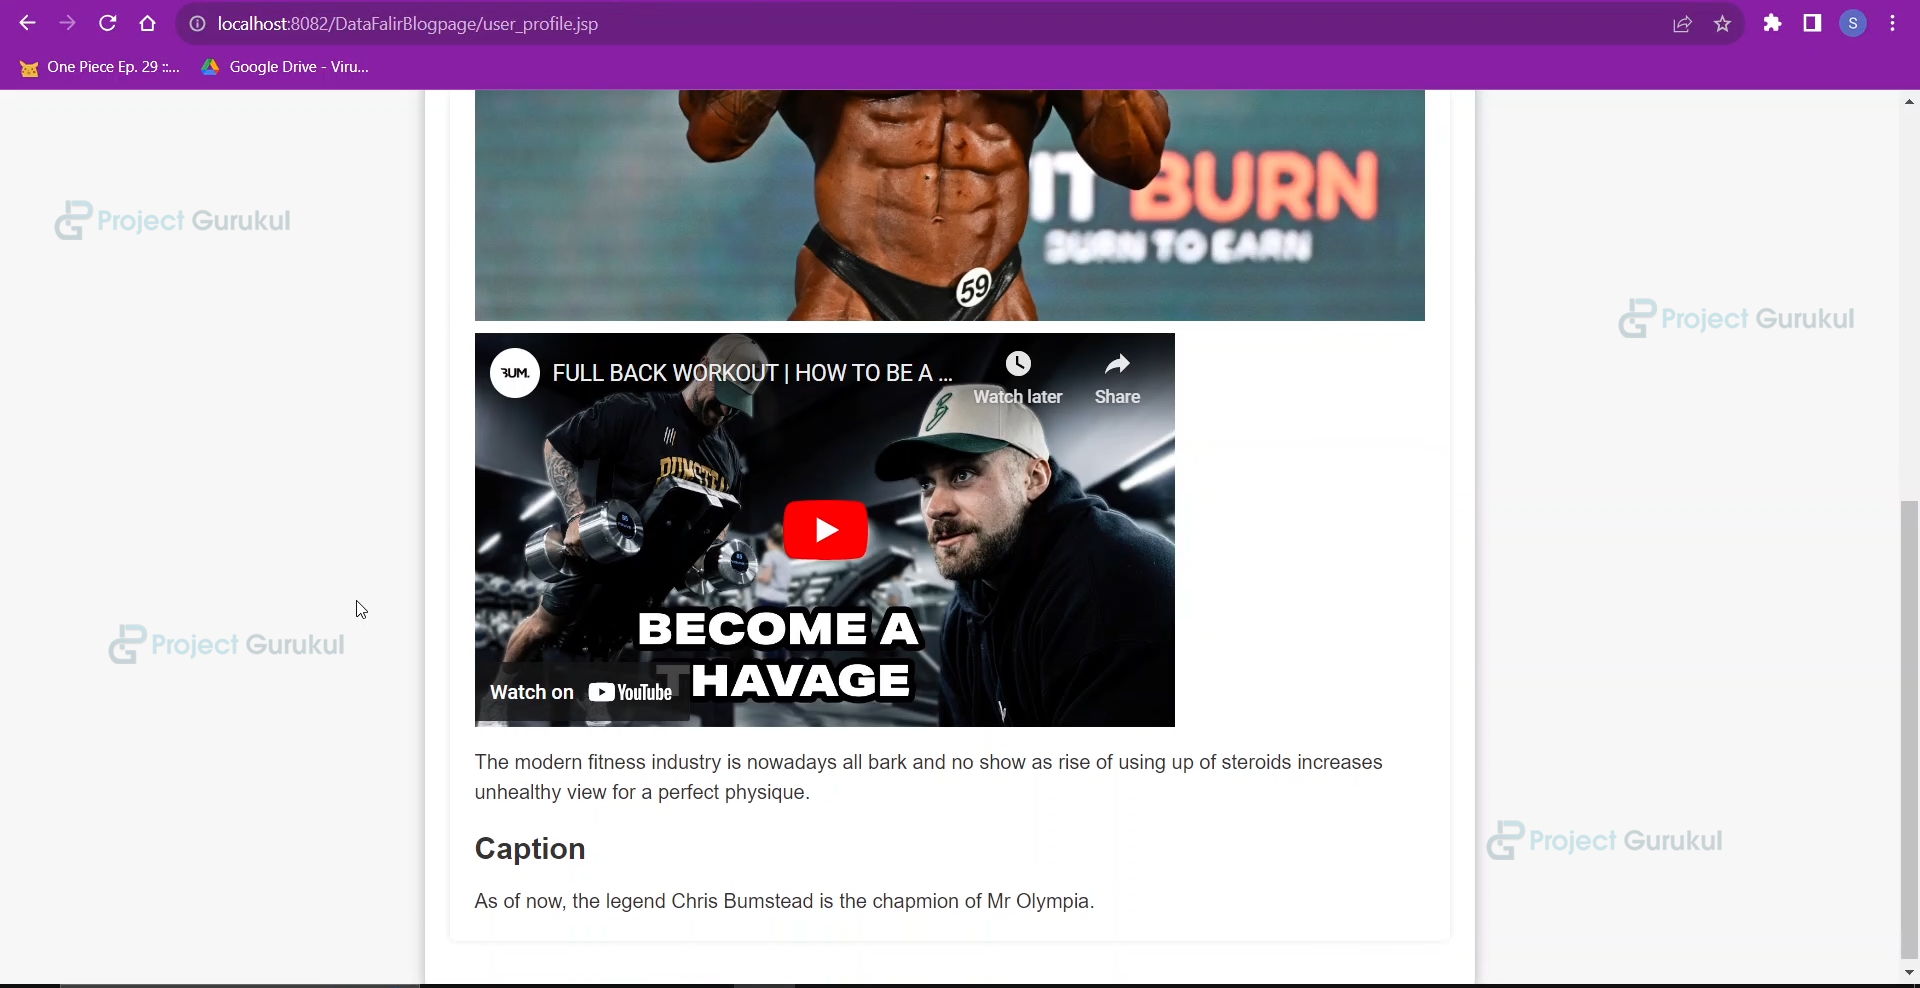
9. Community BLOG page to see all the blogs with the username

Summary
This concludes our online BLOG(CMS), which uses Java Server Pages and Java as the application interface. It is made with HTML/CSS and JavaScript for our friendly and user-appealing UI and Mysql as a database.
Hope you enjoyed the project experience and learnt great things, and also gave a boost to your imagination.